Onsite notifications: Creating and manging notifications
Create onsite notification
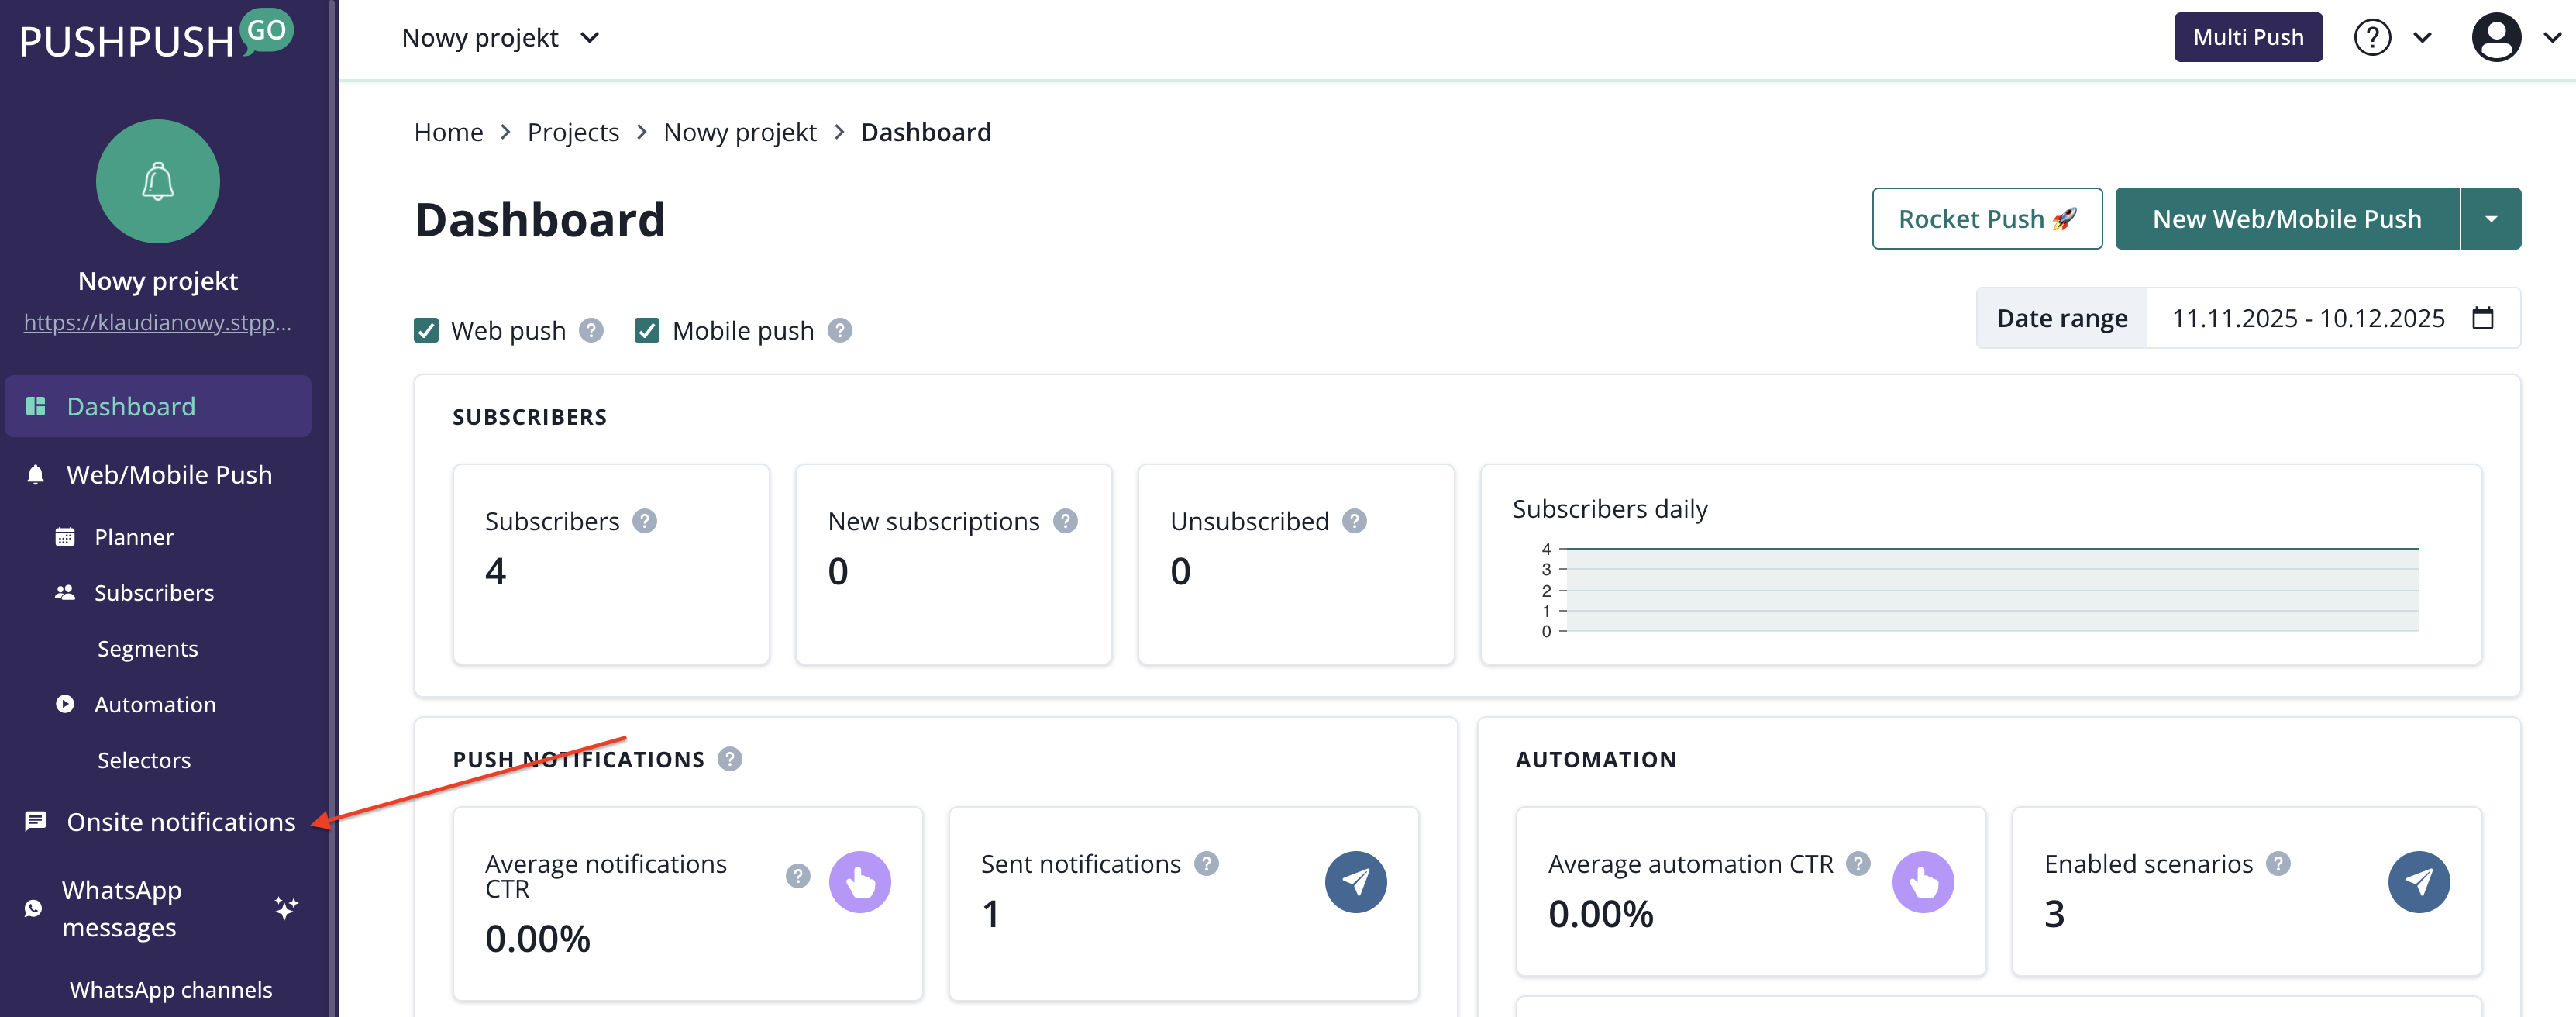
To create an onsite notification, go to Onsite notifications from the main navigation bar.
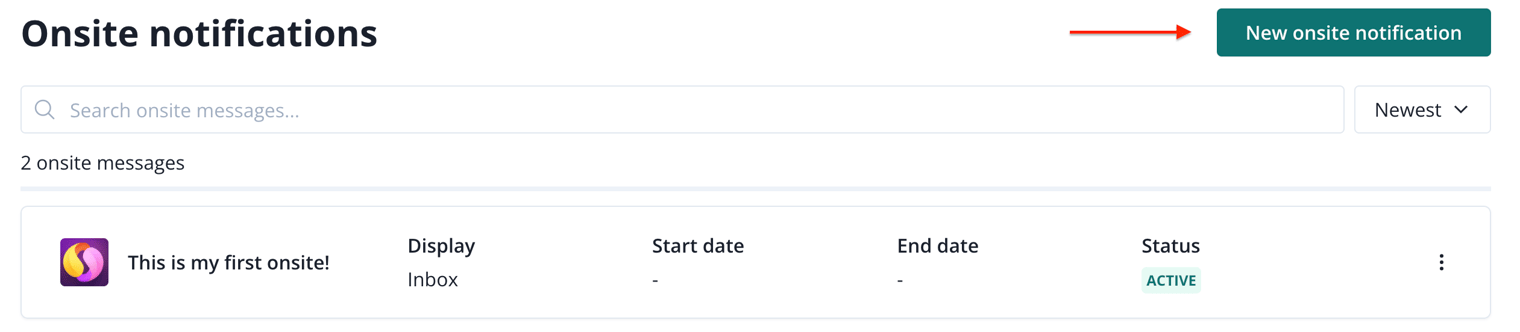
You will land on Onsite notifications list.
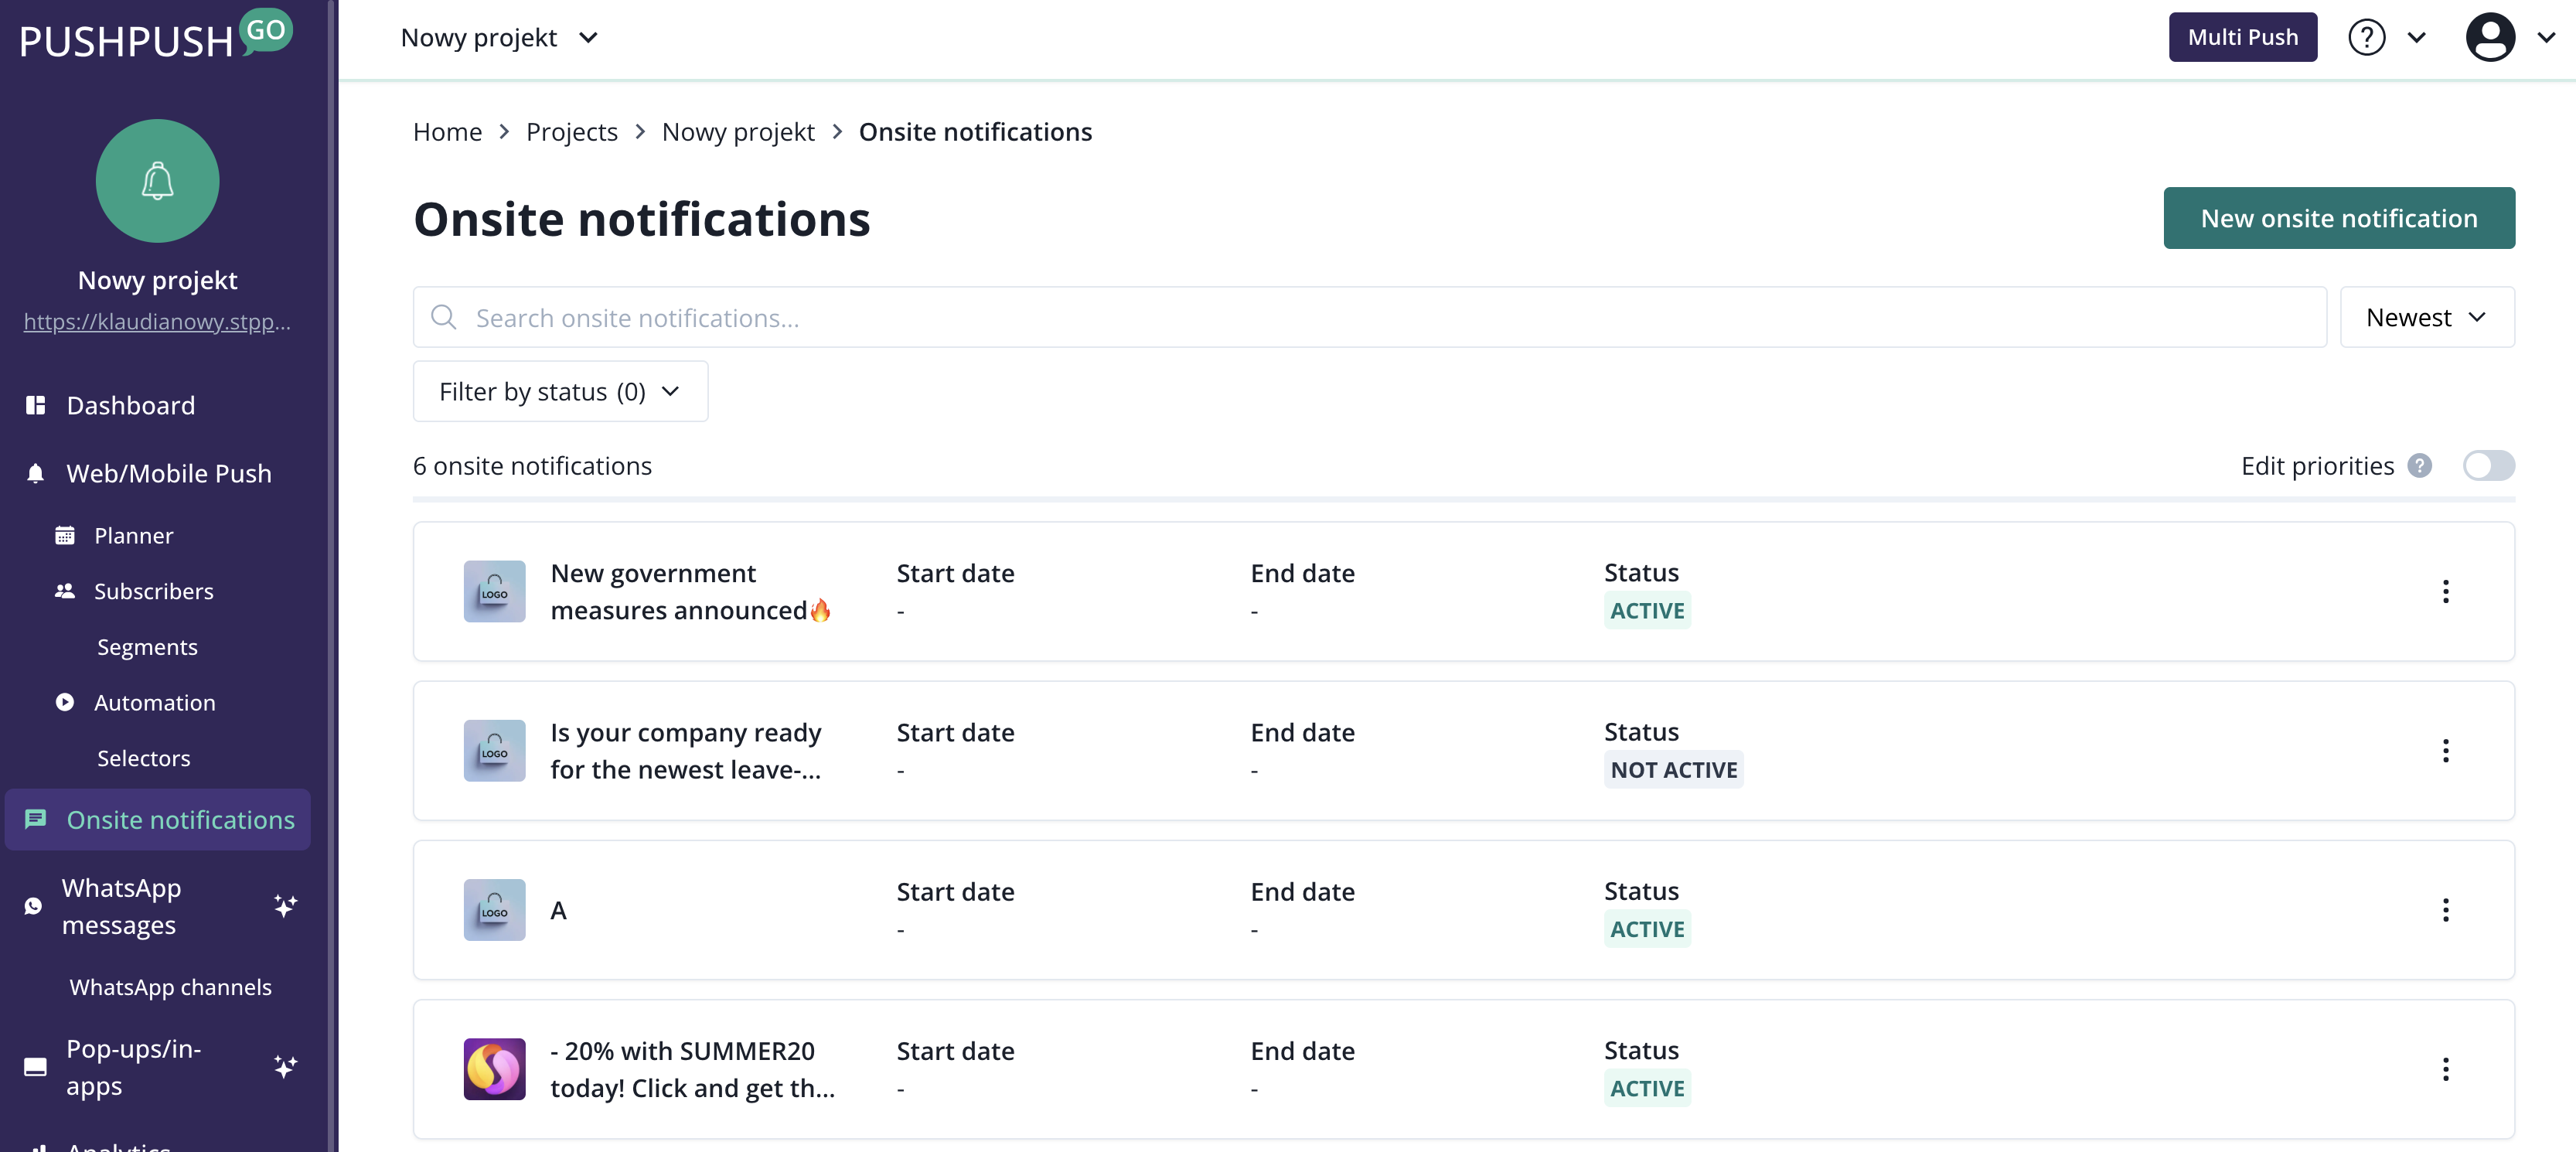
Now, click on the New onsite notification button in the upper right corner.
As soon as the onsite notification creator opens, you can begin the configuration of your notification.
Content
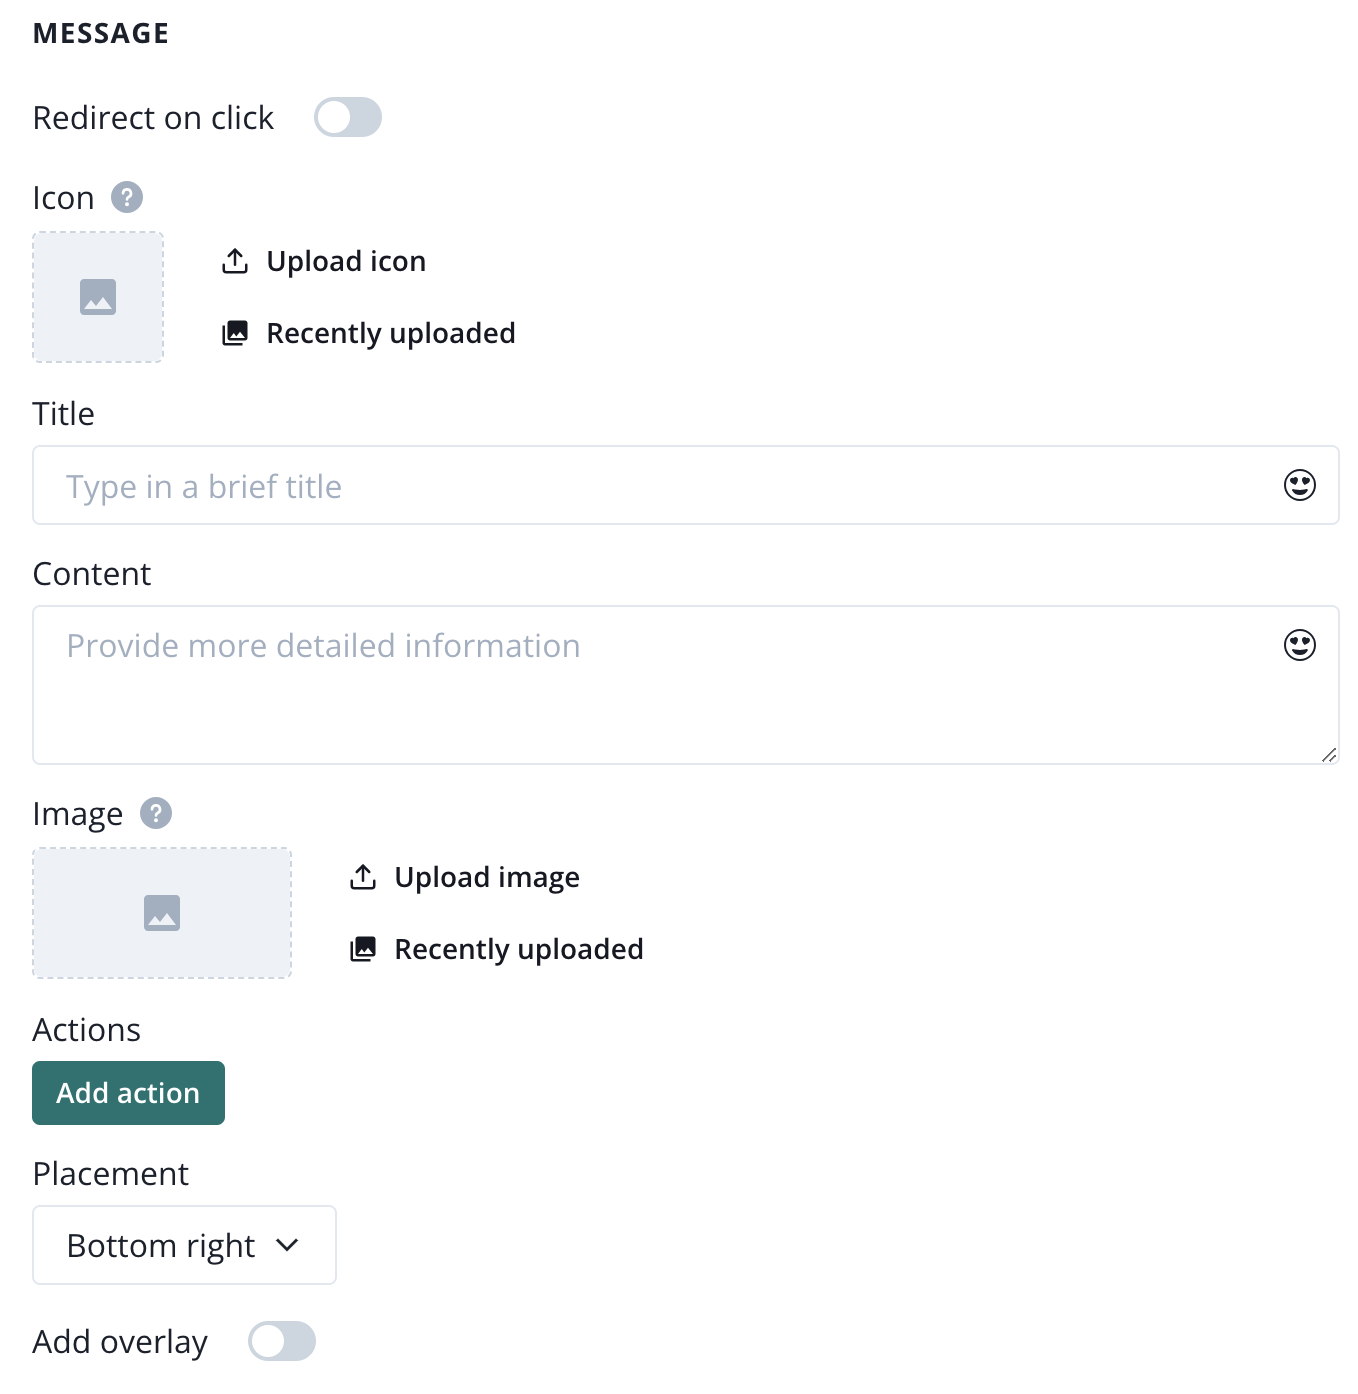
First, decide on the character of your message. If you want the notification to be strictly informational, you don't need to perform any additional actions. If you want it to redirect users to a different URL, use the toggle shown on the screenshot below.
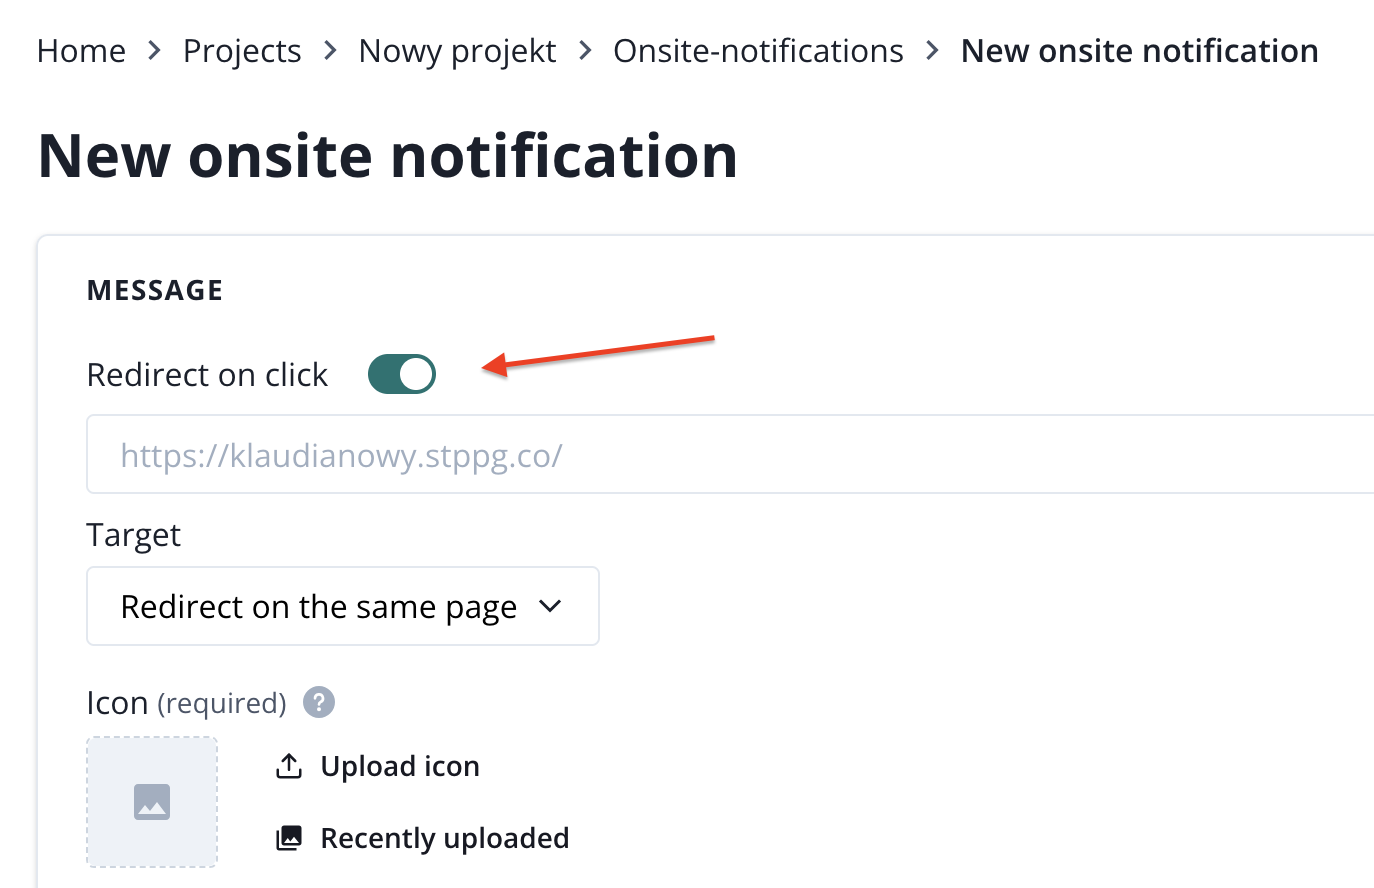
If you choose the Redirect on click option, make sure to use UTMs in the URL, so you can track the results in your Google Analytics (or any other tracker you use).
Next, prepare the content. You will need:
- Icon (most likely your project logo, but you don't have to include it),
- Title,
- Content,
- Placement (e.g. bottom right).
Optional onsite elements:
- Image,
- Actions.
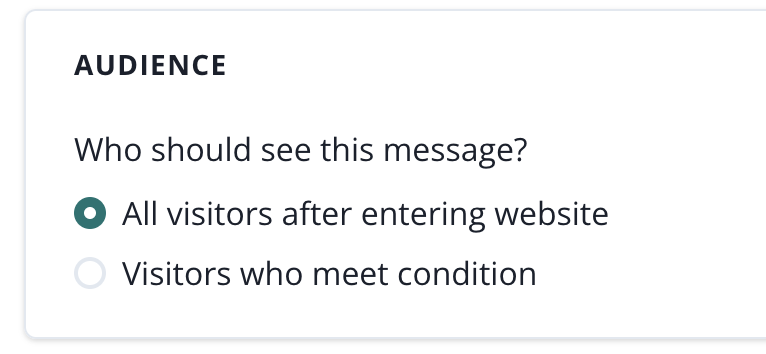
Segmentation
Now, choose your audience. Onsite notifications can be displayed to all visitors after entering the website or to those who meet specific conditions.
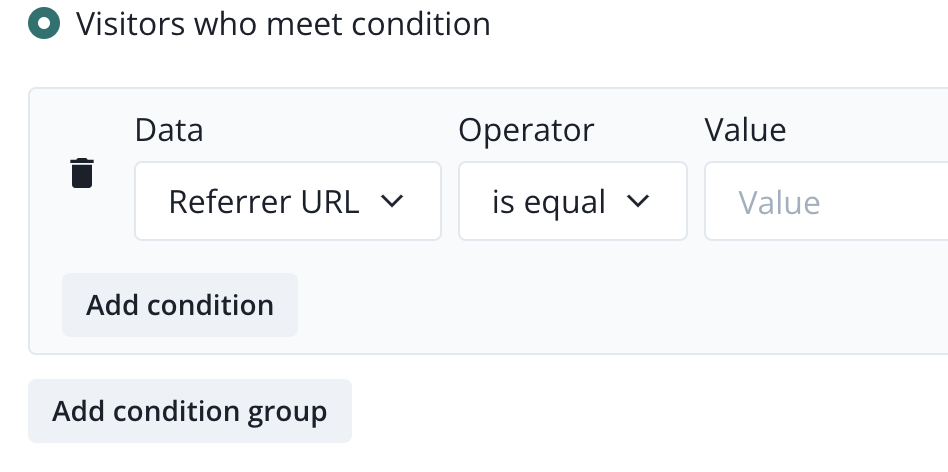
Available data for setting up conditions:
- Referrer URL,
- Visited URLs,
- Number of visited URLs,
- Language,
- Current URL,
- Is subscribed,
- Session duration (s),
- Page visit time (s),
- Platform type.
- Visitors
If you select Visitors, you can display your onsite notification to only a specified percentage of visitors. This is a great way to test your strategy on a smaller group before rolling it out to everyone.
Advanced segmentation
If you want to use even more precise segmentation, you can enable selectors.
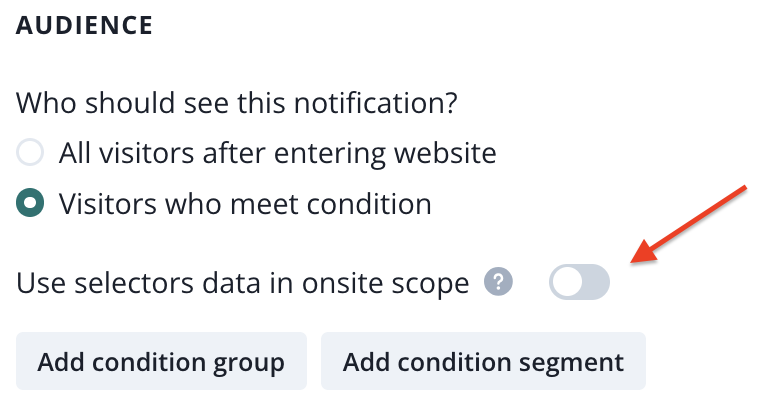
Selectors must be previously created in the Selectors tab. Bear in mind that not all selectors that you can create in PushPushGo can be used in onsite condition groups. You can use all selectors with the reducer "last" and "first".
- Get text from element
- Get number from element
- Get value from JavaScript window object
- Get text value from input
- Get custom Id from Javascript window object
- Get custom Id from element text
- Custom (if you select the reducer as "first" or "last")
Now, you can show onsite after certain element of the website has been displayed, visitor has added items to the cart or the cart value is at certain amout.
Strategy
The last step is to choose the display strategy:
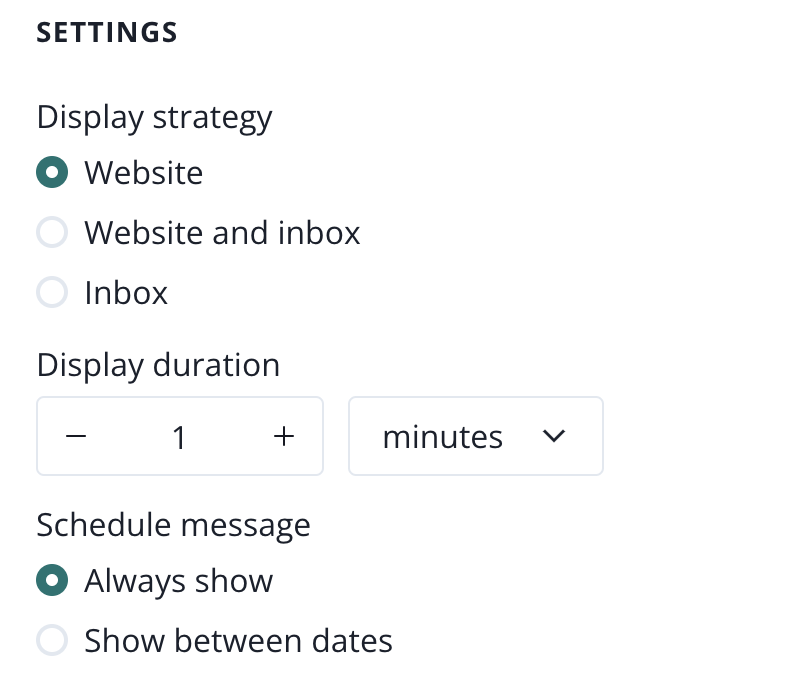
To see all options above, you must also have the Inbox feature enabled (it must be also included in your plan).
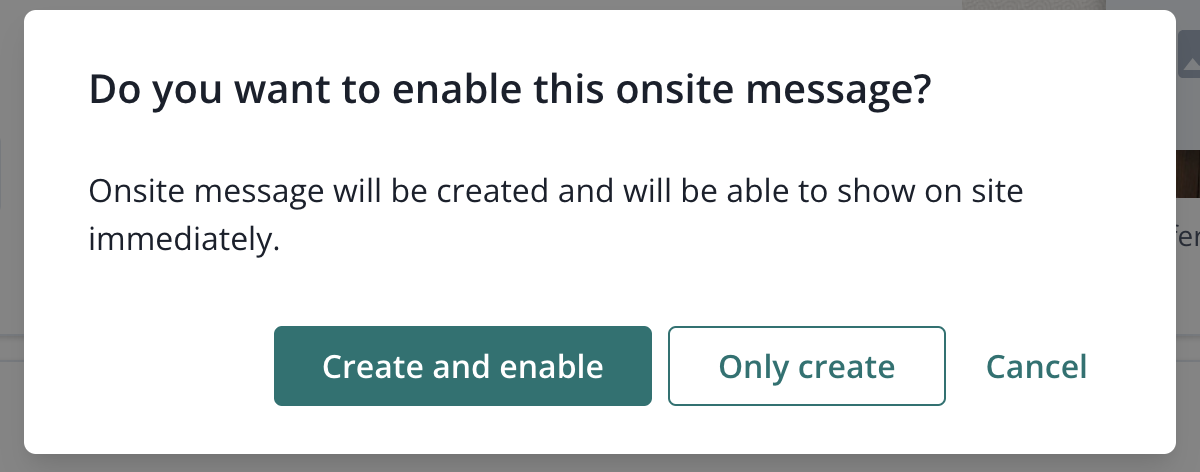
The display duration specifies for how long notifications will be actively visible on the user's device screen, until manually dismissed or clicked on. You can also decide if you want to limit the visibility to particular dates. When you are done with the configuration, hit the "Create notification" button. Now, you can decide if you only want to create a draft or publish and activate the campaign:
Edit onsite notification
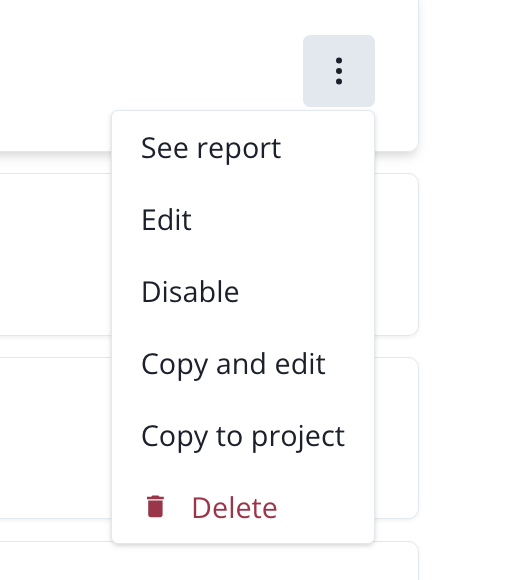
You can edit your onsite notification by hitting the three dots on the selected message on the onsite list.

After you finish tweaking the content or settings of the message, hit the "Save changes" button.
Onsite notification report
Access the onsite notification report from the onsite list by clicking on the three dots.

Now, you can see the notification status, content, and settings.

Below, you will find the notification's statistics.

Onsite notification list
The Onsite notifications list allows you to view all your onsite messages.

You can search onsite notifications using their Title and sort them by Newest and Oldest.

The information about your onsite notifications that you can review on the list:
- Icon,
- Title,
- Start date (if used),
- End date (if used),
- Status (active or not active).
You can also go to report or perform the below actions:
- edit,
- enable,
- disable,
- delete,
- copy and edit,
- copy to a project.