
Web/mobile push: Subscribers
What is Subscribers option and where to find it?
Subscribers page refers to your web push and mobile push subscribers. It can be accessed from the main navigation bar.
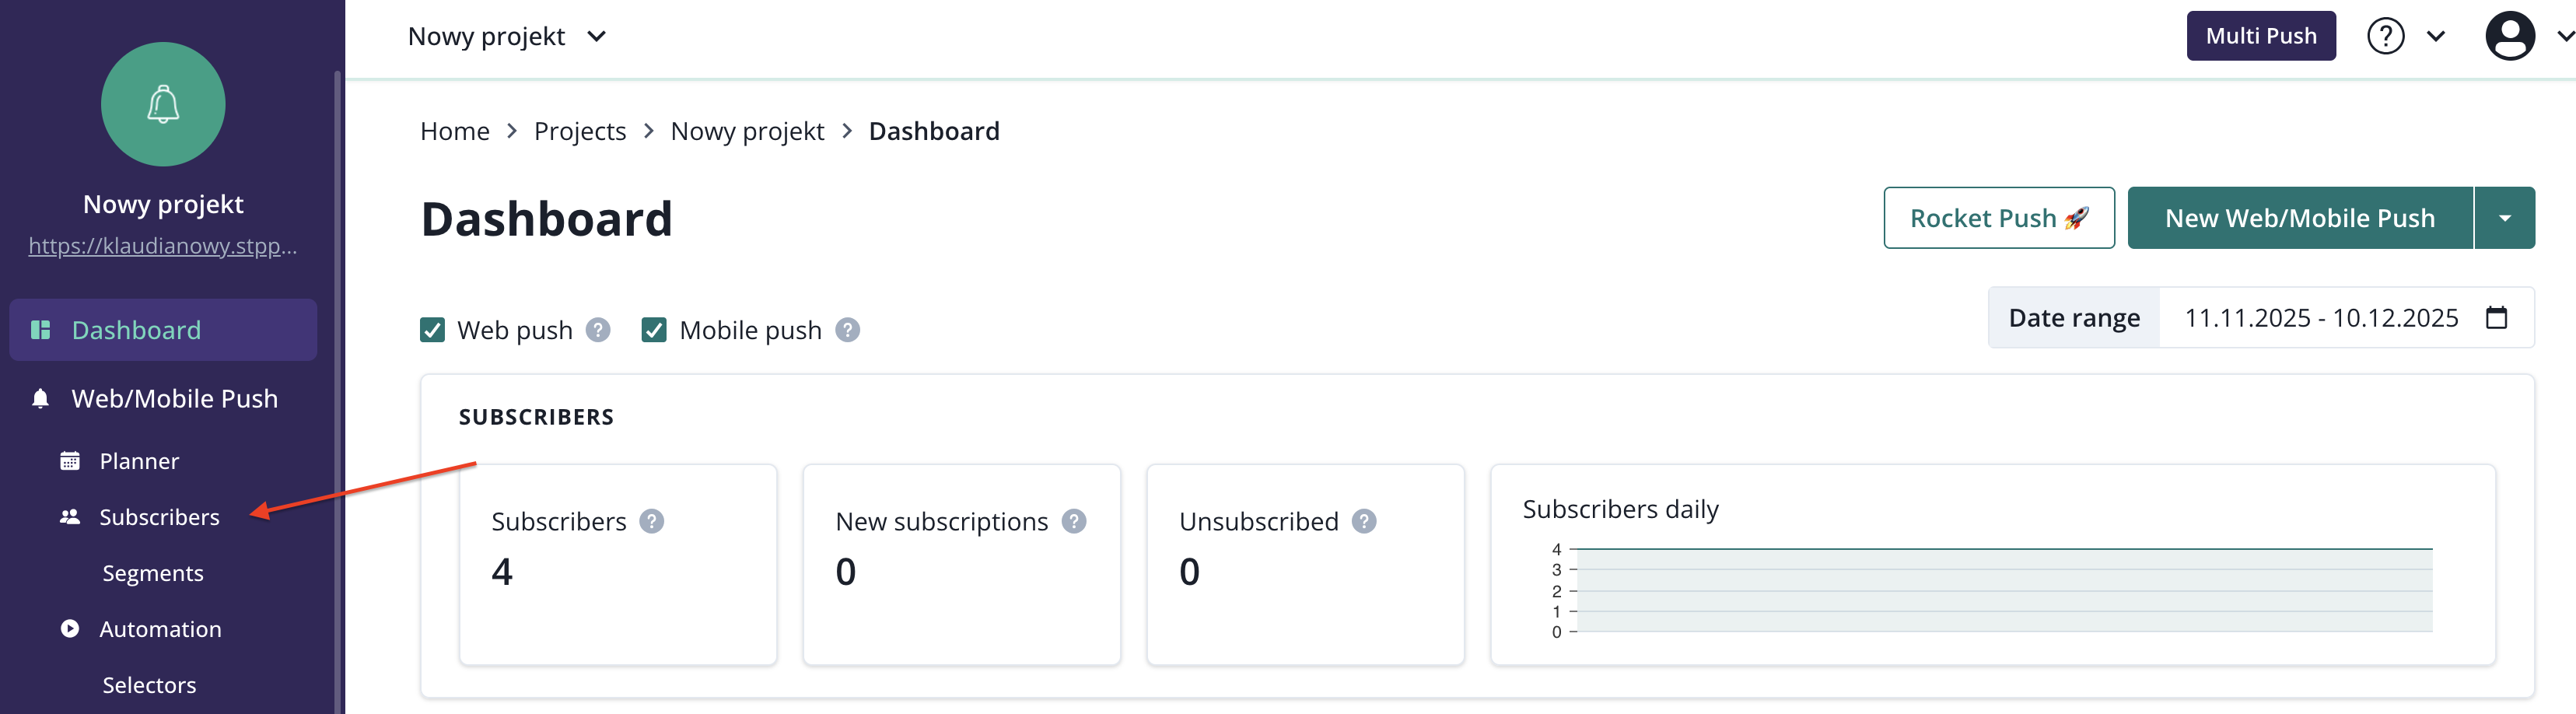
After clicking on that option you will land on Subscribers list.
Subscribers' list
On the subscribers list, you will find your subscribers' logs, arranged from the newest
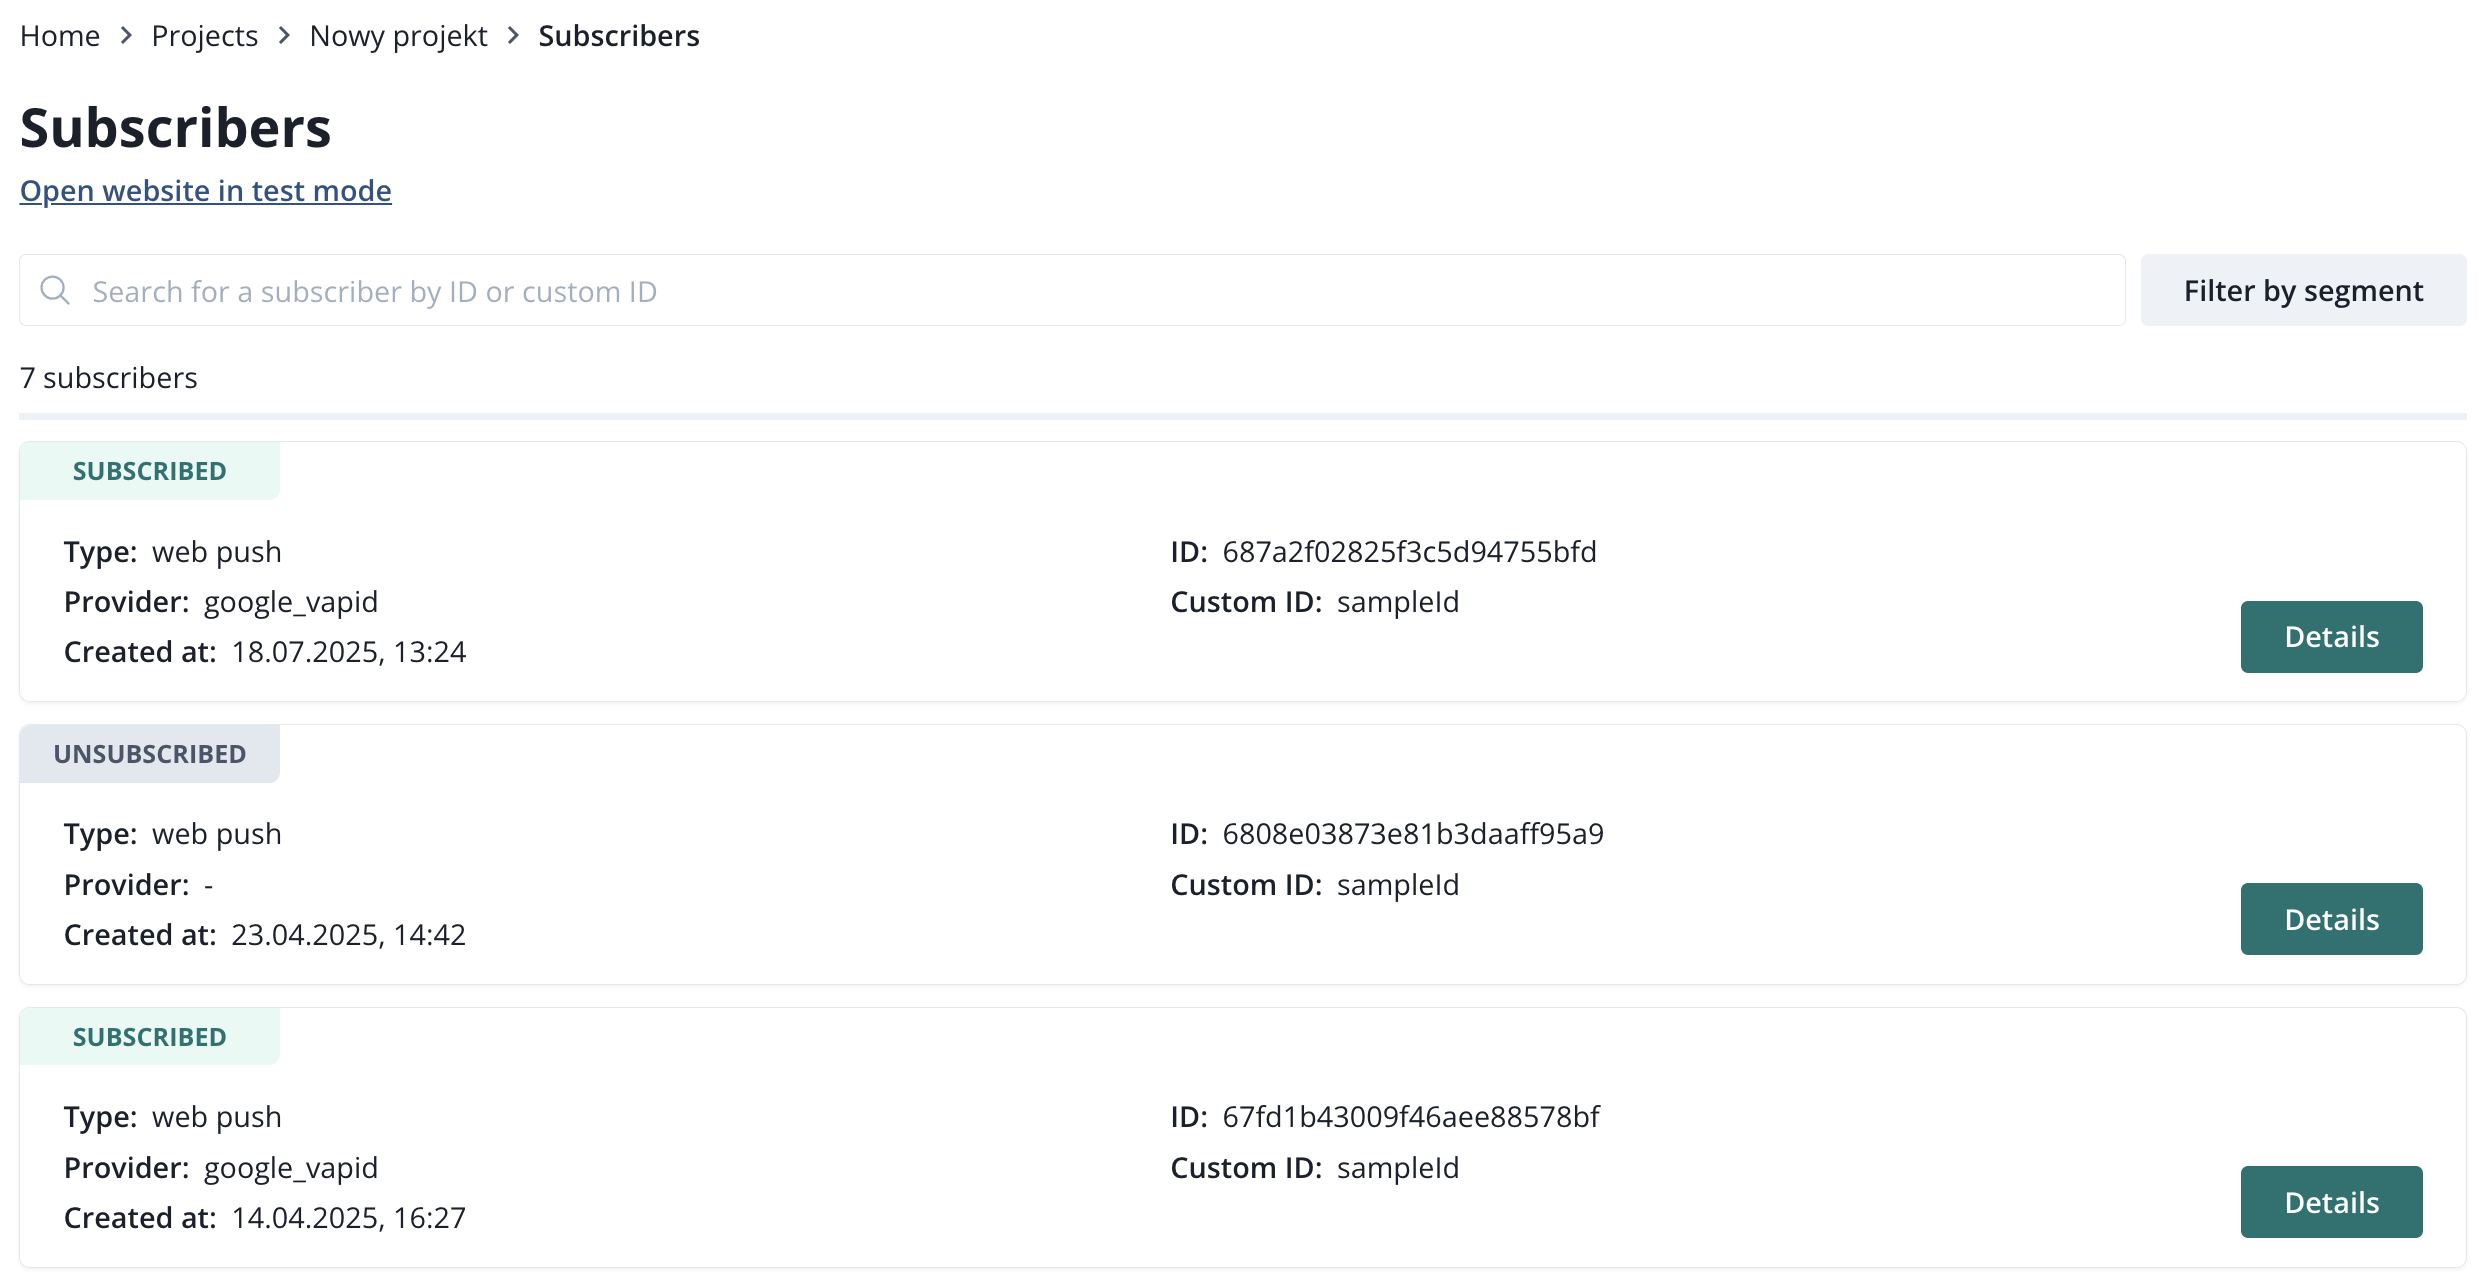
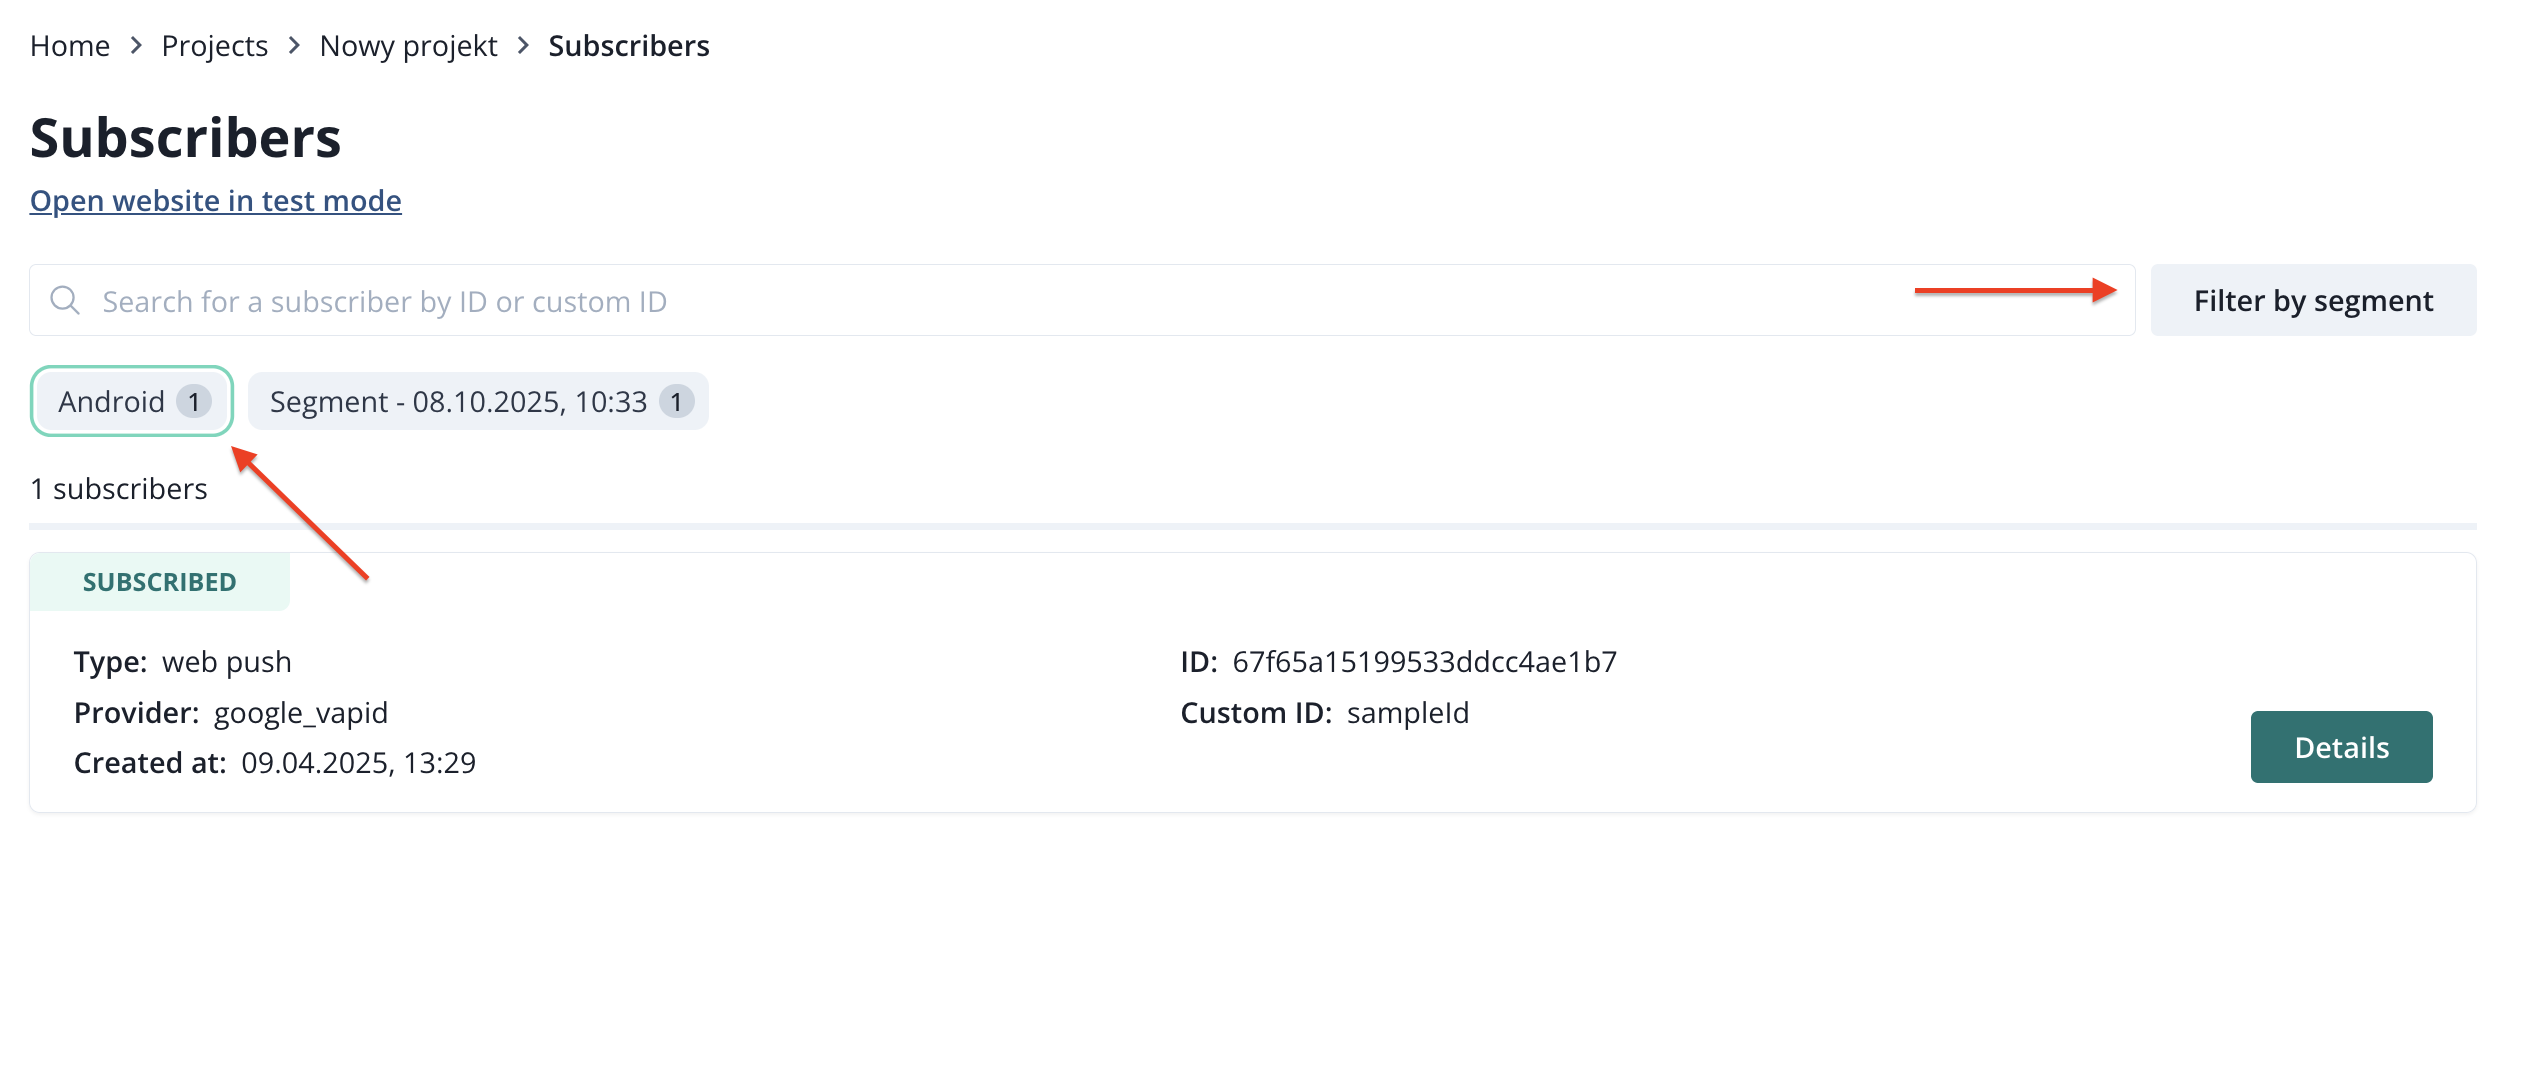
You can search for a particular subscriber using its ID or Custom ID (if you use custom IDs). You can also filter by segments.
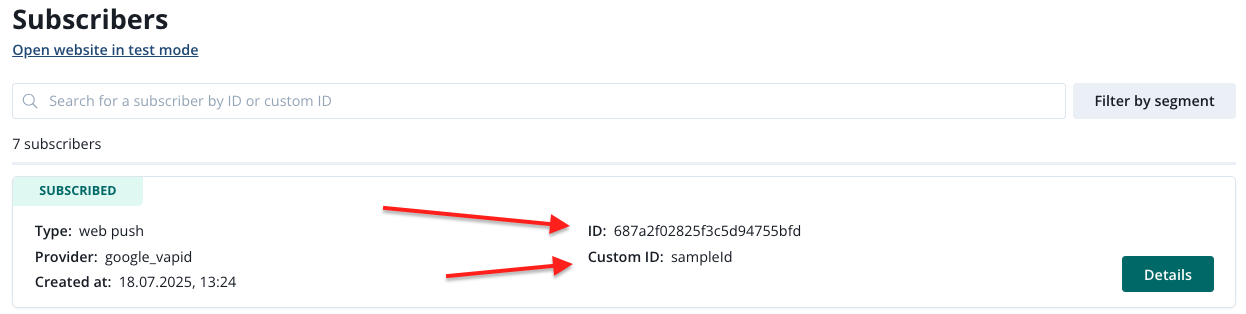
Each subscription on the list has basic information:
- status of the subscription (subscribed/unsubscribed),
- type (web/mobile push),
- provider (e.g. google_vapid, apns_ios, android_fcm),
- date of subscription (created at),
- ID (PushPushGo ID, created at the moment of subscription),
- Custom ID (ID that is attached to the subscriber from your system through DataLayer or API, so you can identify the subscriber on your side and run transactional campains).

Subscriber's details
More information about a subscriber can be found under "Details"

Here you will see General information (gathered in the moment of subscription)
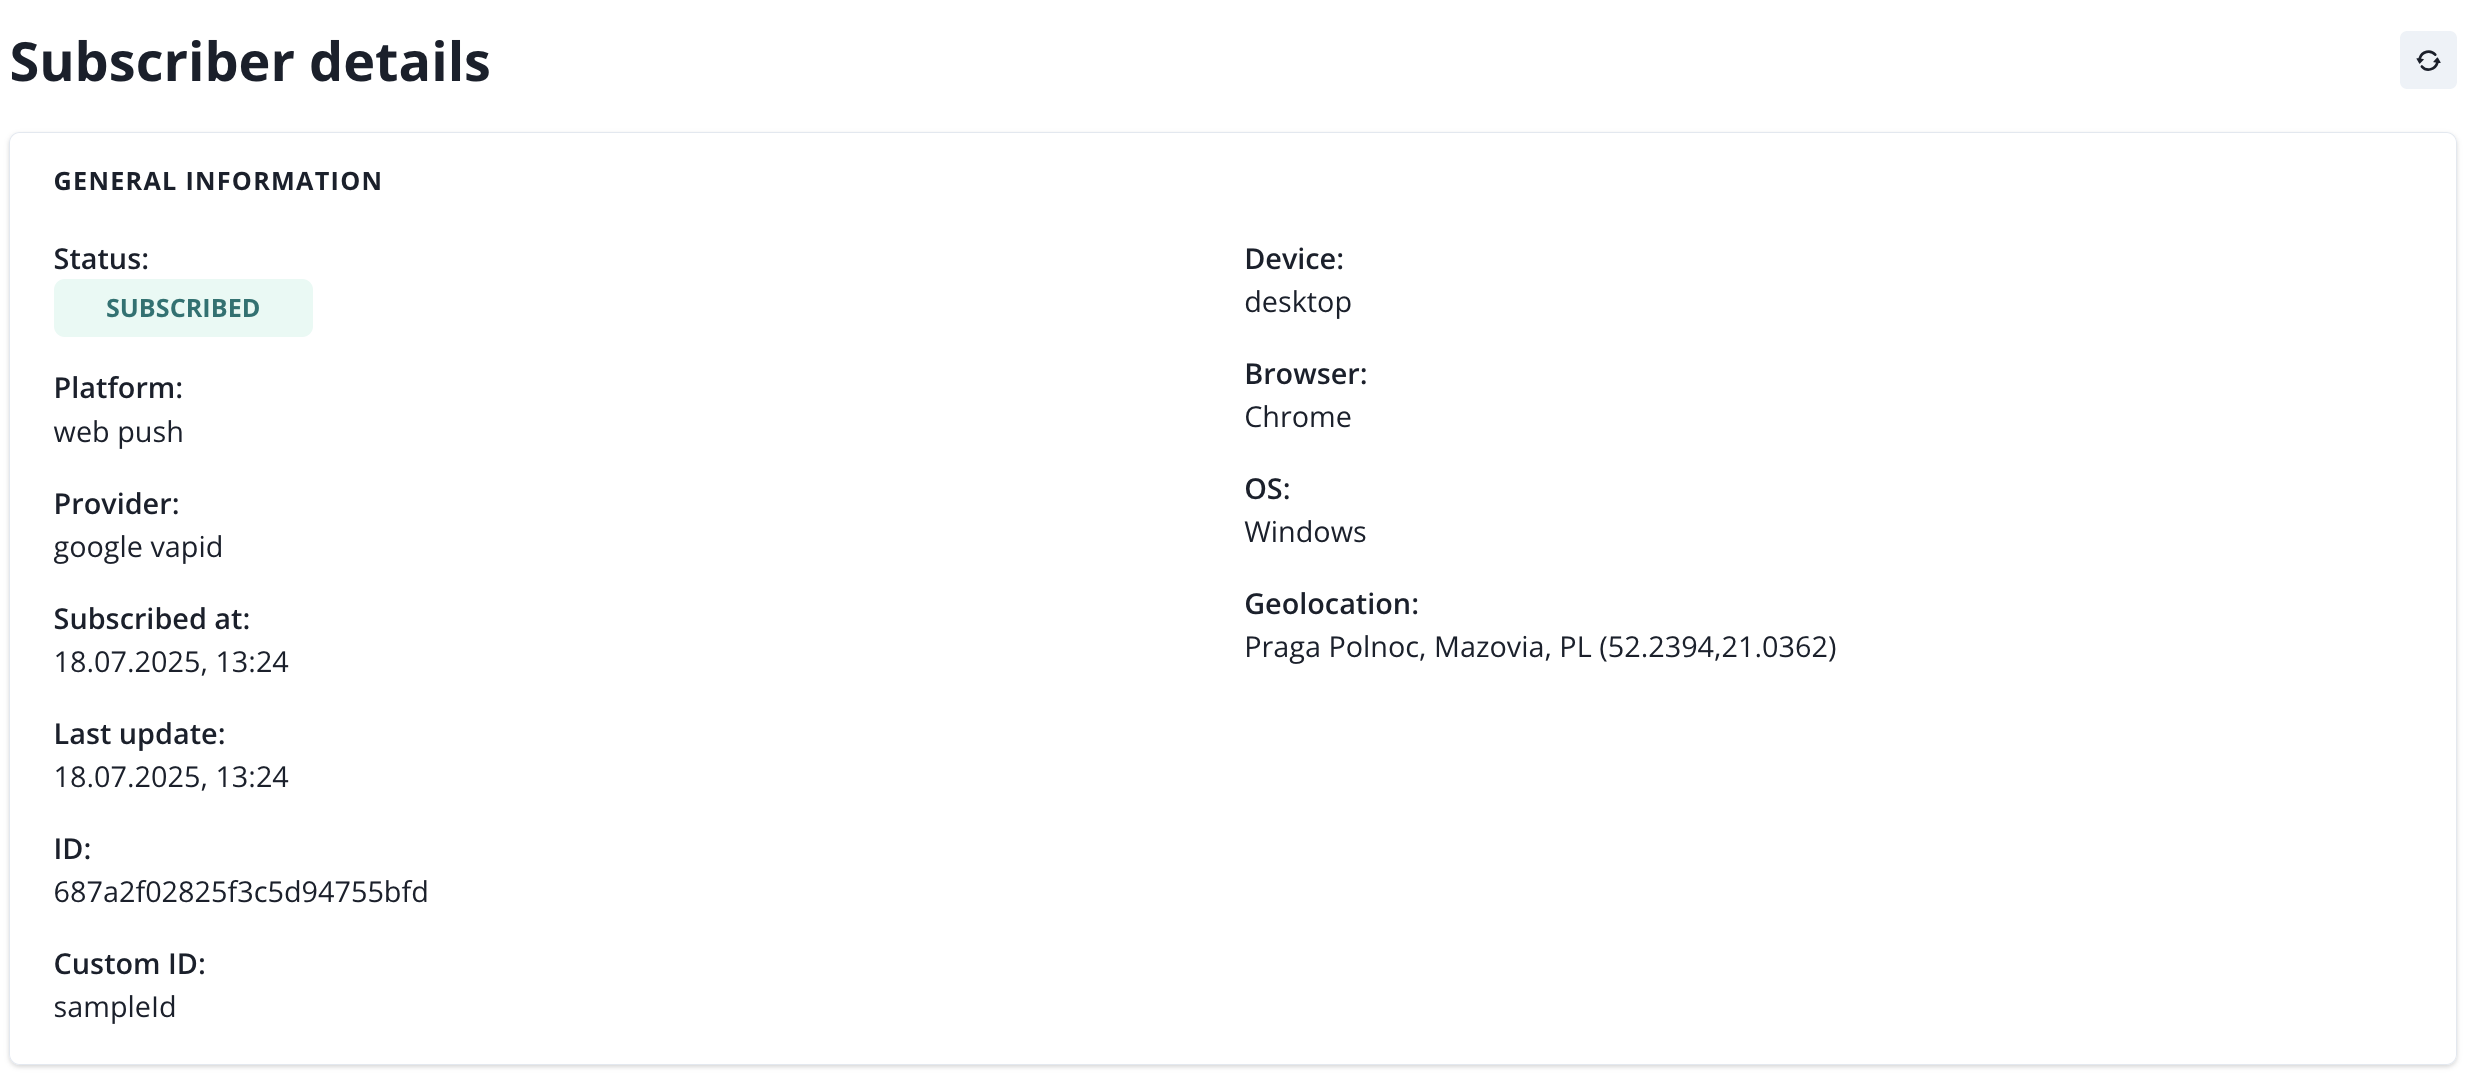
data from the last session,

and data from selectors, labels and segments.
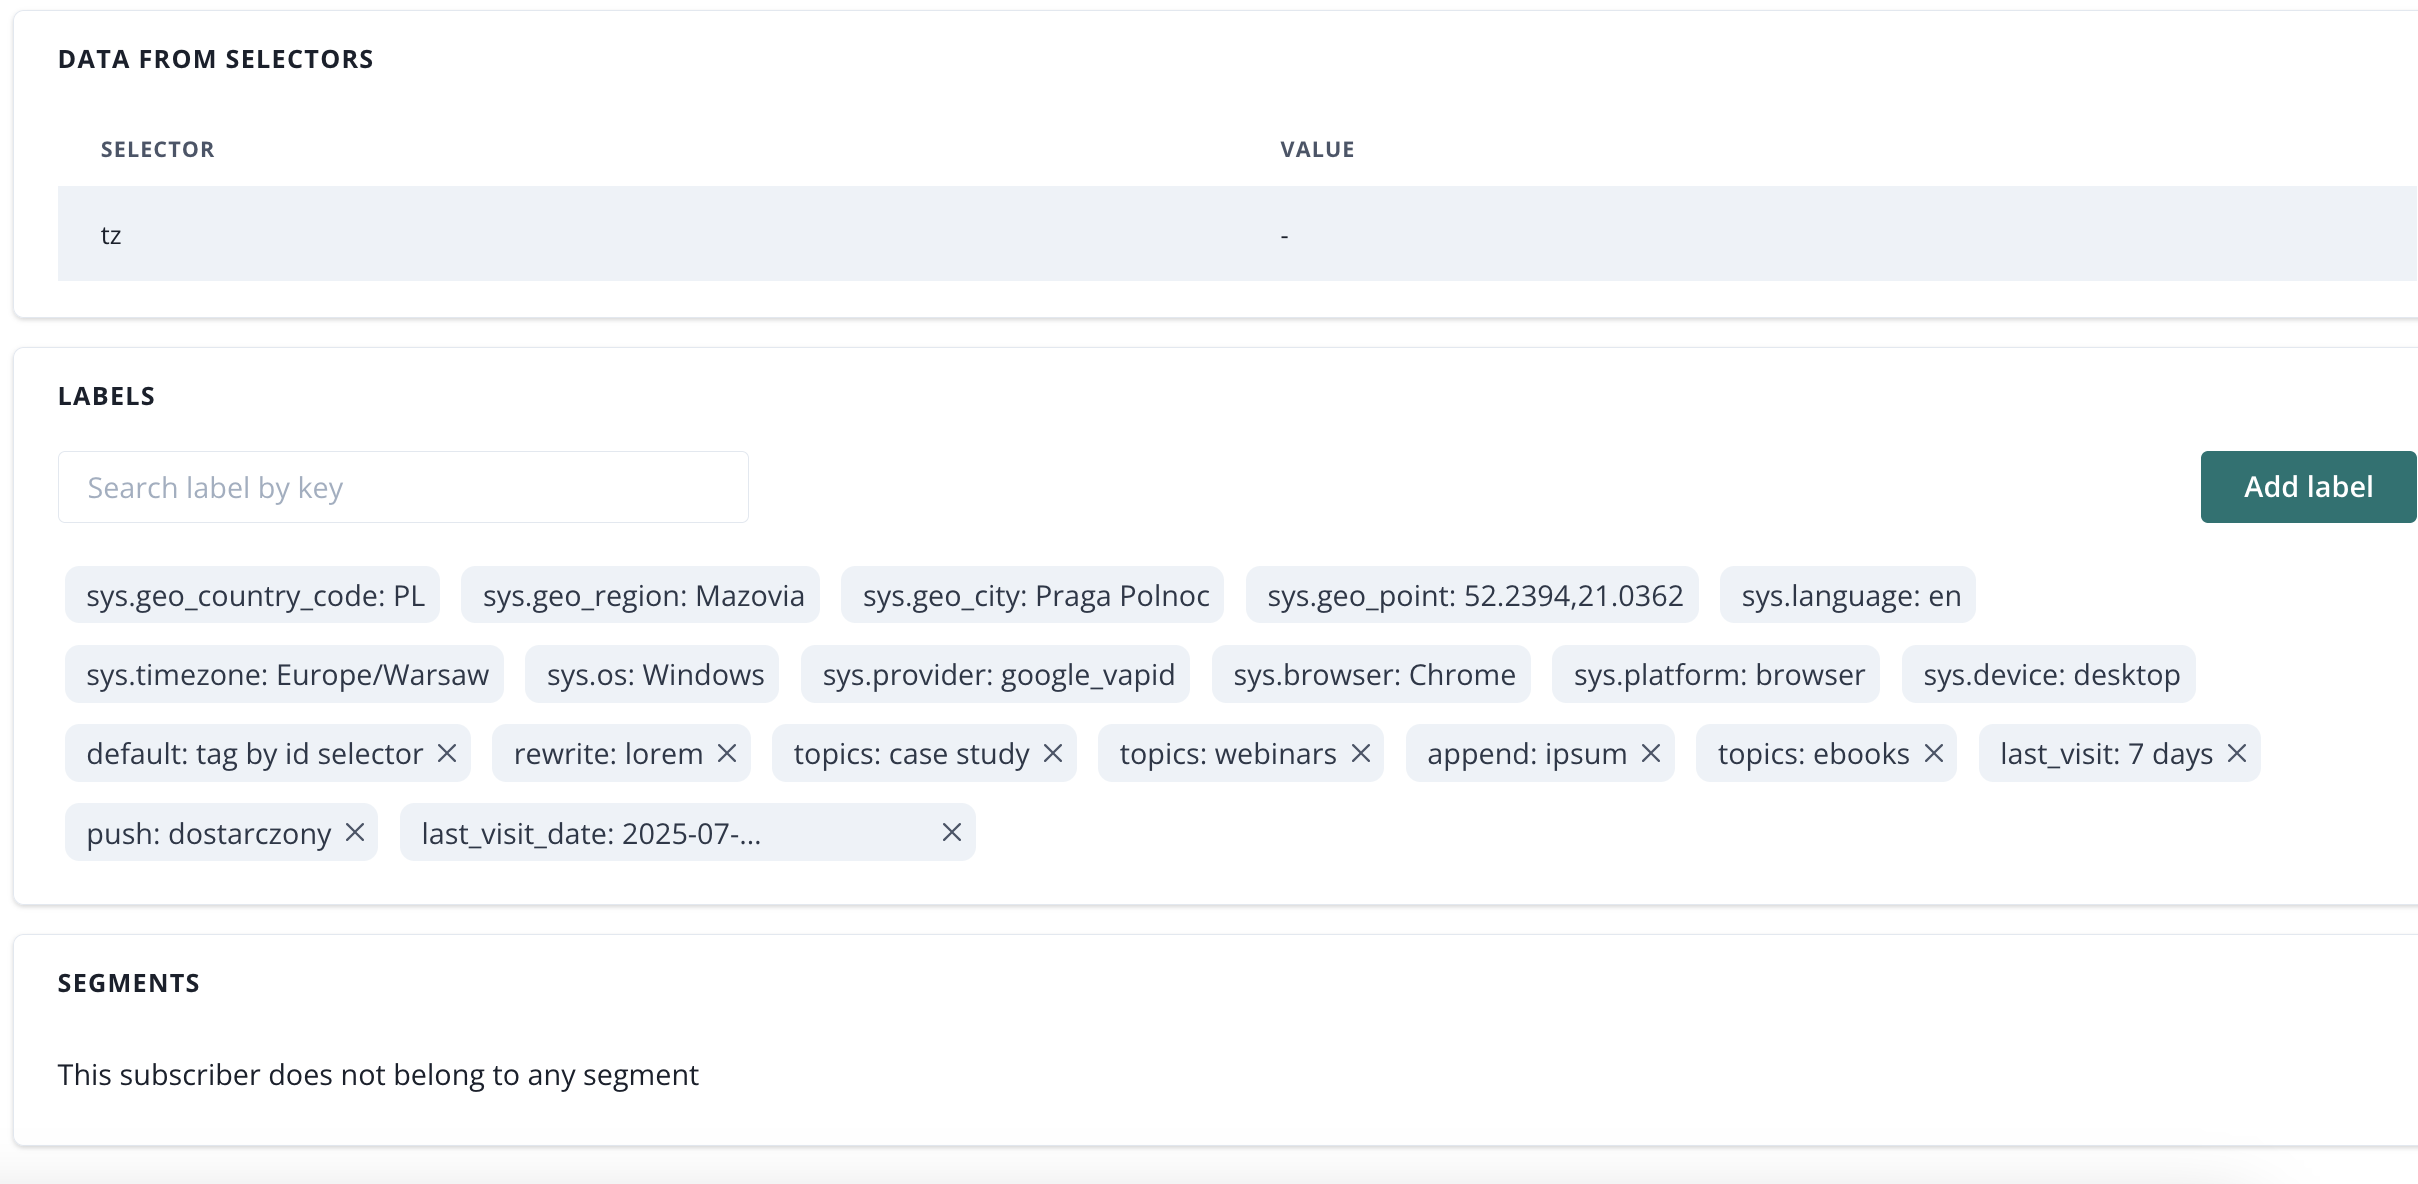
The information that we have about a subscriber from the session is gathered thanks to beacons. That information can be later turned into labels and segments via selectors.
Beacons
Beacons are used to send data about the subscriber's behavior on your website to your PushPushGo account. Thanks to this, we know what subpages they visited and what actions they performed.
PushPushGo offers several strategies for sending beacons to the application. It depends on how your website is built, but generally default strategy works for most cases. Go to Integration > Web push > Beacons to manage beacons strategy.
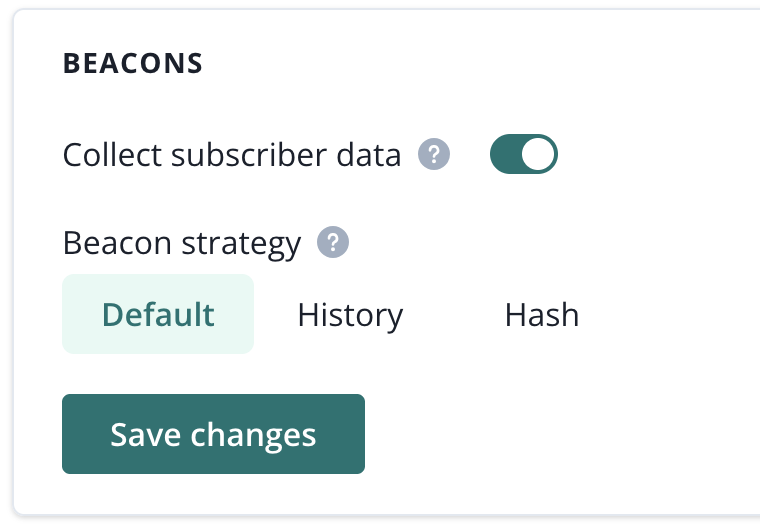
Default: for pages that reload when an element is clicked
Hash: for older SPA pages (Single Page Applications) whose URLs contain "#", e.g. / # / profile /,
History: modern SPA pages running on the History API - page reload is not visible as in the default strategy, and there is no "#" sign in the URL
Visibility change: detection of an action indicating exiting the page, such as changing the tab, minimizing the browser window. Intended for pages on which, after clicking on a given element, a new tab opens in the browser.
All selectors defined on project contain concrete instructions on gathering data from the website and processing it. This is a single piece of information for a beacon.
Each transition on a page, like reloading it, leaving it, or moving to a new subpage, results in sending a beacon with data included in a selector for automation scenario purposes.
Subscriber ID and Custom ID
There are two types of IDs that can be attached to a subscriber in PushPushGo.
- subscriber ID - generated automatically during subscription
- custom ID - added to the subscriber record via selector (see Segmentation article, custom label using selector section. Use Custom Id option while configuring it) or using API.
Subscriber ID can be found on the Subscribers' list, on the subscriber card. If custom ID has been passed to us, it will be visible as well, right under Susbcriber ID. If it was never setup, it will show: sampleId.
CustomId allows you to send transactional push campaigns and create transactional automations using our API. There is no option to create transactional messaging within our platform.
Add label to a subscriber manually
Manual proces of adding a label to a particular susbcriber comes in handy when you are tesing your segmentation rules based on selectors or automations. If you label your subscriber, you can later restrict rules and automations only for your subscriber, before they are ready go go live for the whole subscribers base.
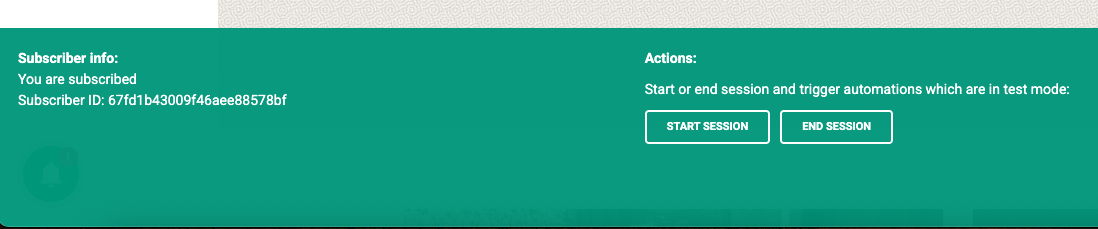
To add a label manually to your subscriber, first, make sure that you know your subscriber id. There are two ways to get it; using our test mode link, or searching in the Dev's console.
Test mode link
When you are in the browser, enter the url of the website linked to your project adding /?ppg_test_mode=on. It should look like this:
https://yourwebsite.com/?ppg_test_mode=on
You should immediately see a green bar at the bottom of the site with your subscriber ID.
Dev's console
When you are in the console on the website linked to your project, do the below steps:
- Go to Network tab
- Tick Preserve log
- Search: beacon
- Refresh Ctrl+Shitf+R
- Choose the last beacon log
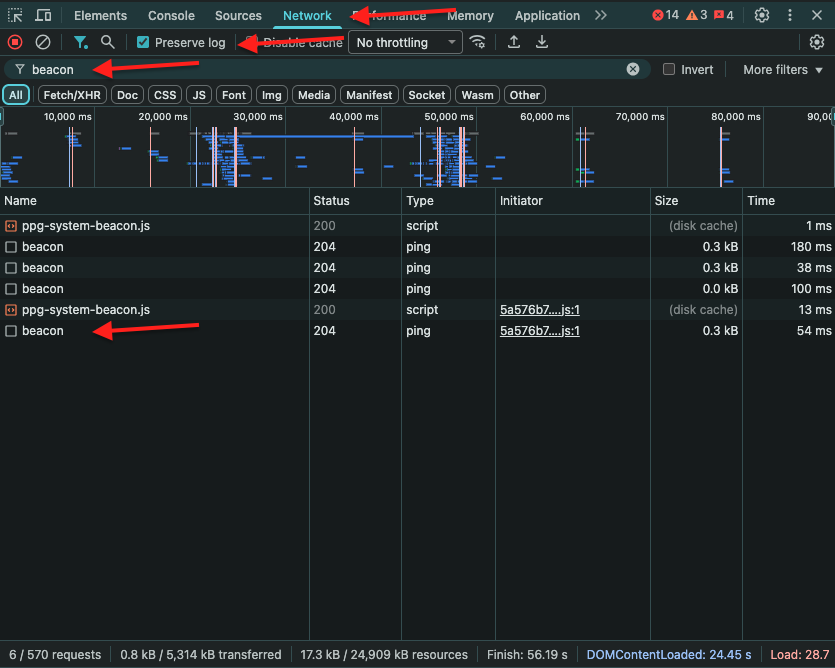
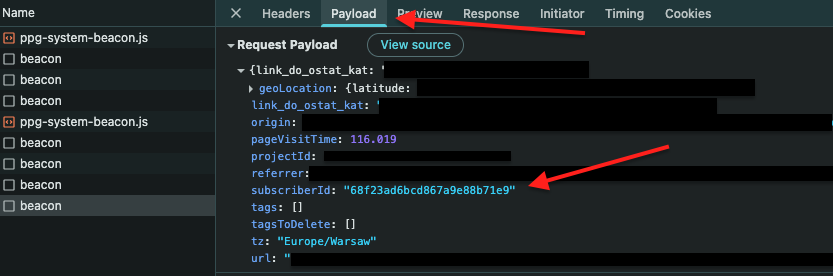
Now, go to Payload tab and find your susbcriber id there.
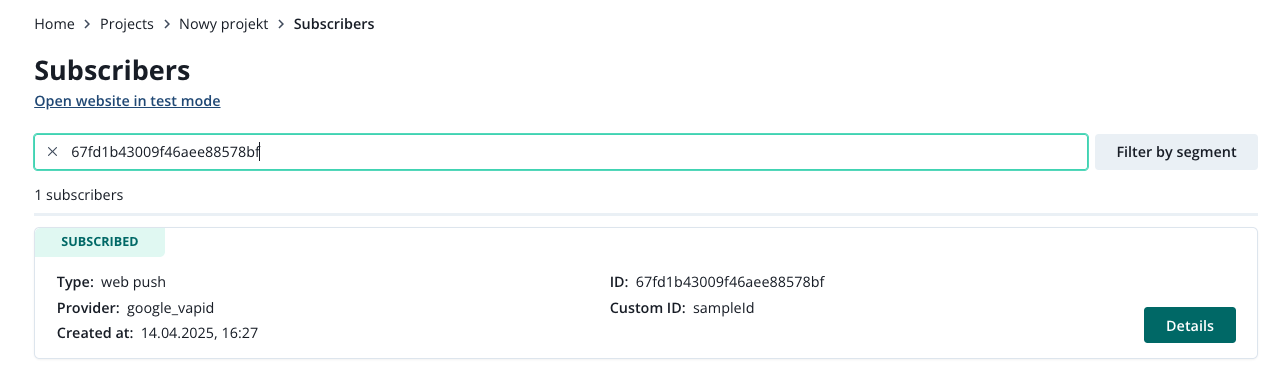
Now, use your subscriber ID it to filter out your susbcriber from the susbcriber list.
Go to Details and scroll down untill you see the Labels section. Click Add label and fill in the details of your label.
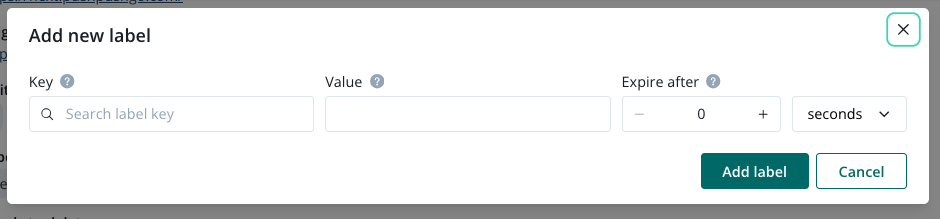
Using a unique key for your label will later help you find it more easily, since we always have to option to choose the label key first when we target campaigns and automations.