
Web/mobile push: Selectors
Selectors are predefined values meant for downloading data from the HTML tree, which are later used for automation scenarios.
Every selector has its properties:
- name
- selector path or JavaScript variable
- value type
- reduction method
A selector can be also described with label-ascribing characteristics. It means that it can append a value to a given subscriber without using automation scenario. It’s a handy solution that saves time and shortens scenario preparation.
Selectors that you will use are:
- id
- class
- DOM tree
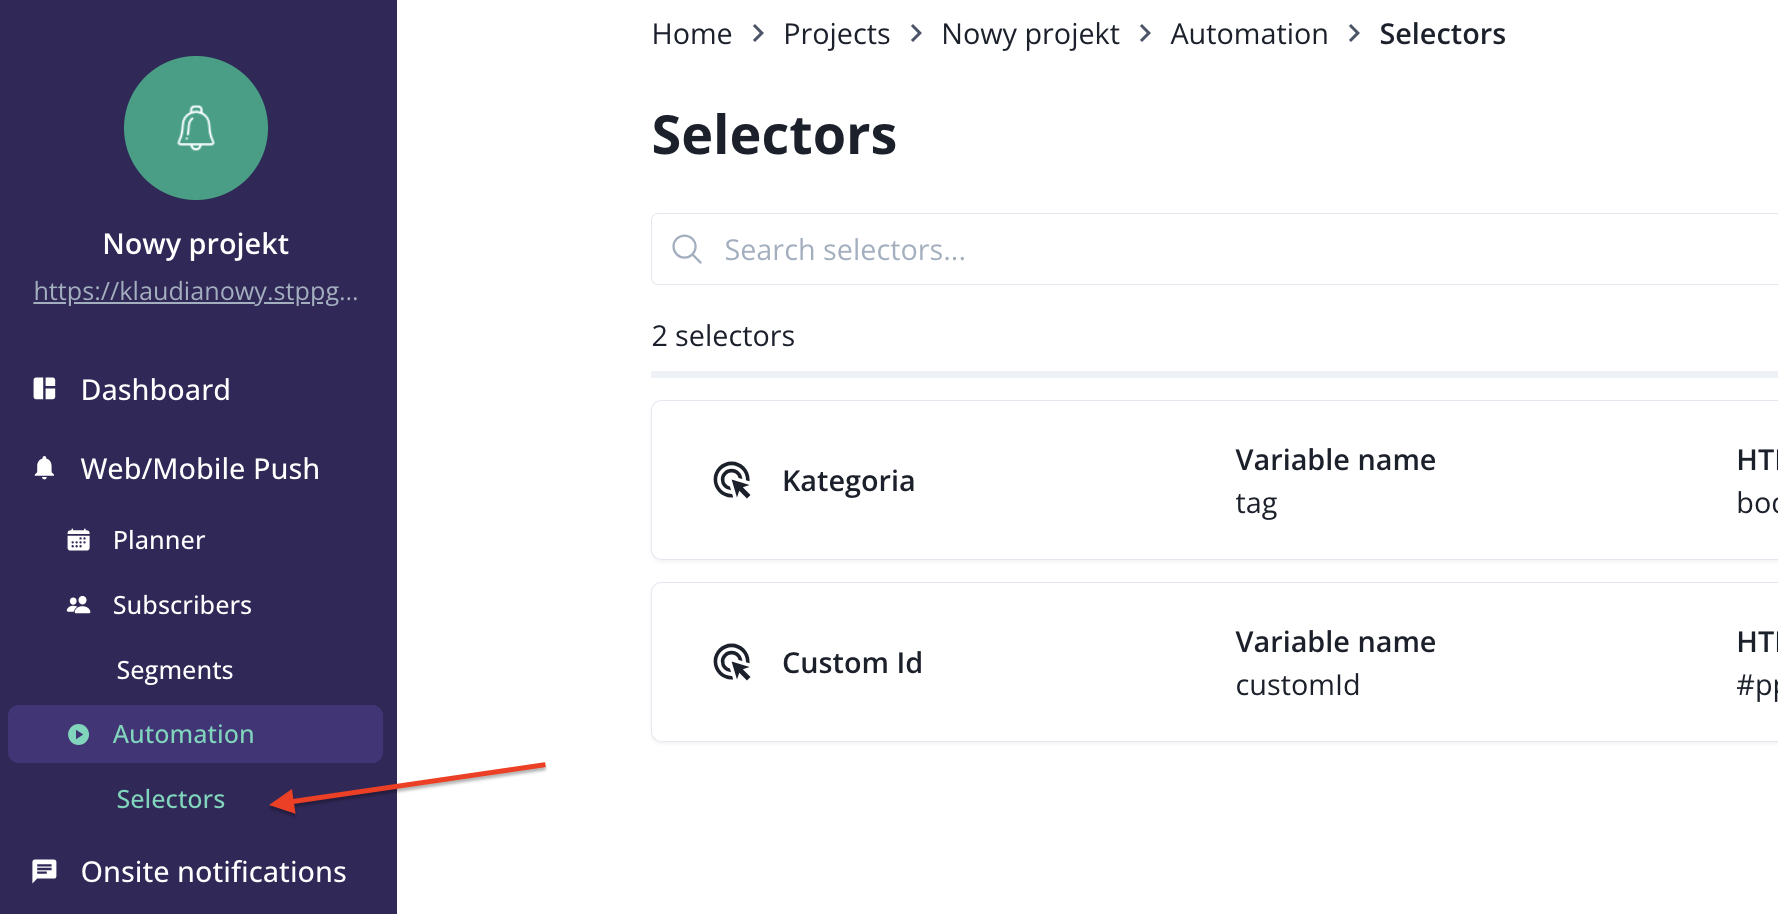
To define a selector, go to the Selectors tab.

For each selector, you have to define:
- name - this will be only visible to you in the panel.
- type (action) - choose an action that your selector will perform.
- HTML selector (path) - paste the exact path to the element on the page that you want to monitor.
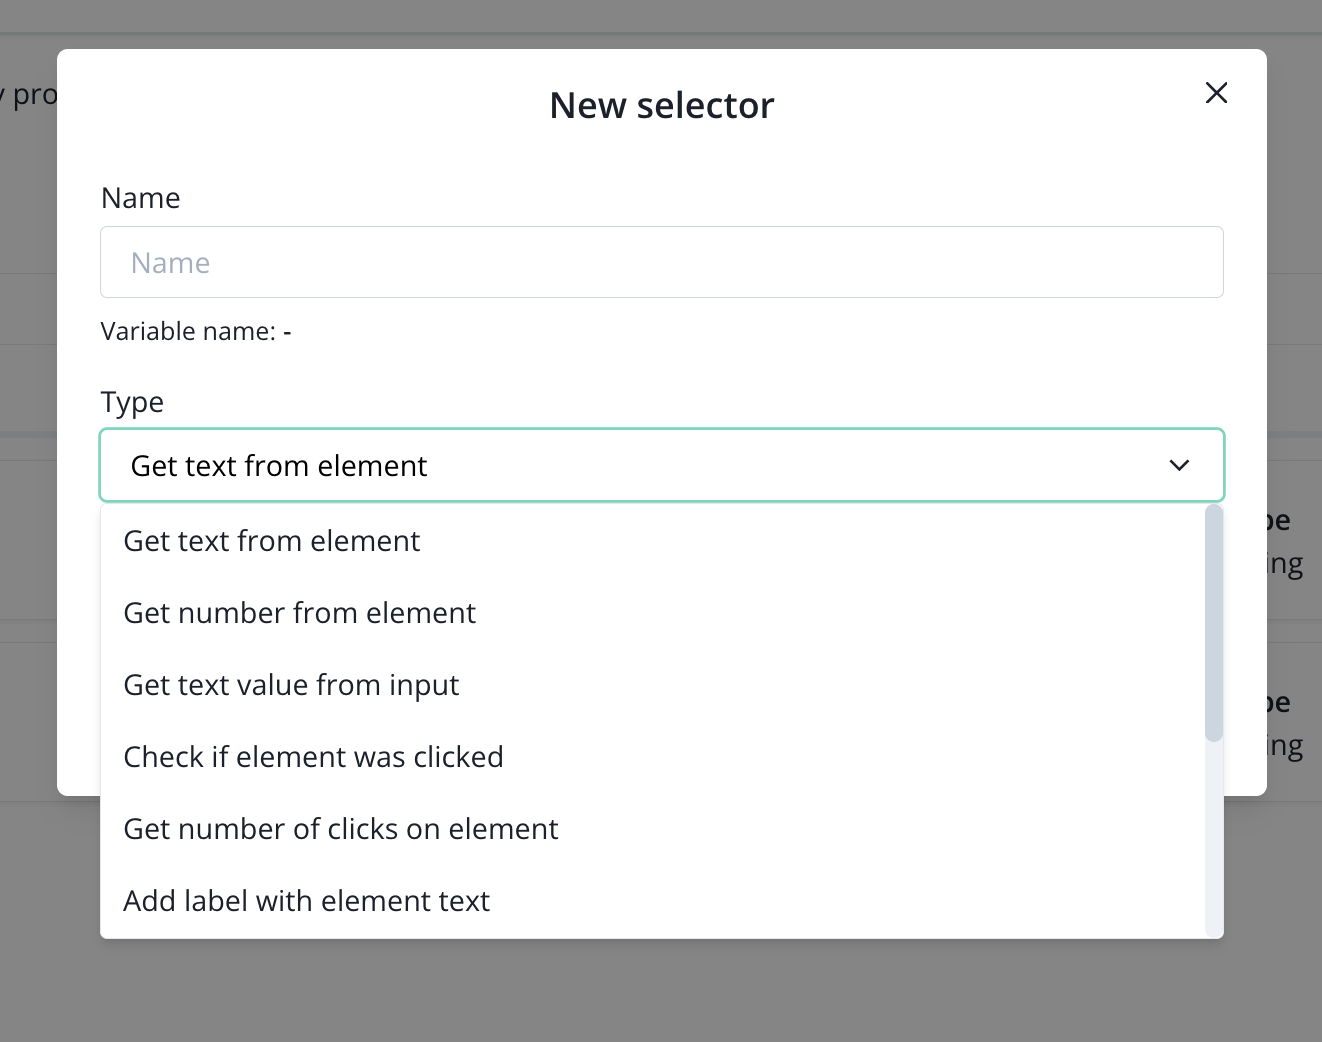
Get text from element - This action allows you to collect the name of a given element on the page, which can then be used as a so-called variable when creating the notification. The names will be placed in a separate column in the subscribers' tab
Example: #article_title
Get the number from the item - This allows you to collect numerical information, like how many products a given subscriber has in a cart, or what the final value of an order is. This selector can be used, for example, in an abandoned cart scenario.
Example: .simpleCart_total
Check if the item has been clicked - You can collect the information if the recipient clicked on the element designated by you on the page, like CTA buttons.
Example: #add_comment
Get the number of clicks from a given element - The action allows to collect the number of clicks, eg in the add comment button. Thanks to this, we know how often the subscriber shares his opinion on our website
Example: .submit-buy
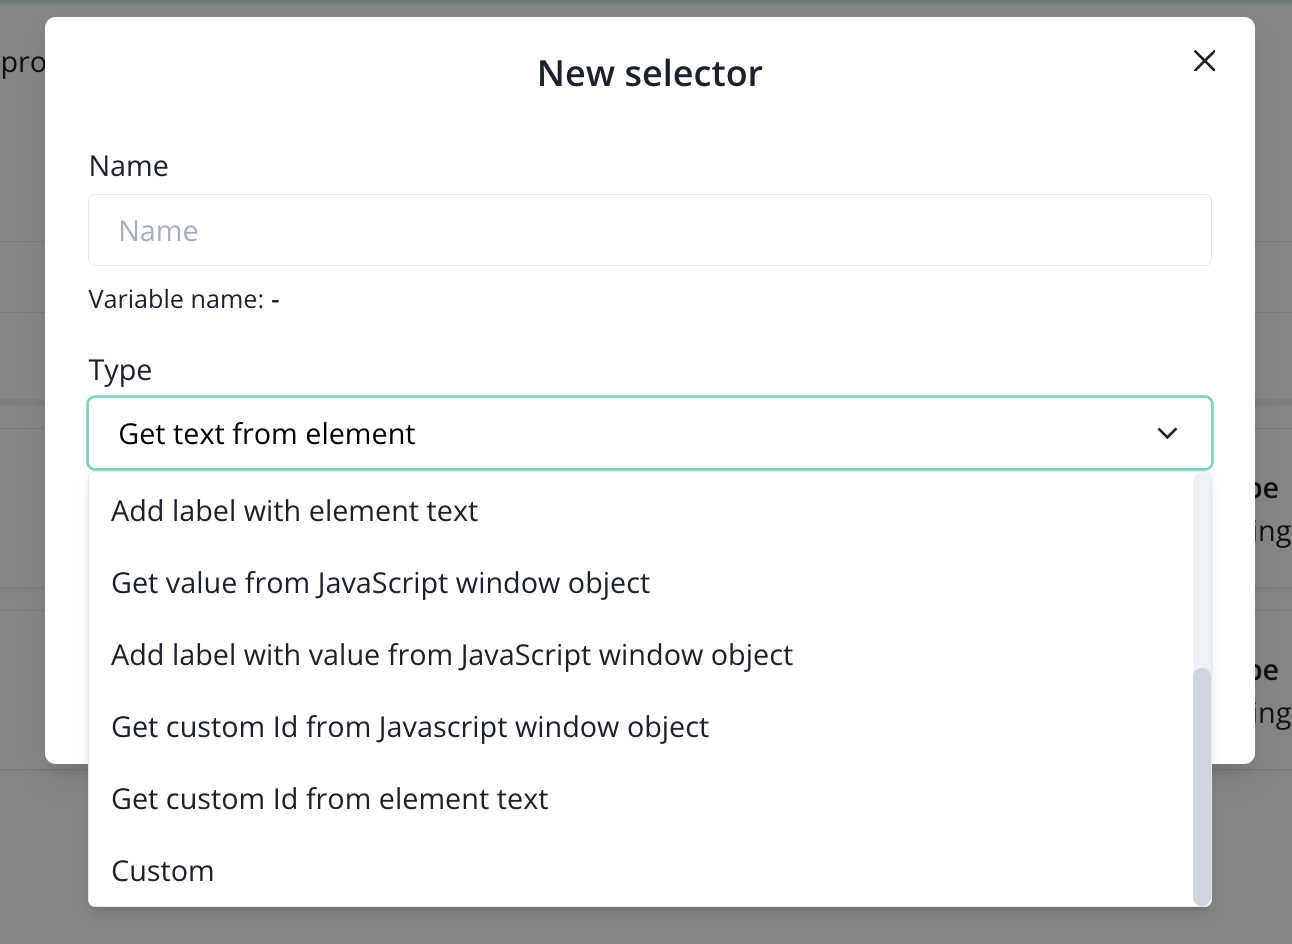
Add a tag based on the content of the item - Thanks to this action, you can collect information about, for example, the categories visited on the page in the form of a tag. They allow for the creation of more personalized messages. Within this action, we can put so-called label tags, so that the collected tags will be grouped according to your design.
Example: .category_list h1
Get the value from the input - Using this action, you can download the content entered by the recipient to input fields. For example, if your site has a product search engine, we are able to check exactly what phrases visitors have entered.
Example: #city
Download a variable from the browser window - Using this action, we can send the stored data to your application in Google Tag Manager using Data Layer
Add a tag based on a variable from the window object - With data collected on Data Layer in Google Tag Manager, you can assign tags to your recipients.
Custom - This action allows you to use recipient information that is stored in class attributes or identifiers. For example, using this action, you can collect the last visited link by a subscriber.
Example:
- link [rel = 'canonical'] with the "href" attribute
- link[rel='alternate'][hreflang='pl'] with the "href" attribute
- meta[property='og:url'] with the "content" attribute