
Web/Mobile push: Segmentation
There are many ways to target your campaigns in PushPushGo. Available options depend on the type of the communication channel.
- Web and Mobile push: labels, segments
- Onsite: condition group or condition segment based on session data
- Pop-up: user type (subscriberd to web push, not subscribed, all), platform type (web), device, browser, operating system, trigger.
- In-app: user type (subscriberd to mobile push, not subscribed, all), platform type (mobile), device, operating system, trigger
- Whatsapp: channel
In the Segmentation section of this documentation we will cover labels and segments, since segmentation options for Pop-up/In-app, Onsite and Whatsapp options are explained in detail in sections that are dedicated to these products.
Labels
There are two types of labels in PushPushGo.
- system labels - created automatically, at the moment of subscription.
- custom labels - crearted by the user using selectors, automation or API.
System labels
System labels are available in the push campaign creator, in the Audience seciton. Labels consist of a key and value; key: value. Here is an example of the system label: sys.browser: chrome. When you are in the Audience section of the push campaign creator, select desired label key to see all currently available labels with that key.
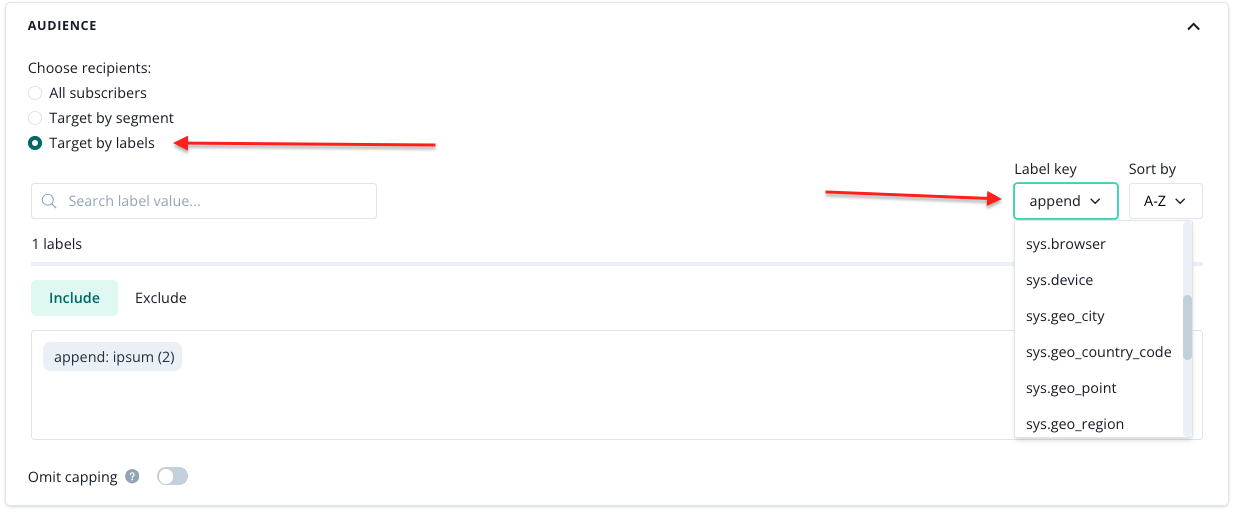
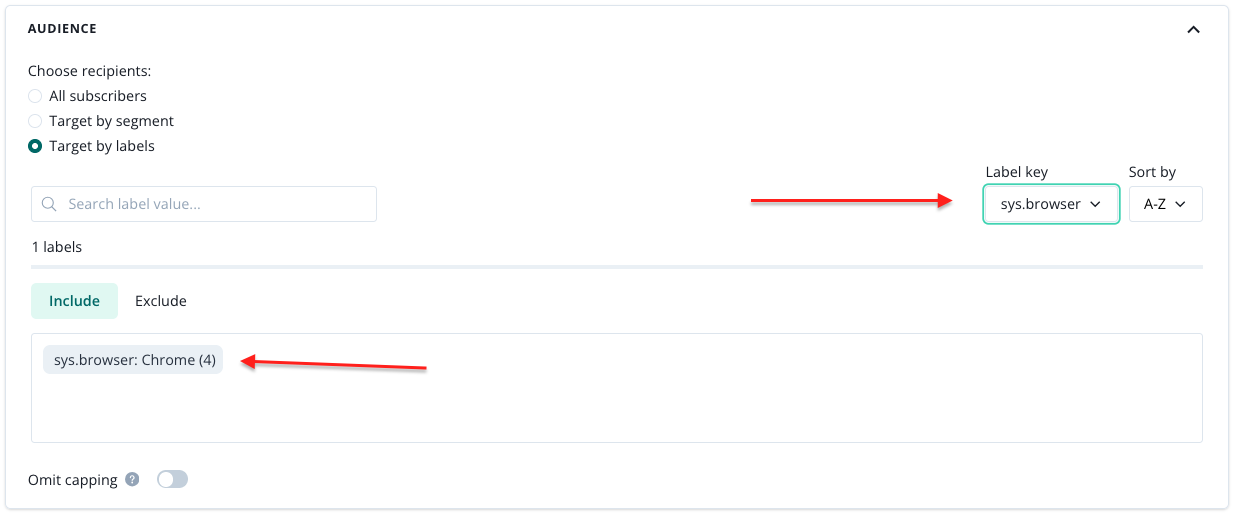
The number assigned to the label is the number of subscribers that have that label pinned.
System labels that we collect for each new subscription automatically are:
- sys.browser
- sys.device
- sys.geo_city
- sys.geo_country_code
- sys.geo_point
- sys.geo_region
- sys.language
- sys.os
- sys.platform
- sys.provider
- sys.timezone
- last_visit (e.g. 7 days ago)
- last_visit_date
Custom labels
You can create your own labels using selectors and automations. The information that you can use to create labels can come from the subscriber session, or your CRM. When it comes to the data from the subscriber session, you can use following information:
- visited urls
- origin url
- referrer url
- page time visit
- last visit date
- displayed elements on the website
- clicked elements on the website
- entered value from input
- custom ID (if it was configured before and is visible during the session)
This information can be either visible to the subscriber who is browsing the website, or it can be placed in the DataLayer container and only visible during browsing trough Dev's console.
Custom label using automation.
An example of such custom label could be a visit on the success page in e-commerce. If you care to have a label pointing out susbcribers who recently made a purchase (in the last 30 days), you could create it using automation.
- Go to Automation > New automation
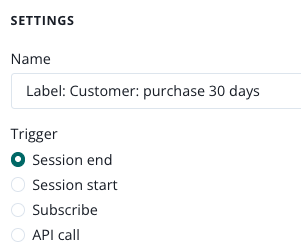
- Name your automation and set the Trigger to Session end.
3. Choose the option Subscriber can enter automation repeatedly, after time period (5 minutes).

4. Click on the icon Play on the chart, find "Codition" step and click on it. Select "connect".

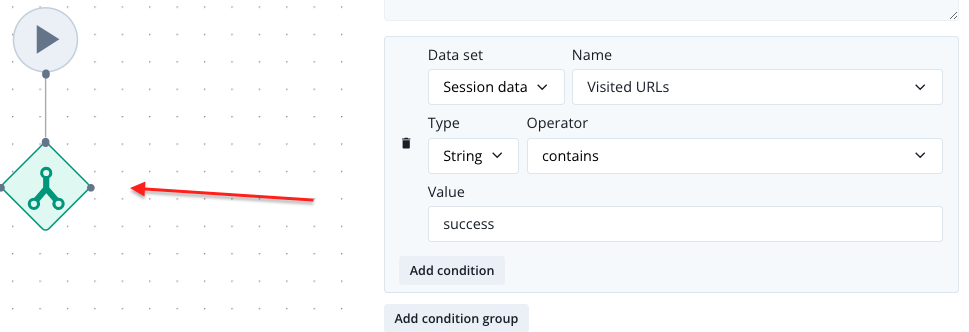
5. Make sure that the condition step on the chart is active (green, you select it by clicking on it), and fill in the data;
- data set: session data,
- name: visited urls,
- type: string,
- operator: contains,
- value: success (adjust it to your own case and website, this key word is just an example).
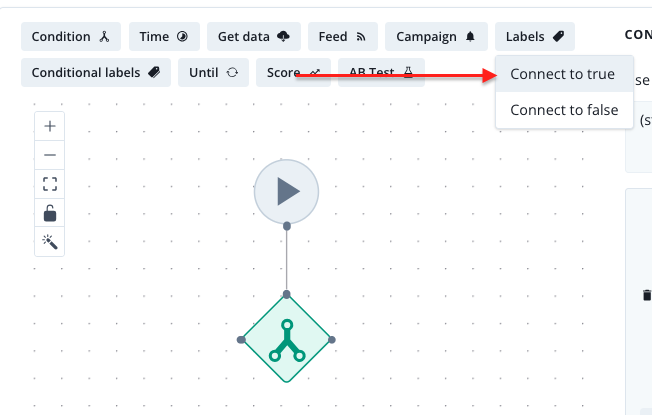
6. Select Labels and go with "connect on true" option.
7. Make sure that Labels step i selected on the chart and fill in the details of the step on the right side of the screen.
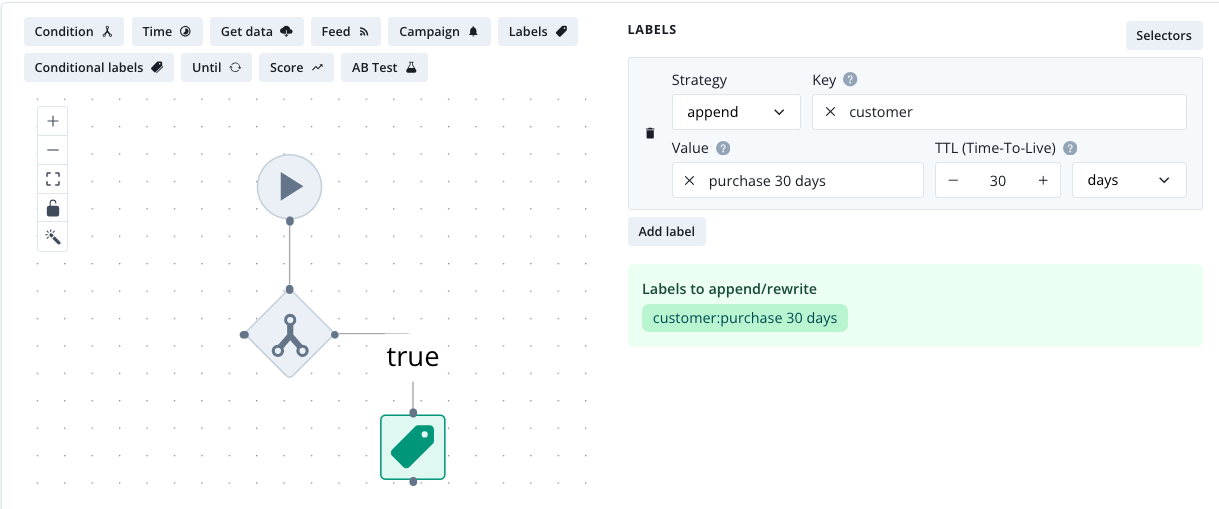
The strategy can be either append or rewrite, it depends how you want your labels to act when there is many possible values for the same key. Should they only keep the last value or multiple ones for a subscriber? It this case the strategy does not make a difference, there is only one value possible.
8. Save your automation.
Congrats! You have a custom label now . It will appear in the push creator Audience section once the first subscriber meets the conditions.
Custom label using selector
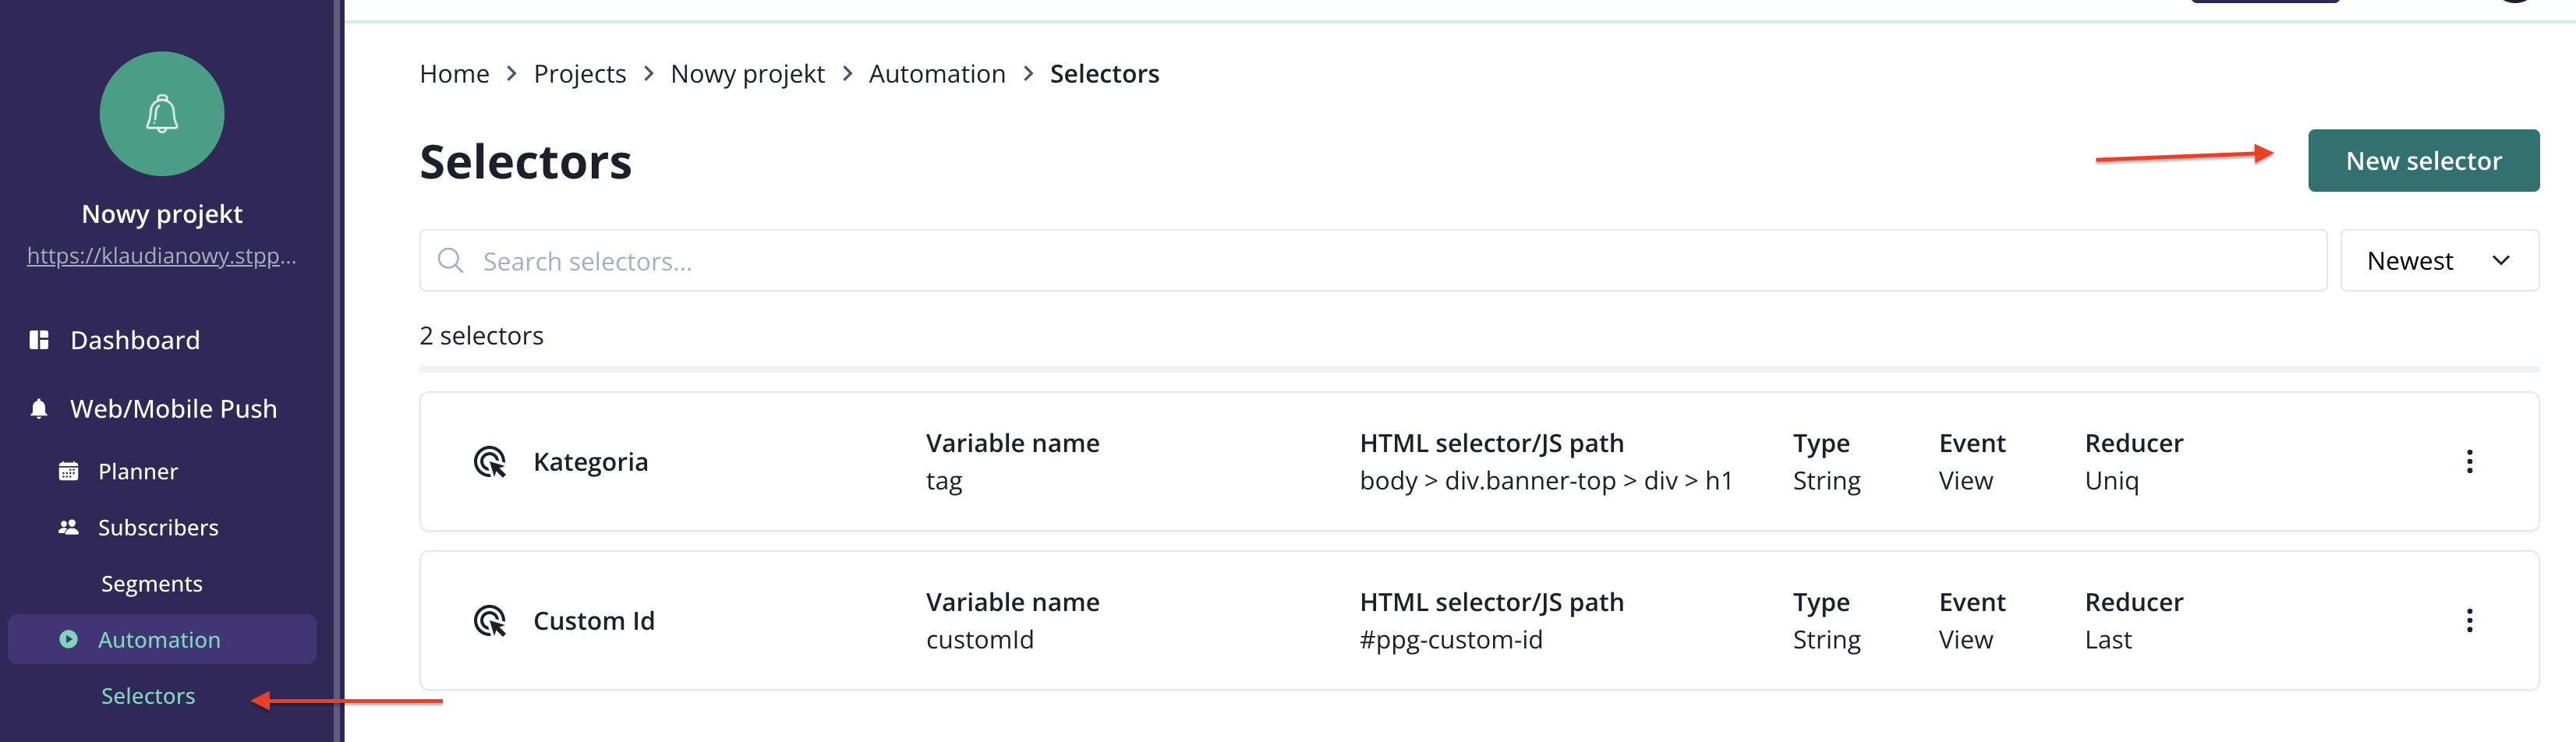
To create a label using a selector, go to Selectors otpion from the main navigation bar and select New selector.
You will see a window with three inputs. Start from naming your selector.
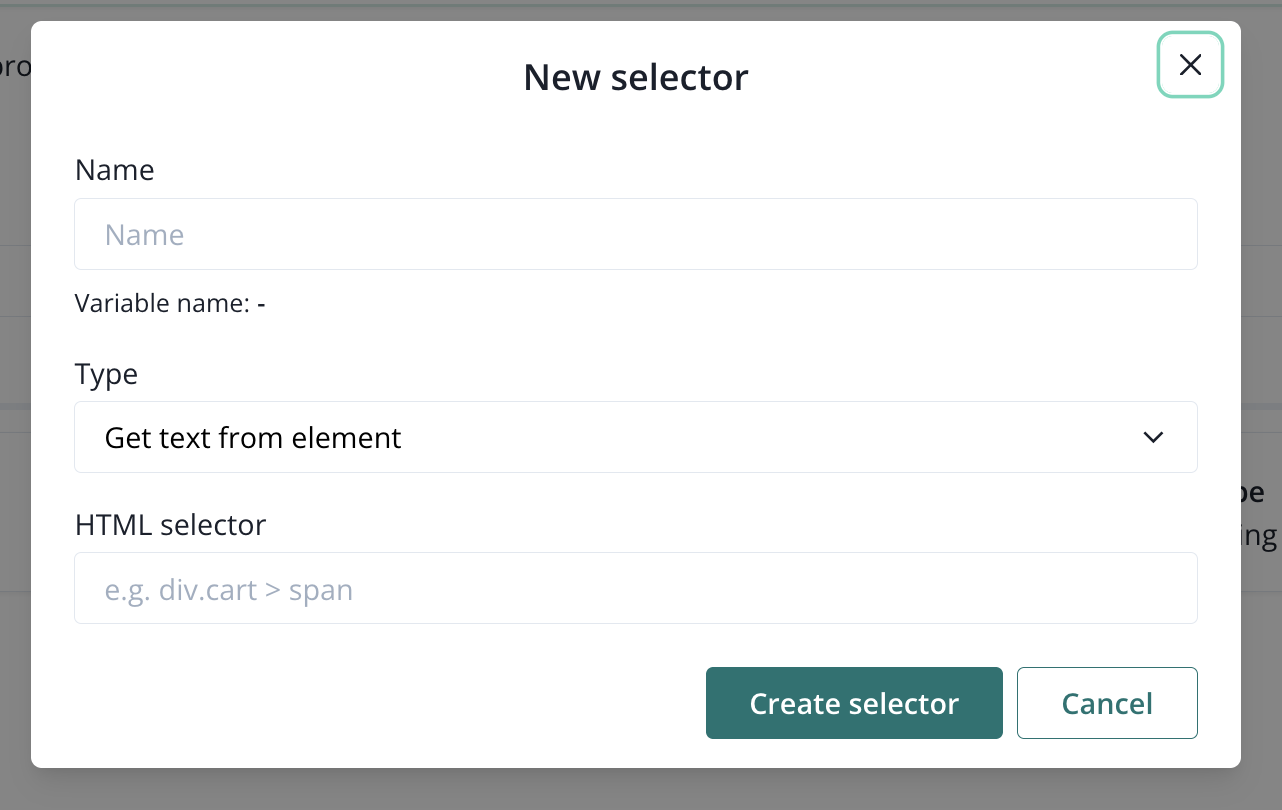
Now, choose the type of the selector.

Since we are creating a label, we only care about these ones:
- add label with value from JavaScript window object (for selectors created from DataLayer)
- add label with element text (for selectors created directly from the source code of rthe website)
The rest of options are available for creating selectors that read specific data from subscribers' sessions. That can be used in Automation.
The next steps are to fill in:
- HTML selector (its path),
- Key (name),
- TTL (Time-to-live),
- Strategy (append or rewrite).
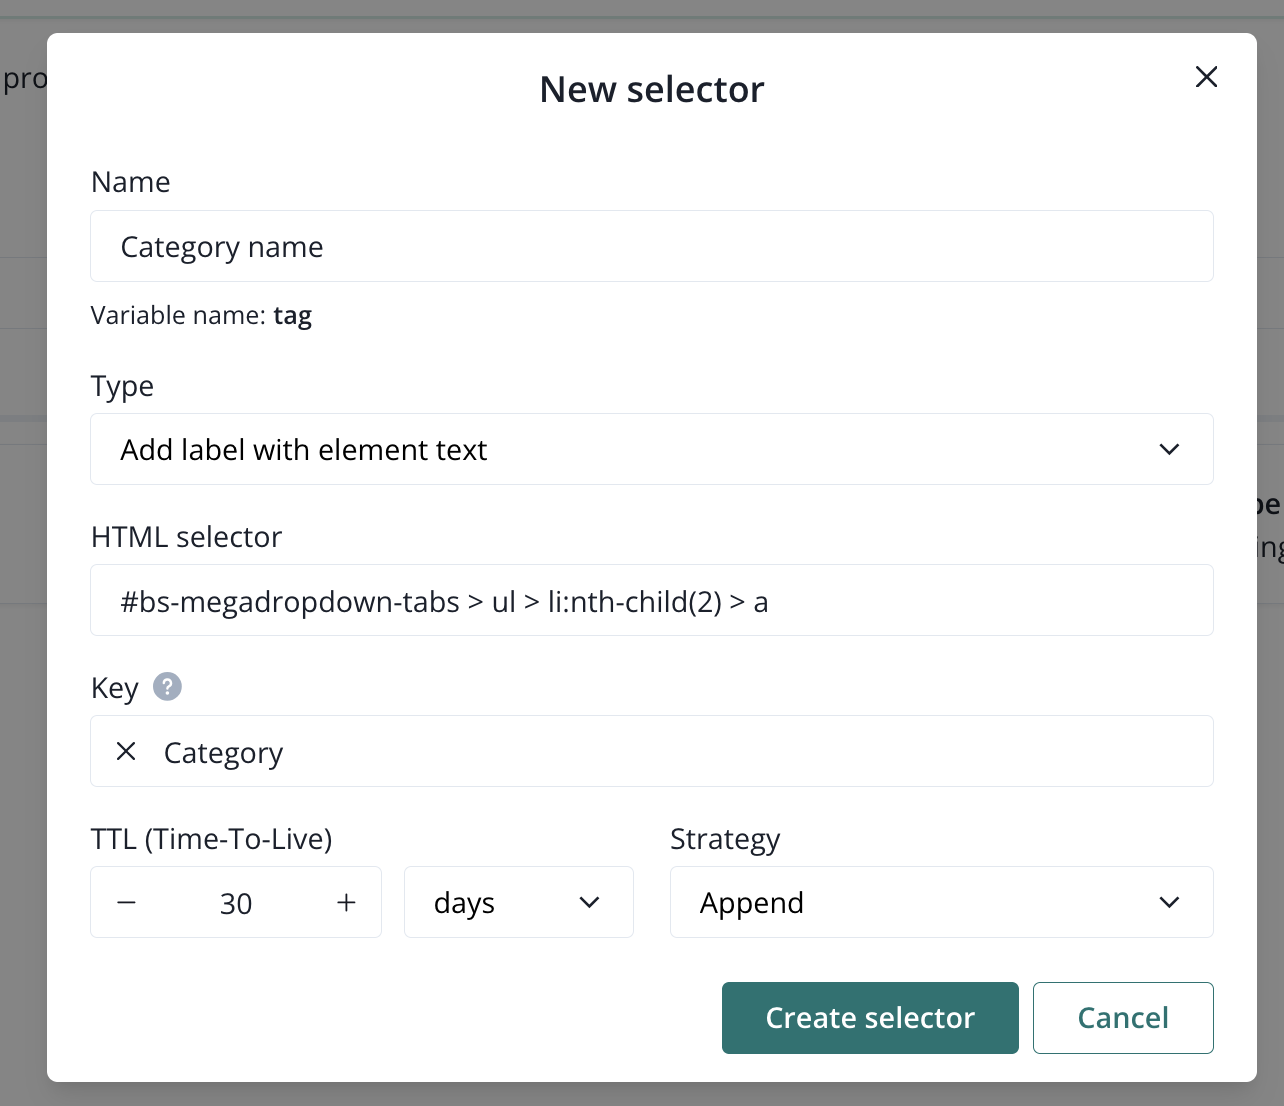
After hitting Create selector, the system will start scanning sessions of your subscribers and saving the value that the selector had during the last session (rewrite strategy), or all values that popped up during the last 30 days (if you set TTL as in the example above), in form of labels. For example, if you choose append strategy, you will get all categories that your subscriber visited during the last 30 days in form of labels. With rewrite strategy you will only get one label; from the last session.
Segments
Overview
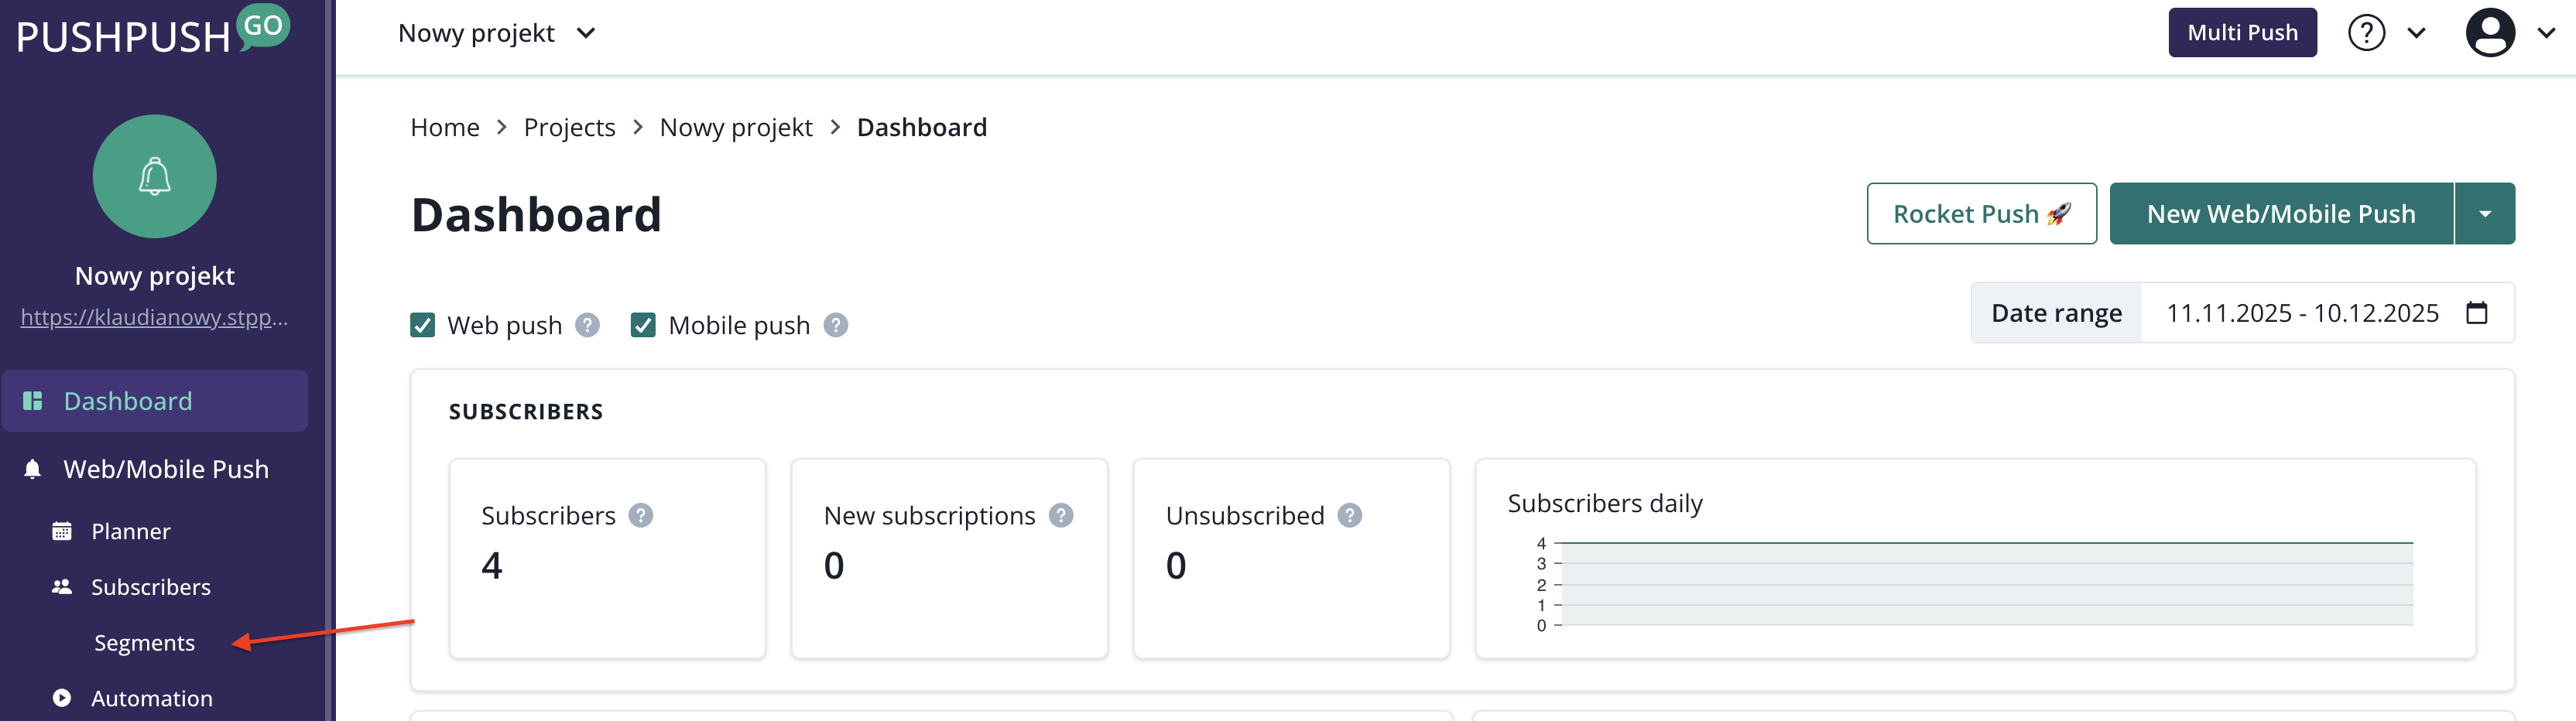
Segments are designed to group labels and precisely target your campaigns faster. You can find that option in the main navigation bar.
Create a segment
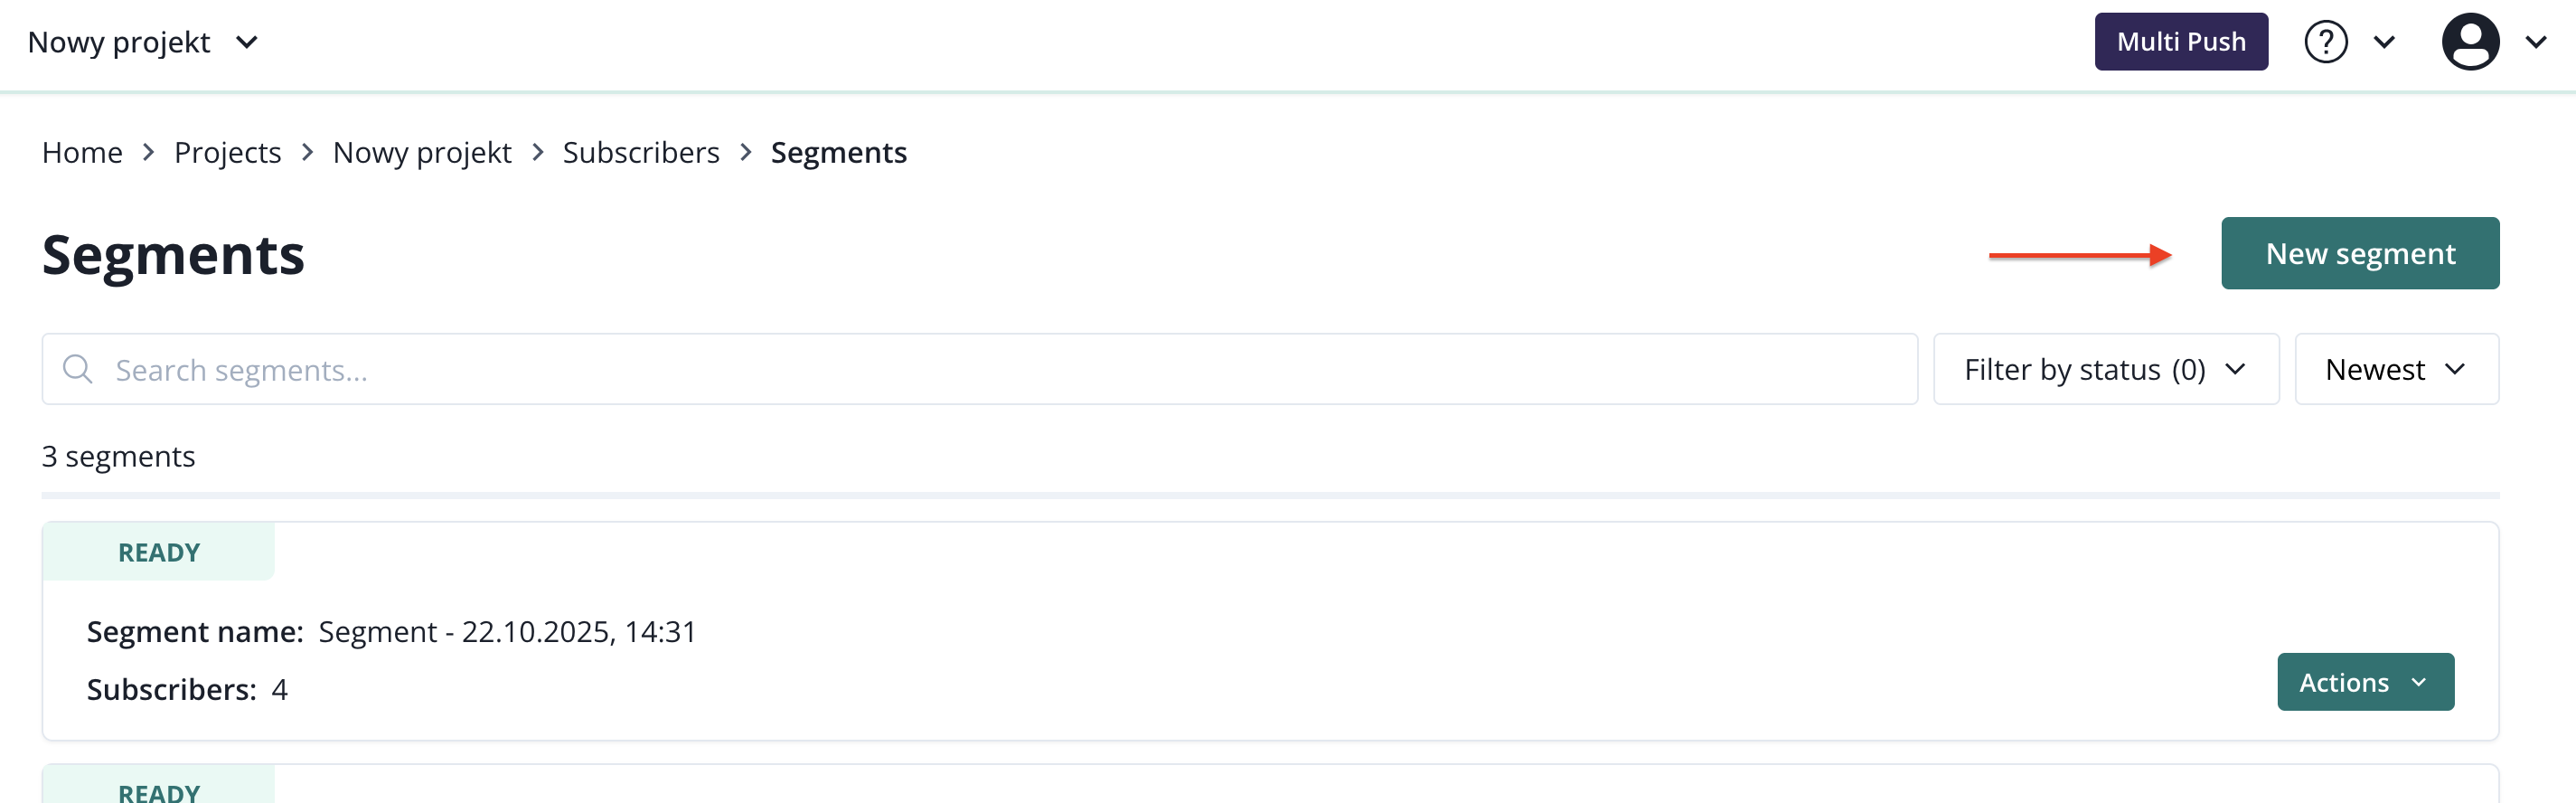
To create a segment select that option and click on New segment.
Name your segment and start building it as explained below the screenshot
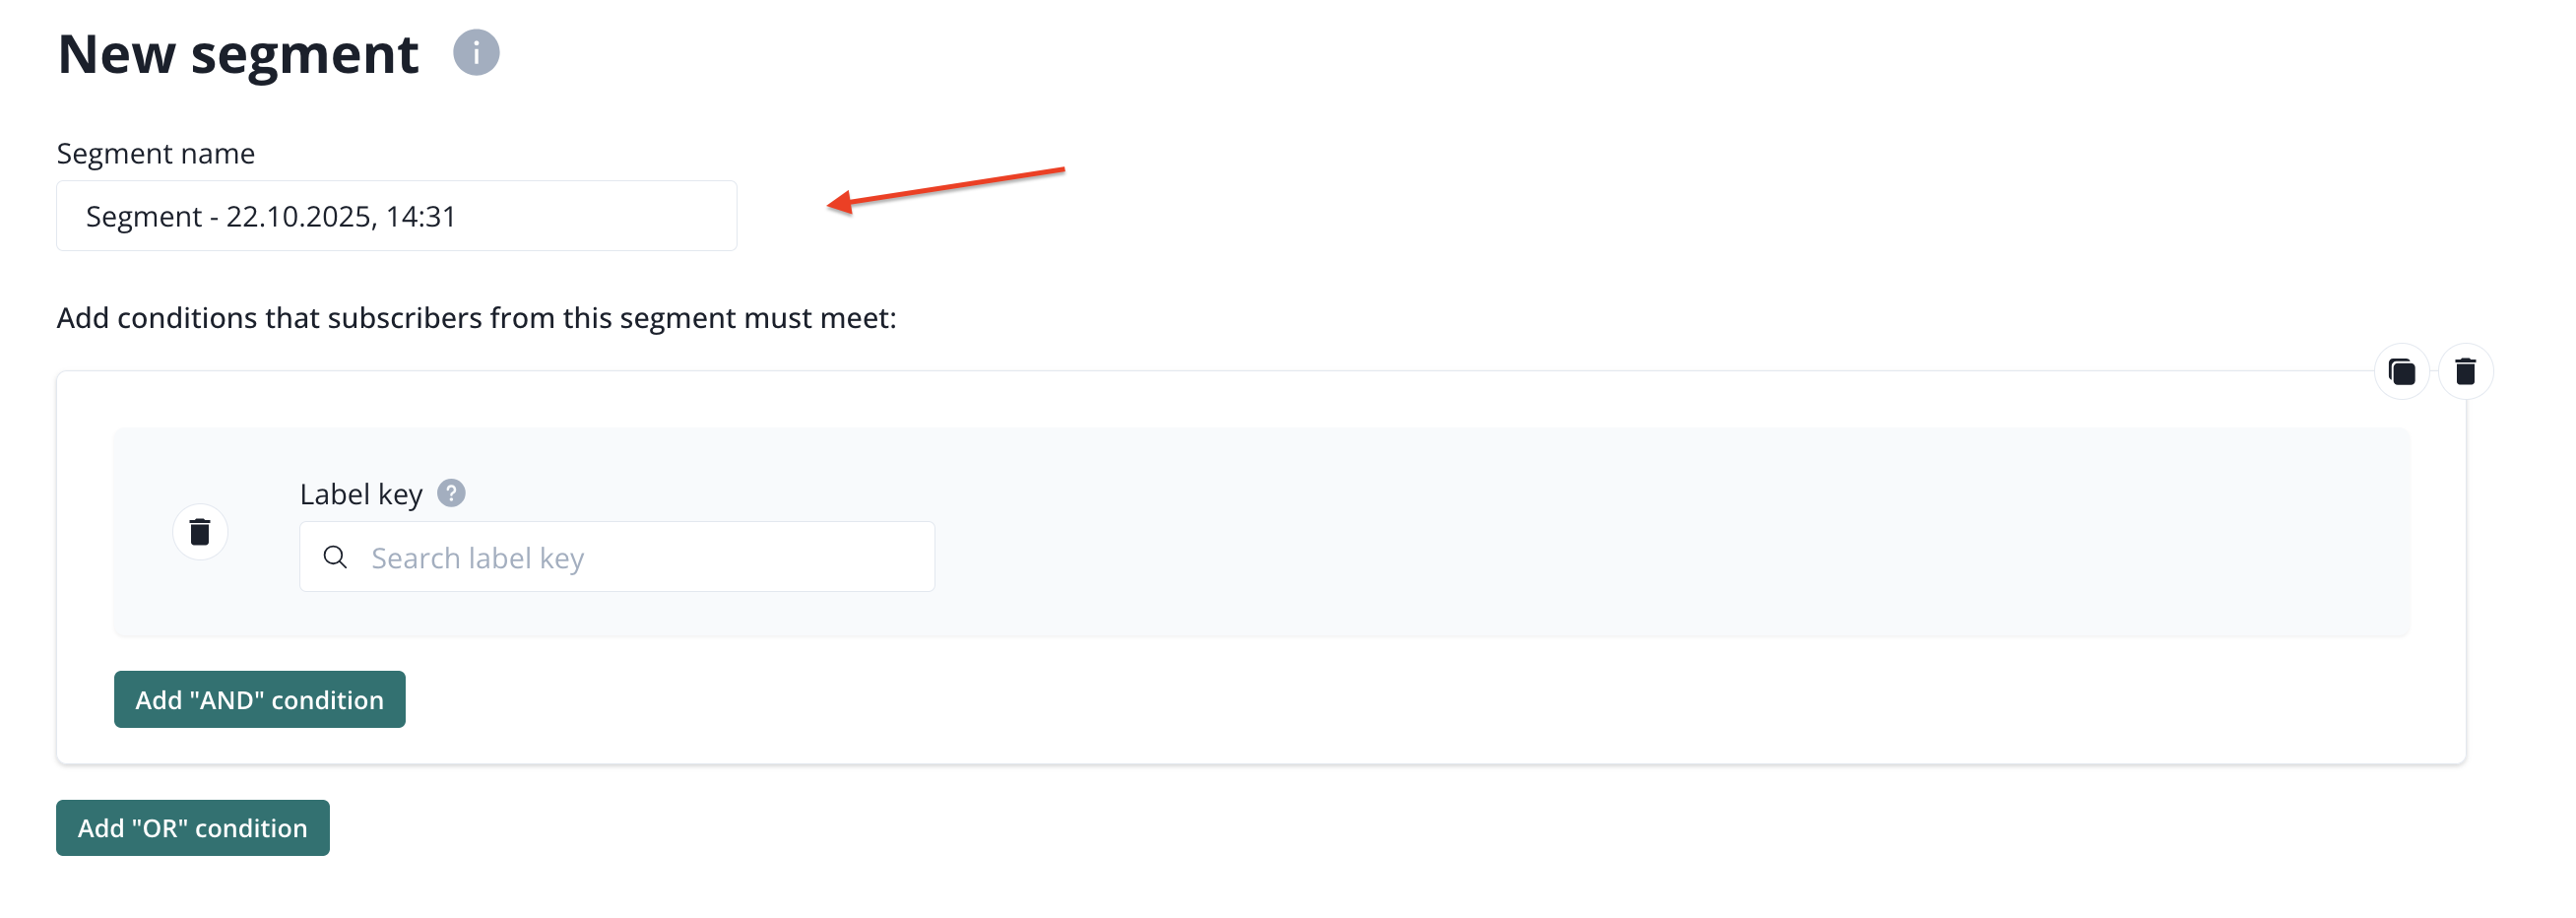
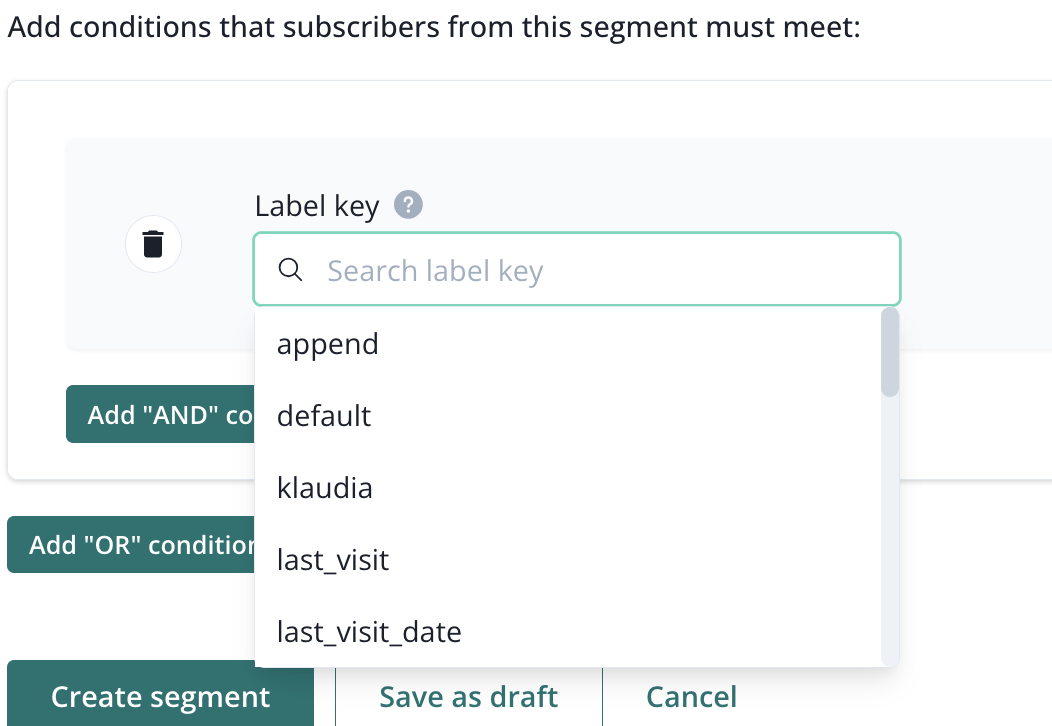
To build a segment, start from selecting a label key. After clicking on the input, you will see available label keys. You can only use labels that were created before. See system labels and custom labels in this article for more information.
Now, select an operator that matches your case.
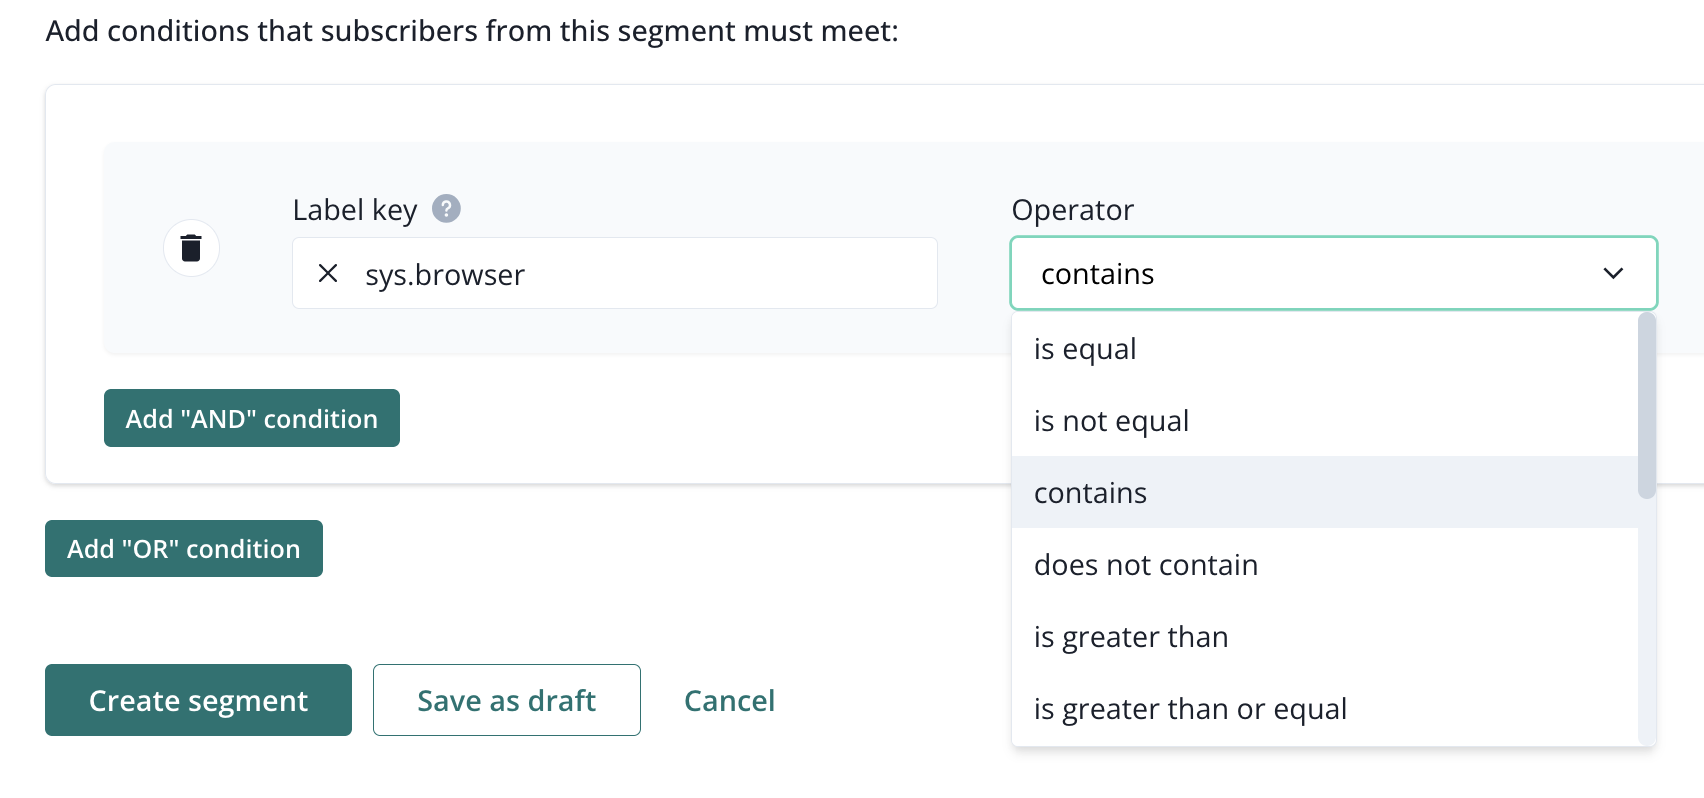
All available operators are:
- is equal,
- is not equal,
- contains,
- does not contains,
- is greater than,
- is greater than or equal,
- is lower than,
- is lower than or equal,
- before or at a given time period,
- after or at a given time period,
- key exist,
- key does not exist,
- is in,
- is not in.
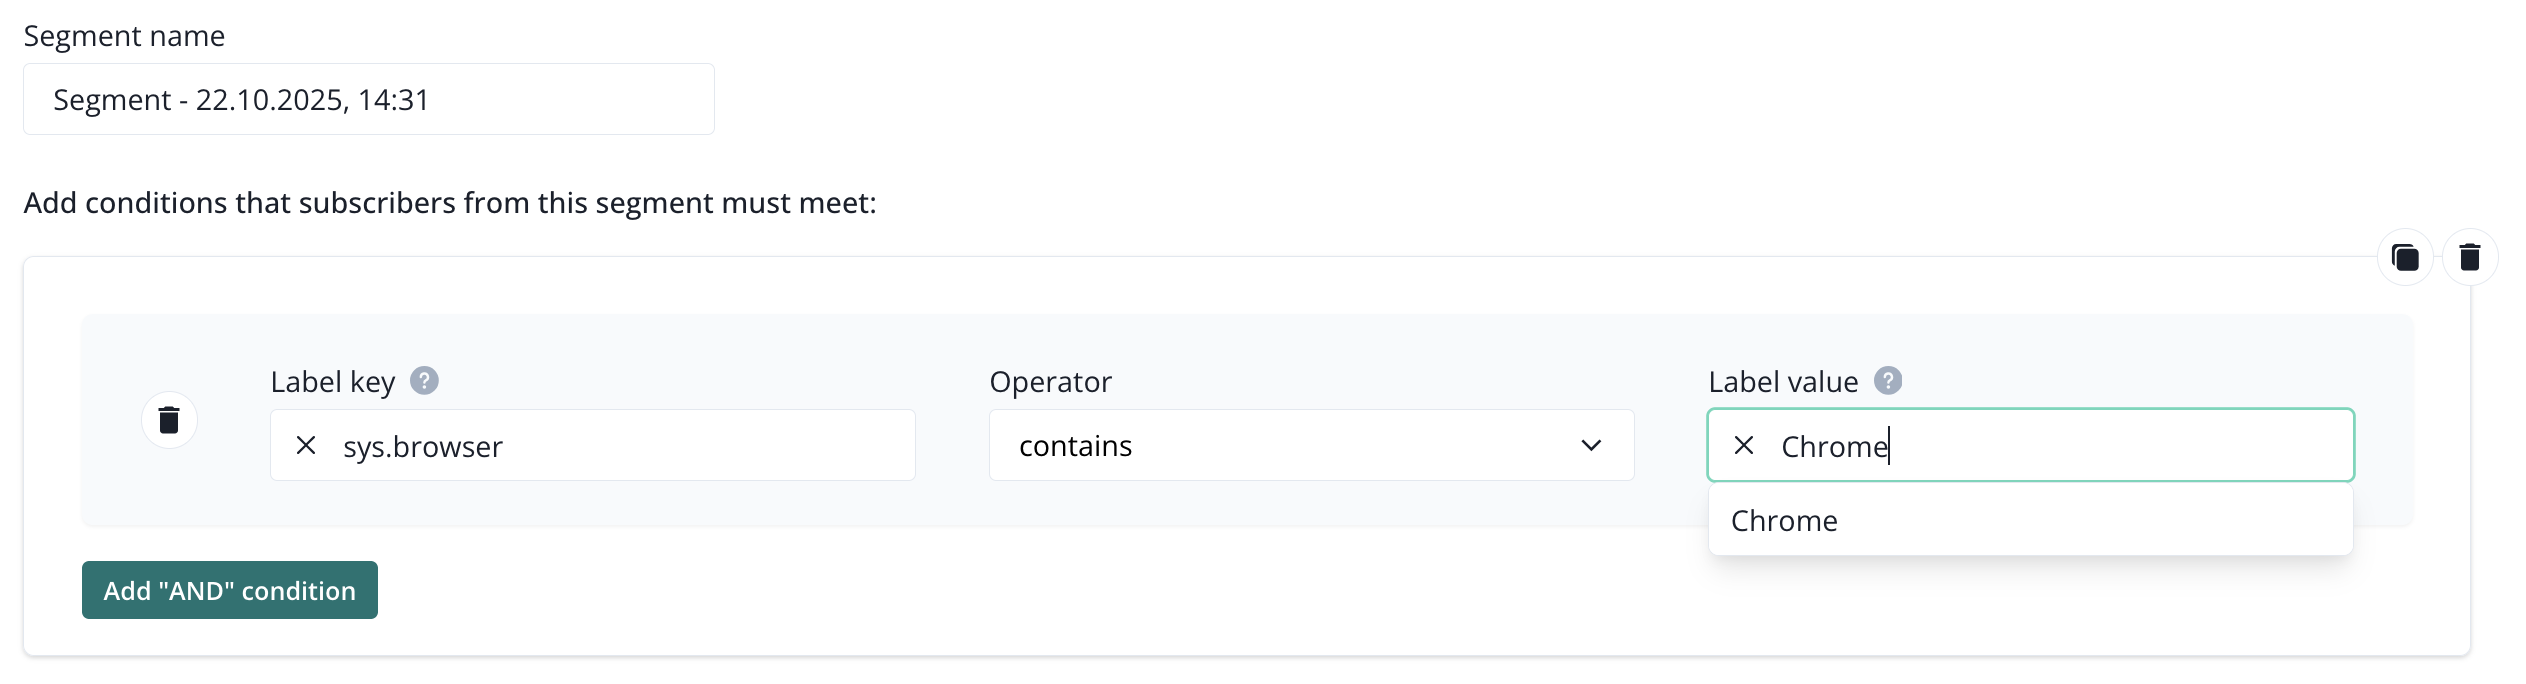
Now, select the value that you are looking for. Input will provide all available options.
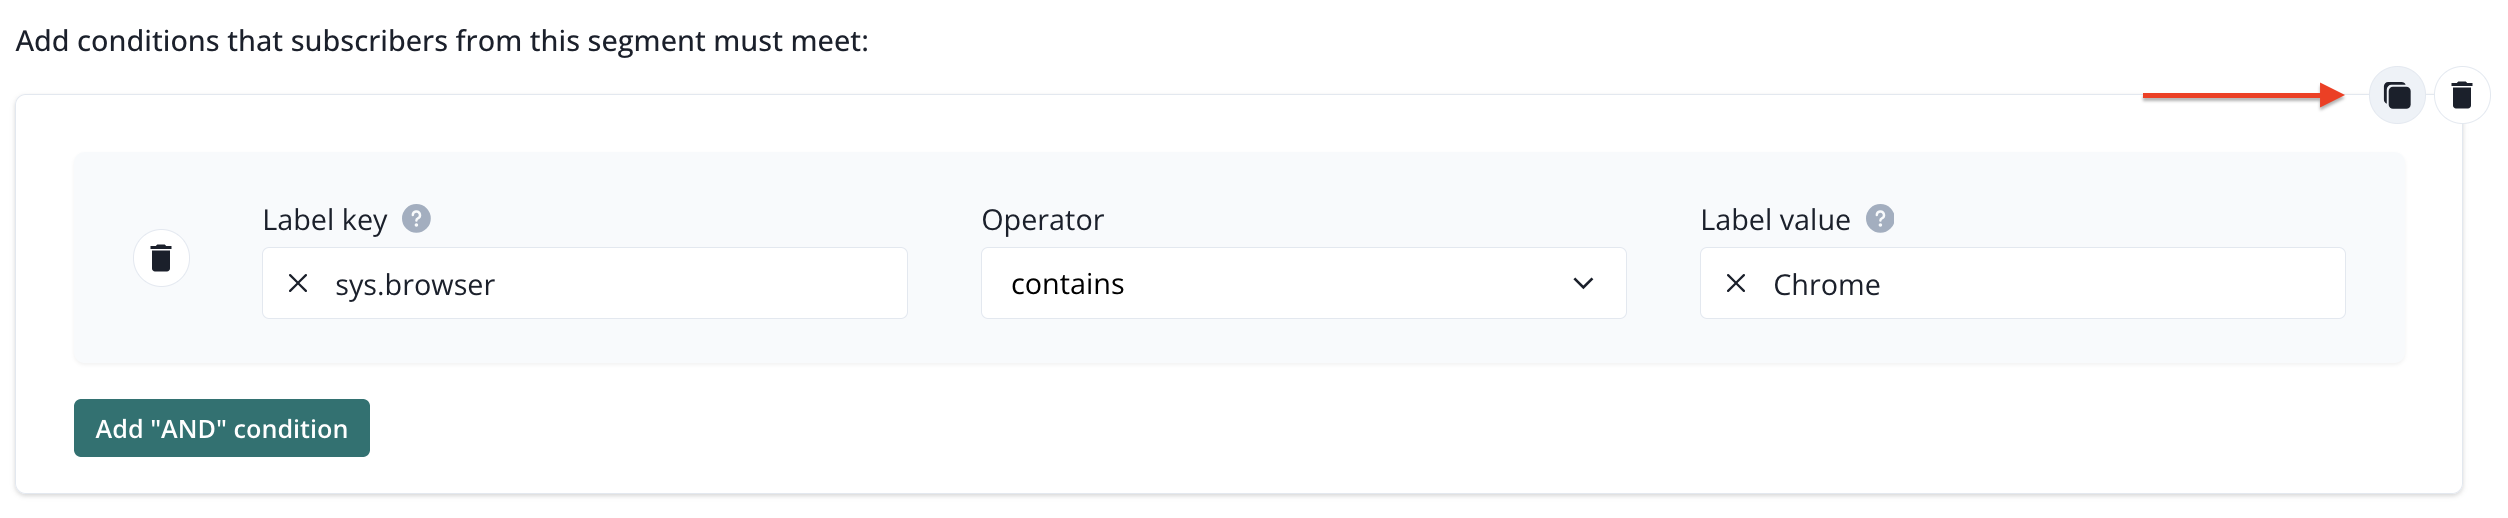
You can use as many labels as you need. They can be linked by OR or AND operator, depending on your use case.
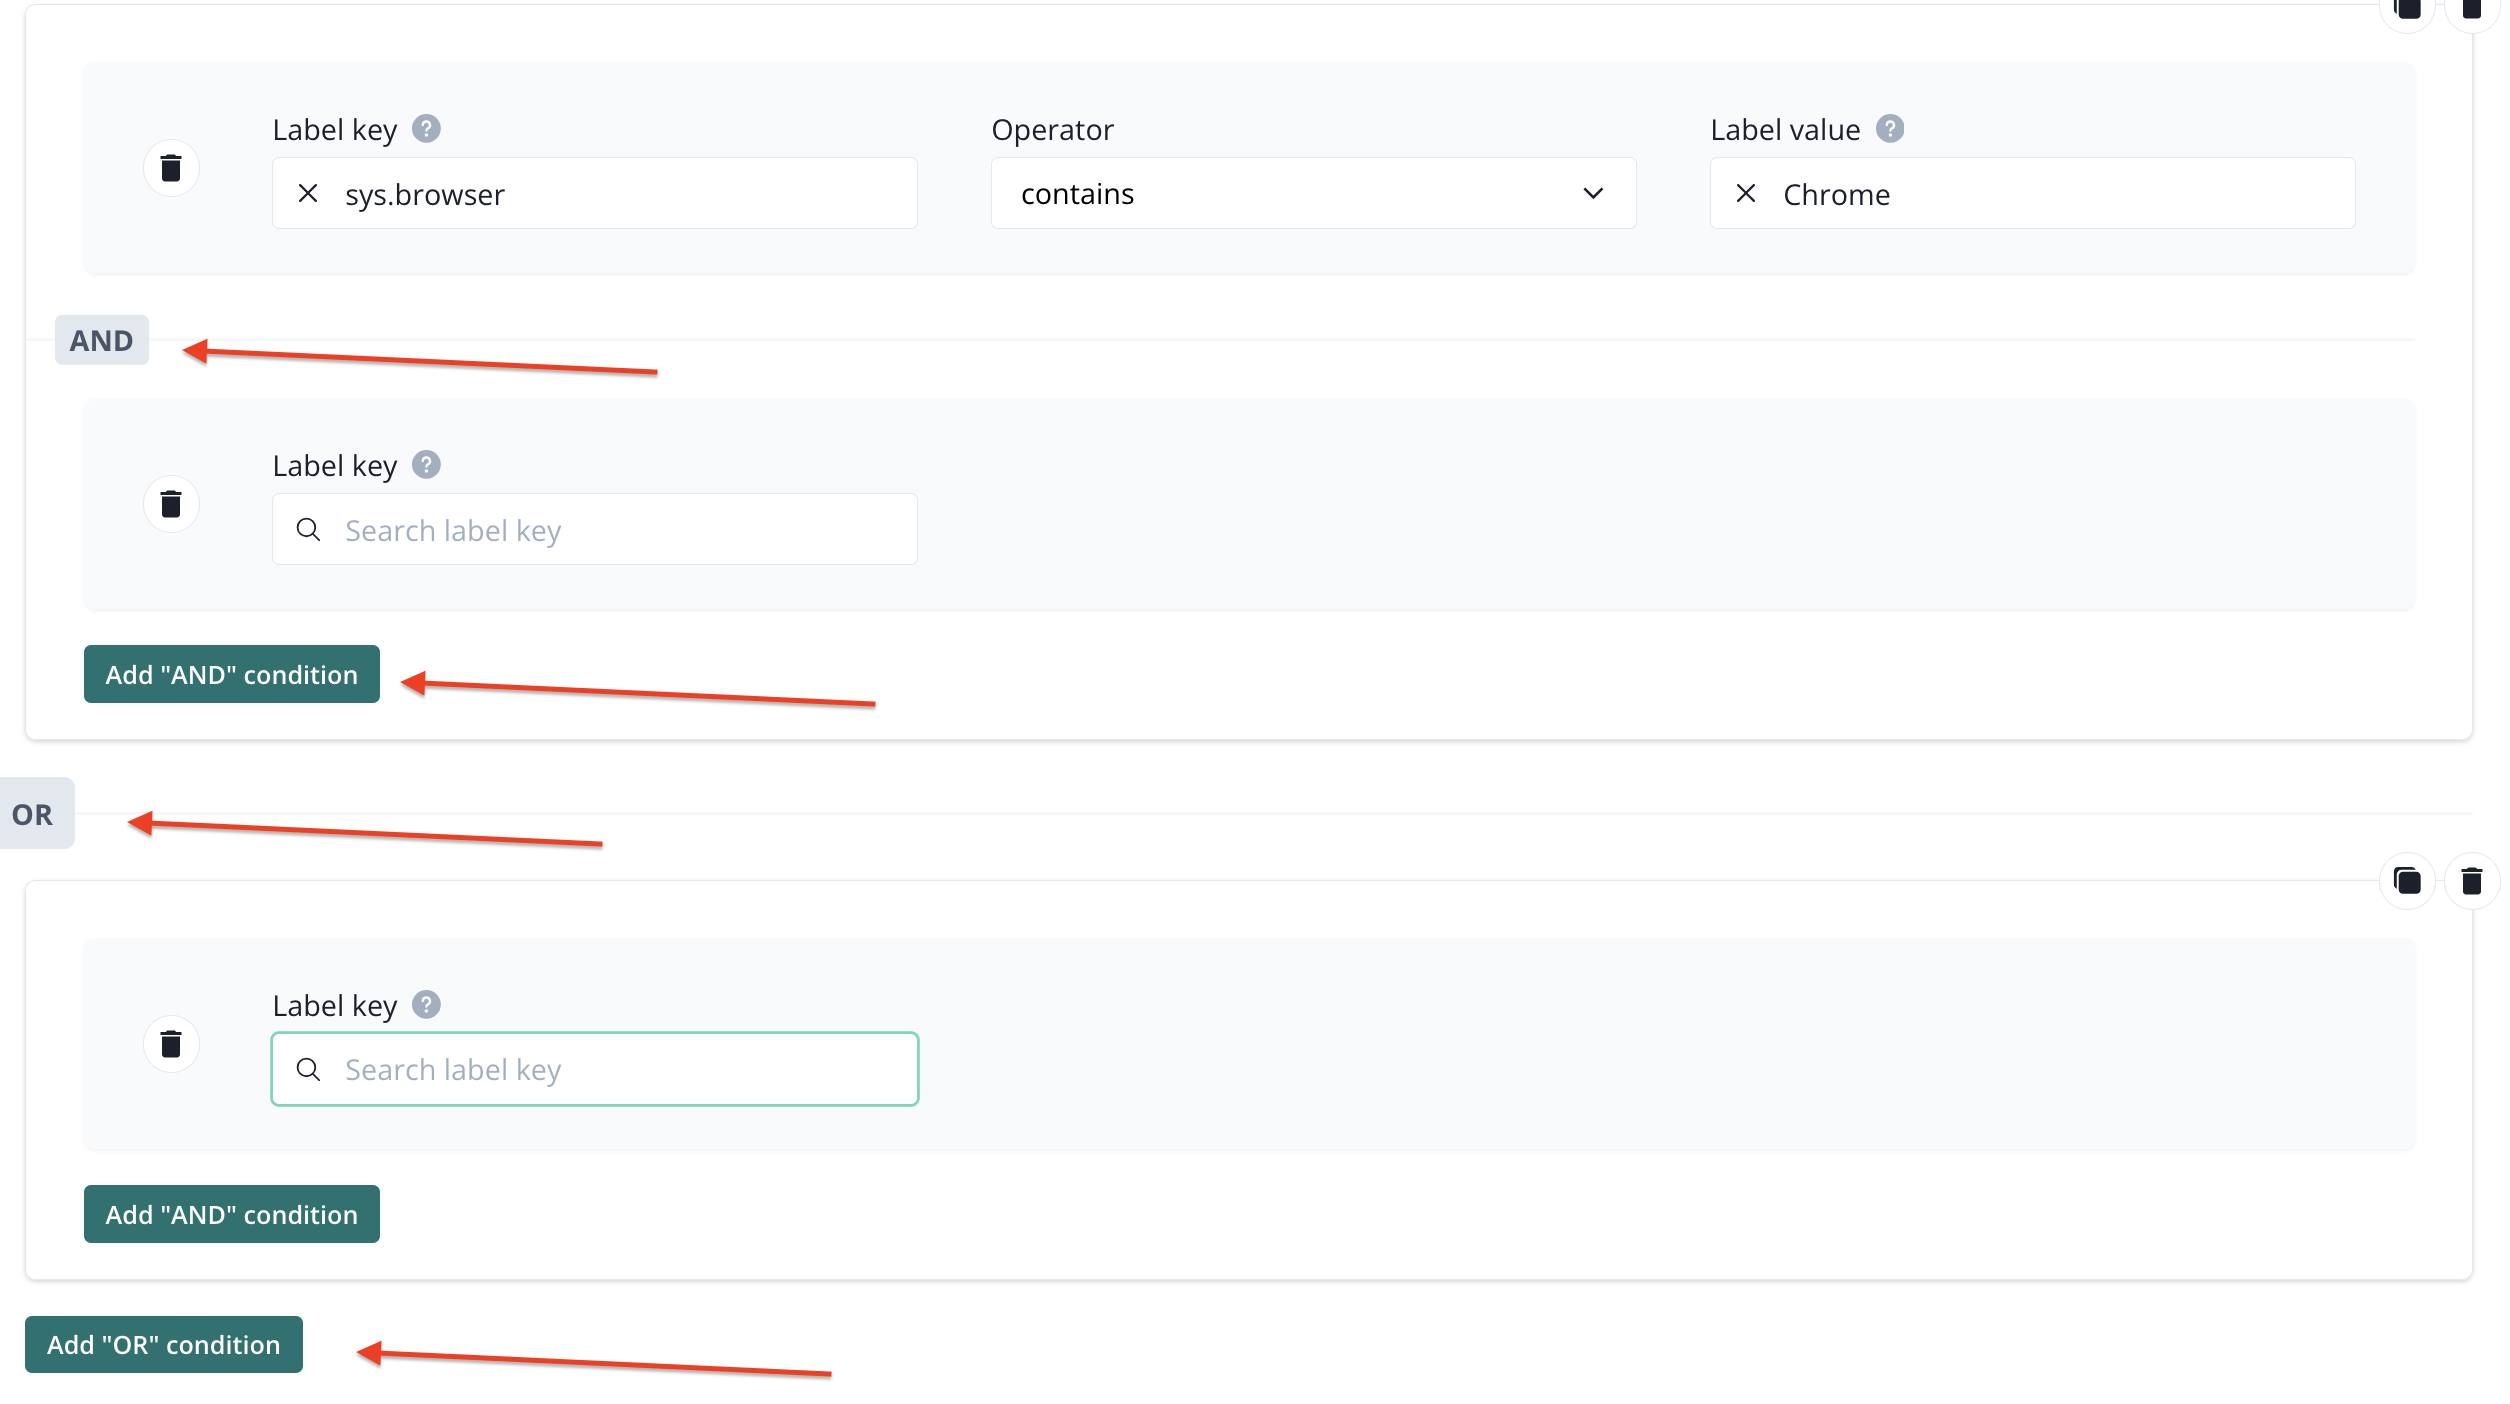
If some of your condtions repeat, you can use copying option.
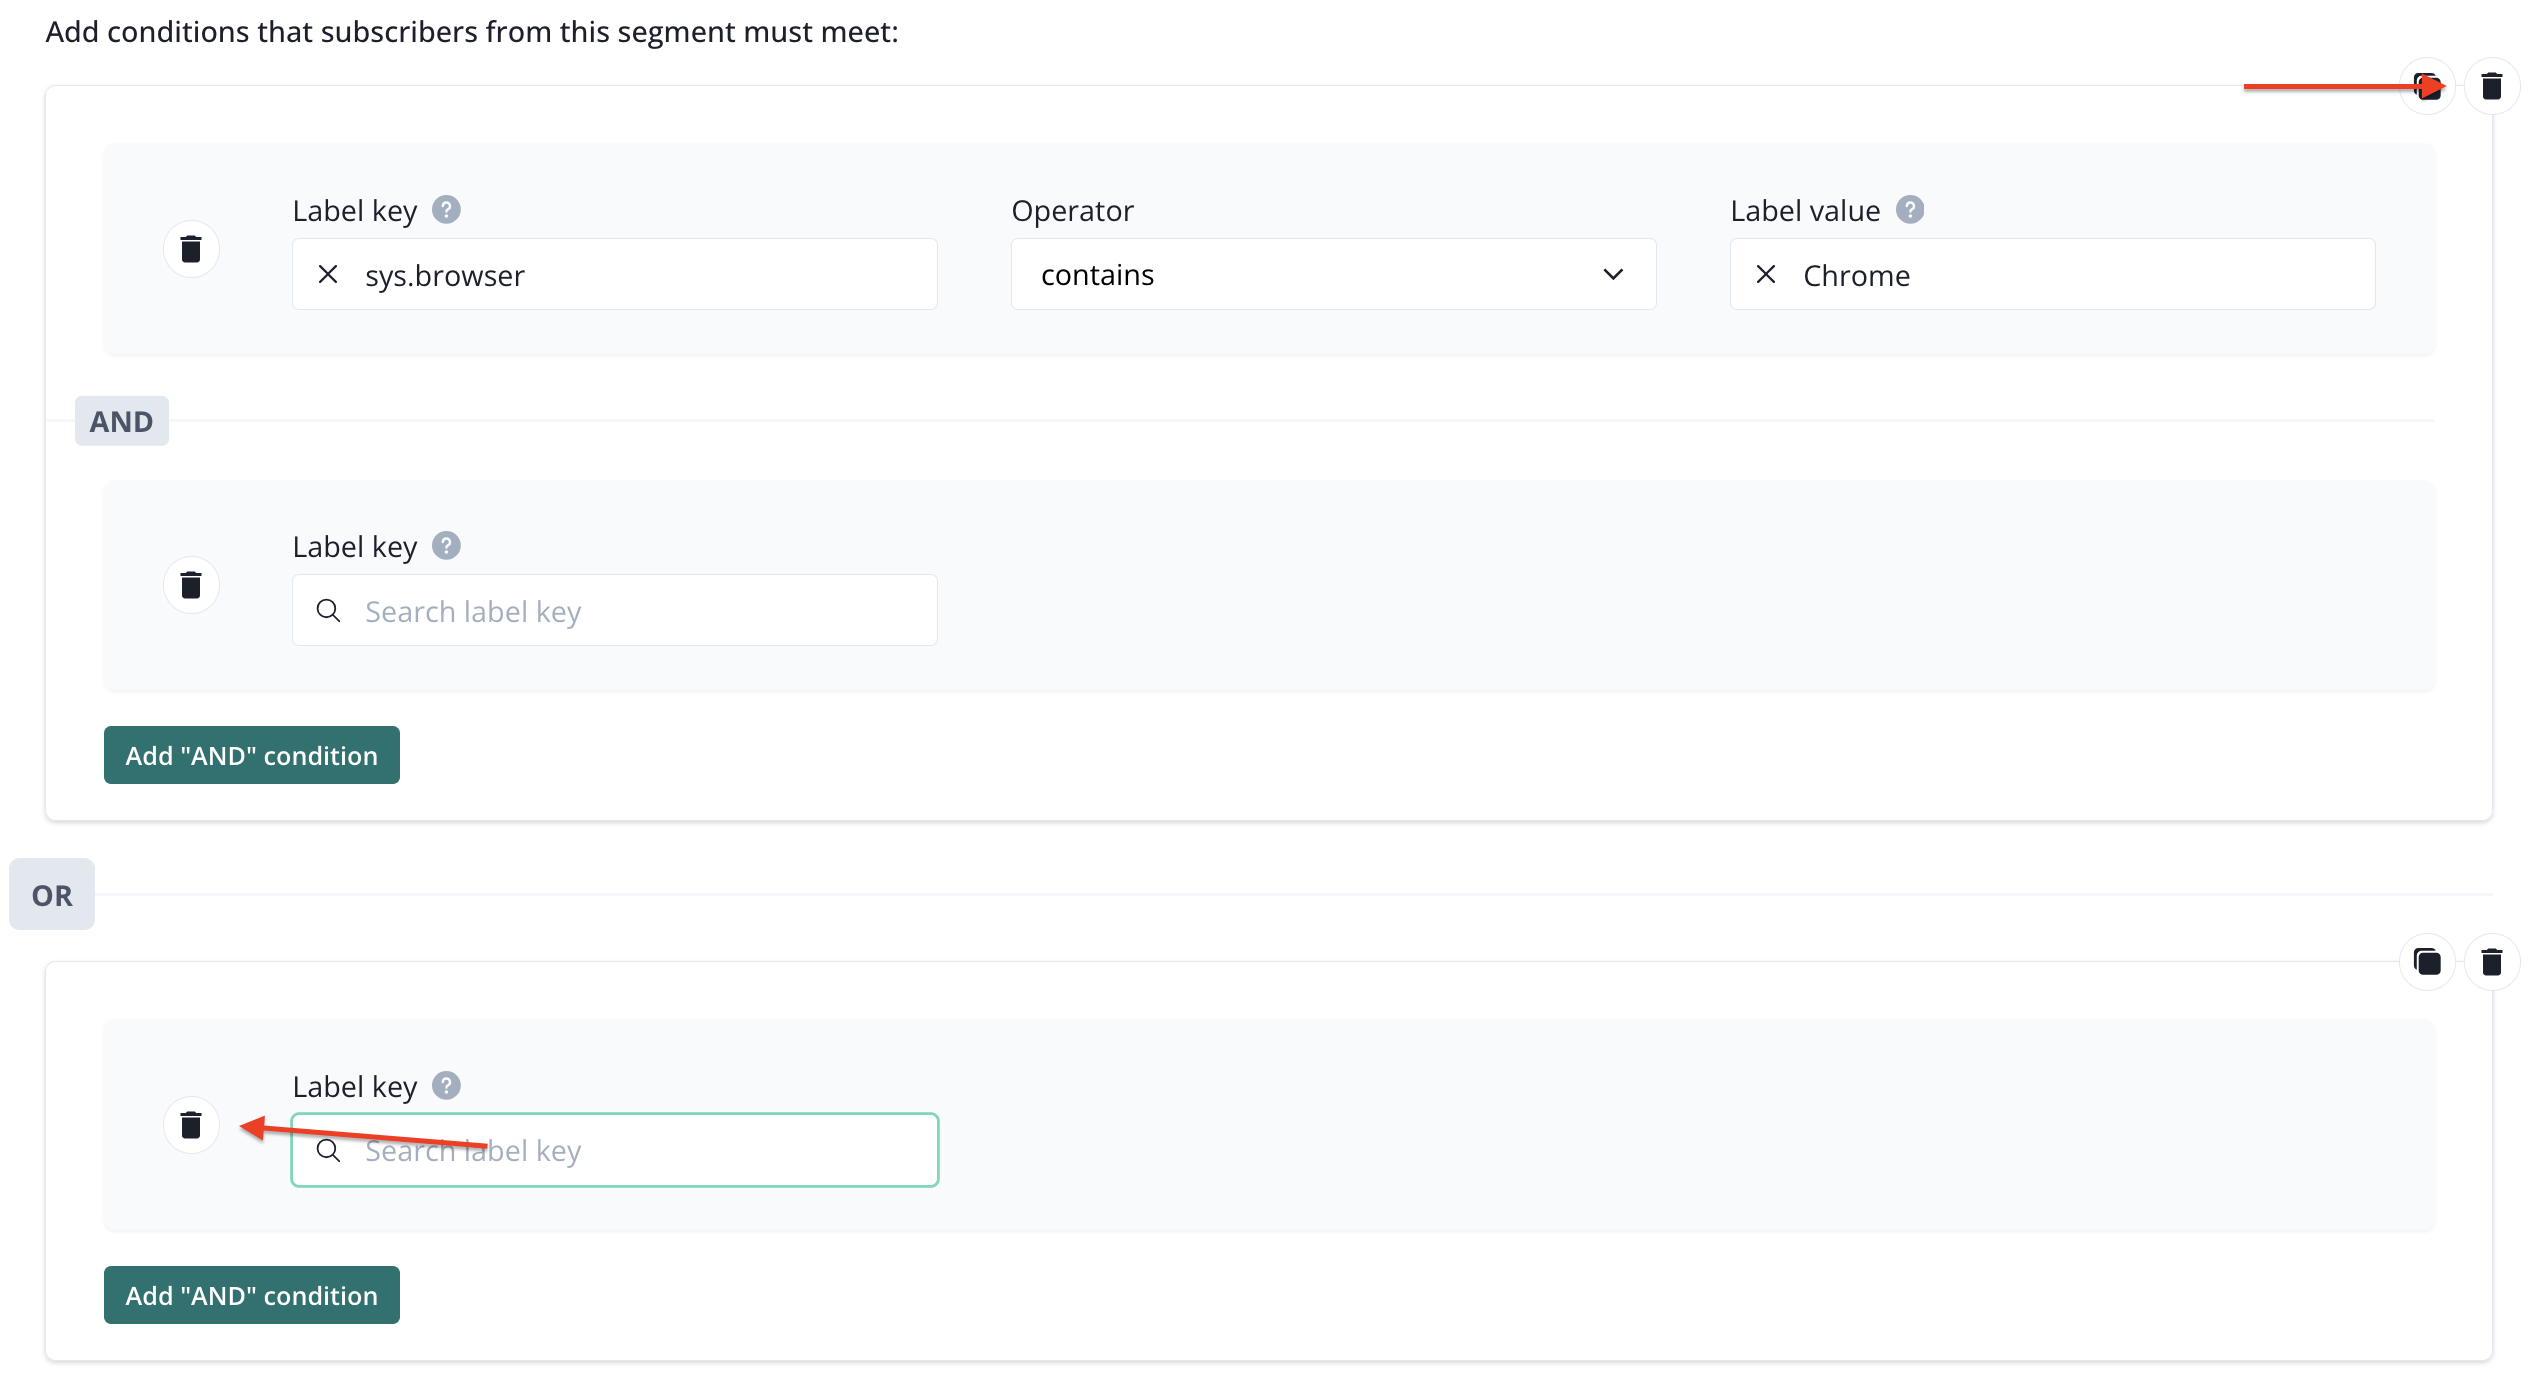
If you make a mistake, you can delete the conditon or group of conditions.
When you are done with the configuration, save your segment.
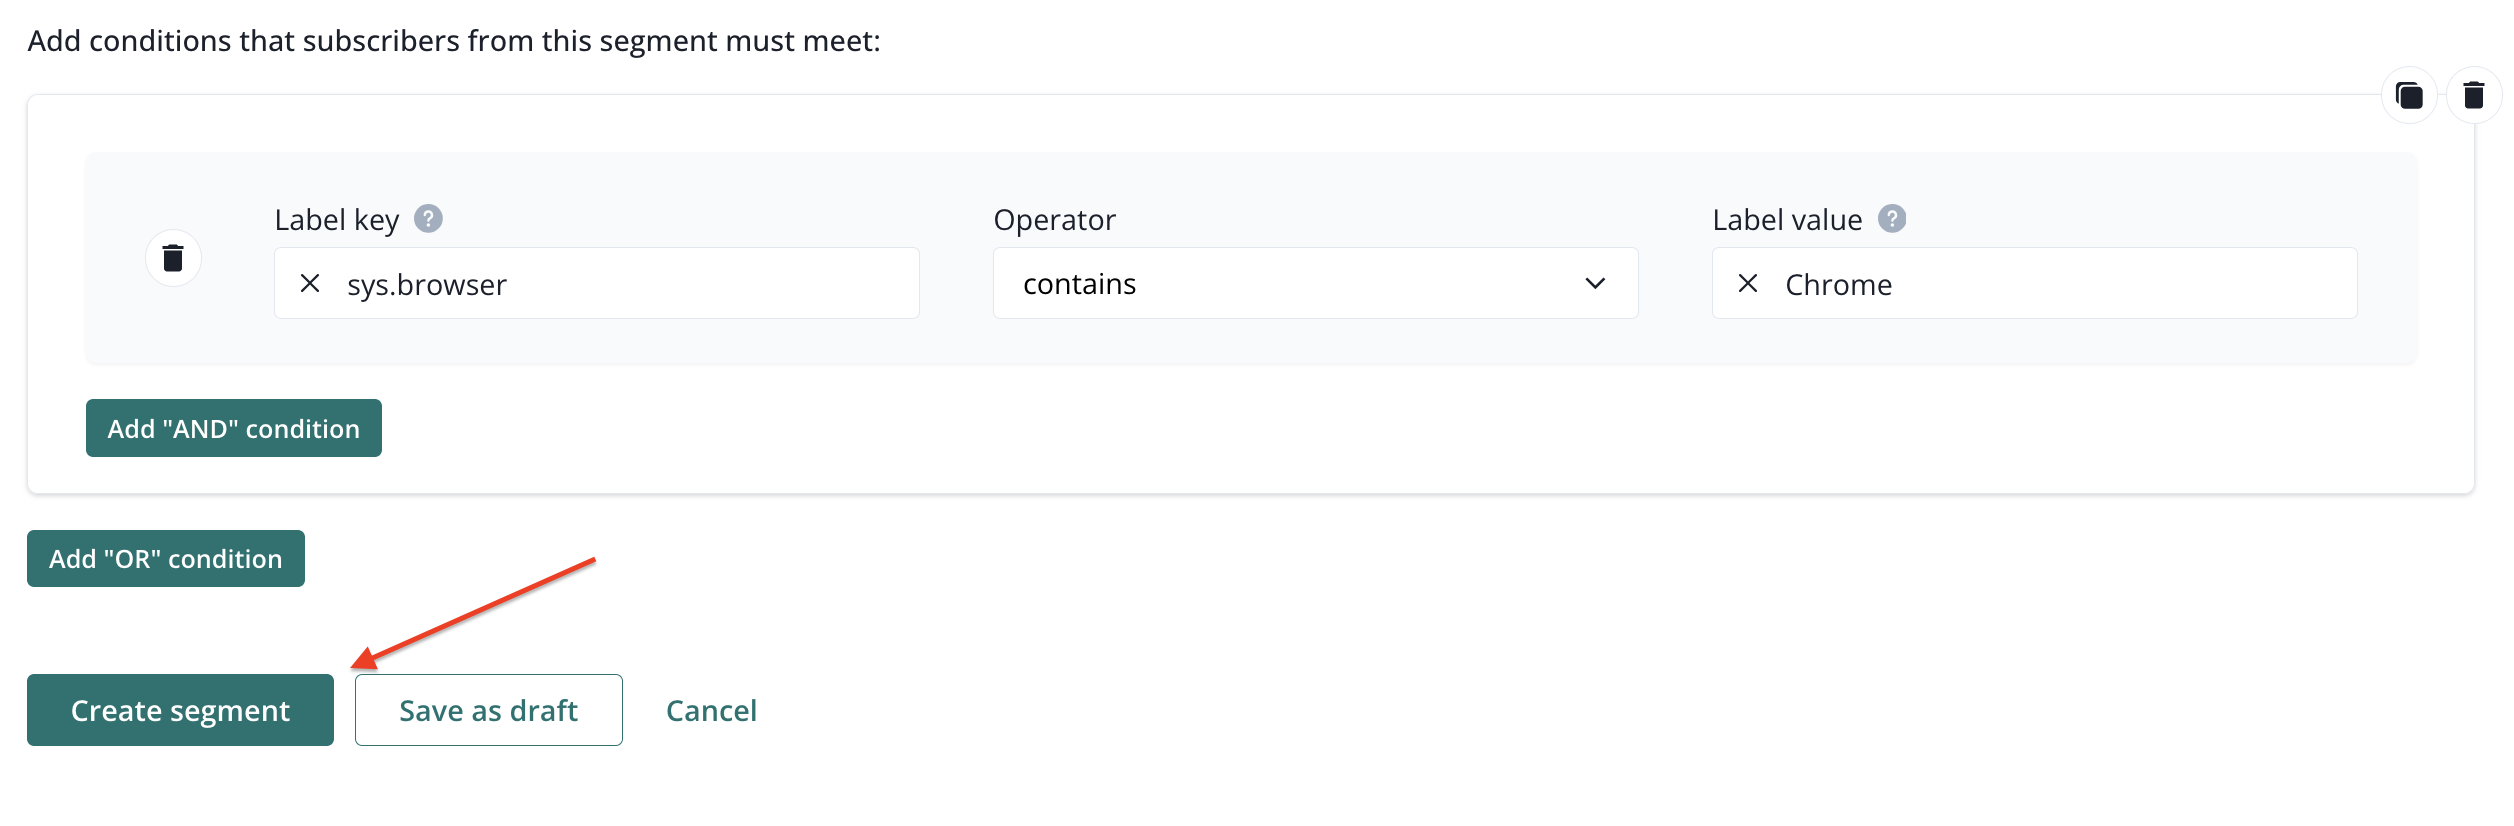
Go to the list of segments (select the option form the main navigation bar) to see the state of your newly created segment. When it is still building, you must wait until it changes its state to Created, to use it in your campaign.
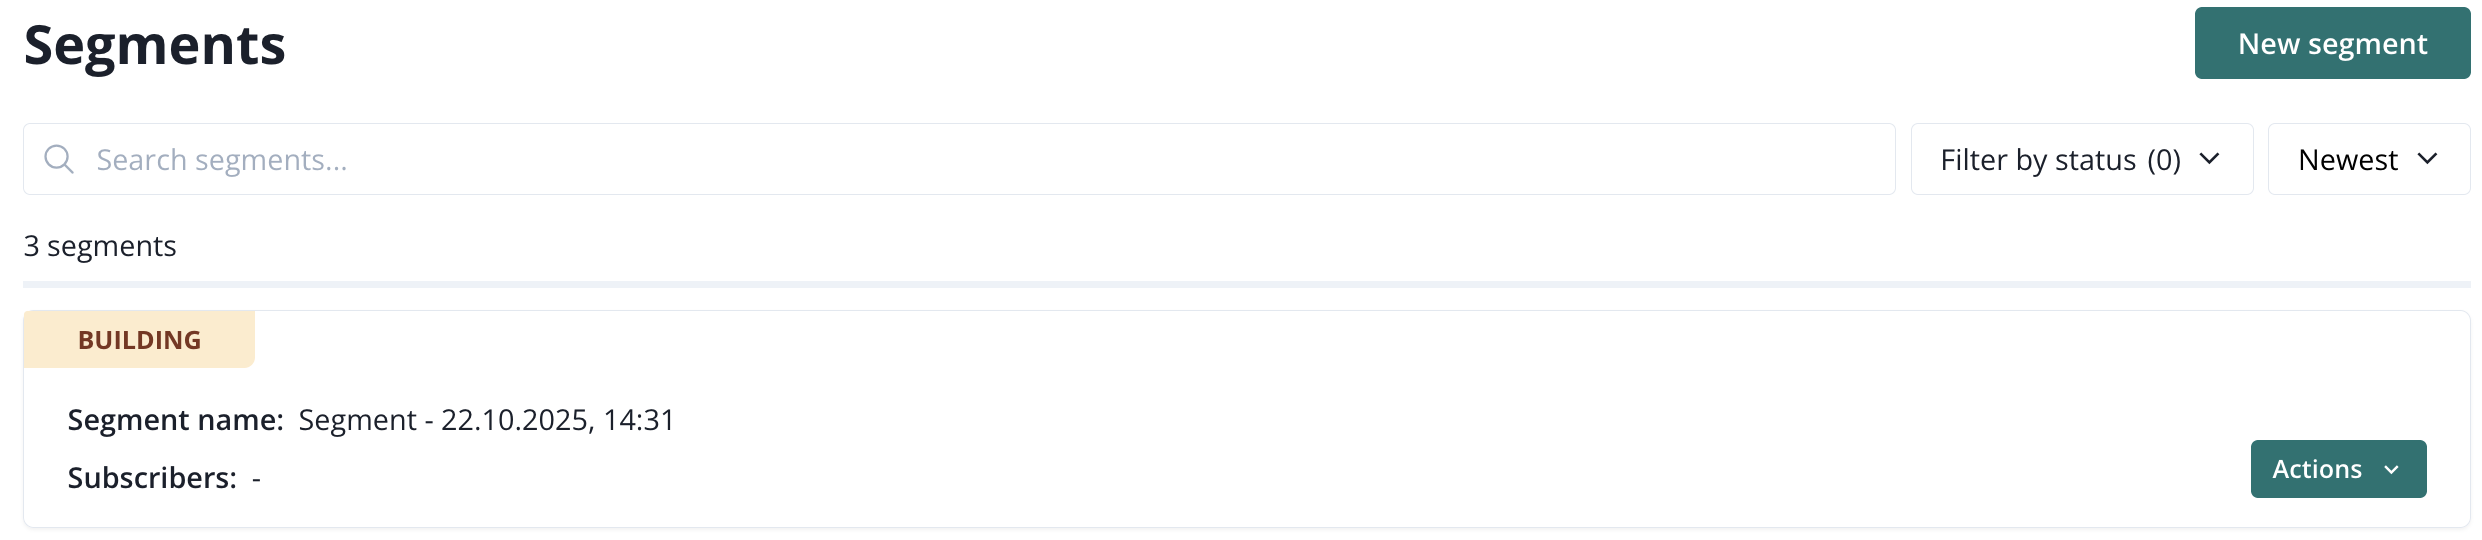
List of segments
List of segments shows all the segments that has been created.
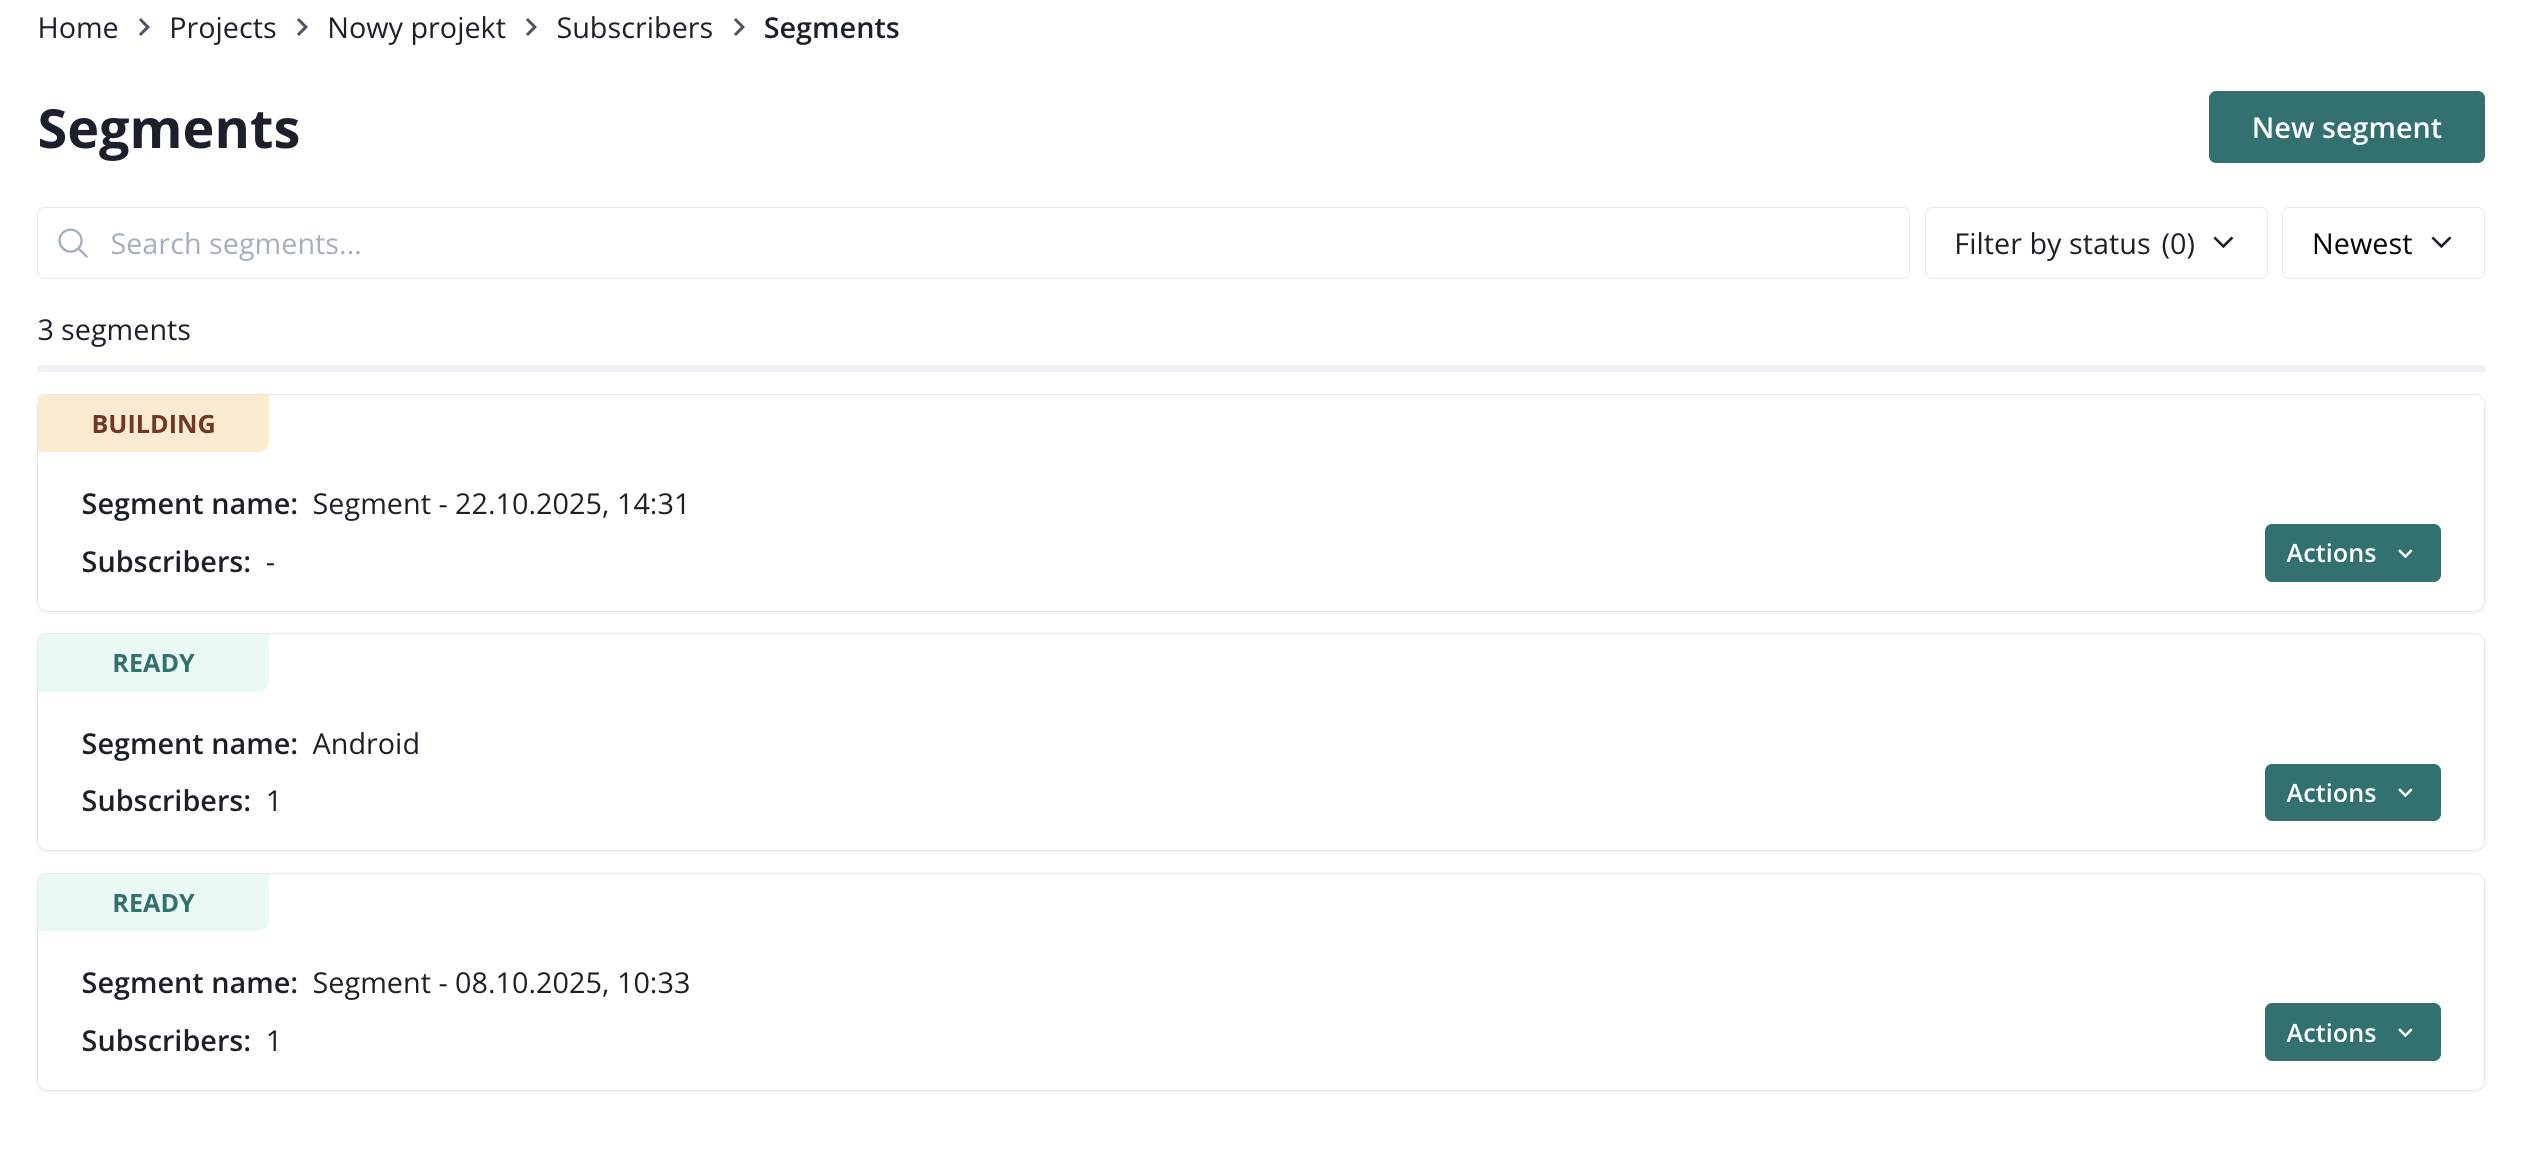
There are few actions that you can do with a created segment

If you choose to export subscribers, you will get a csv file with the data: id, created at, updated at, custom id, labels.