
Web/mobile push: Integration
Web push integration
Standard integration steps
To integrate your webiste witch PushPushGo:
- open a PushPushGo account
- create a project
- integrate it using integration scripts and service worker unique for your project
See the integration video:
Or go to Quick start and your first campaign.
Verifying your integration
To see if the integration was done correctly:
1. Check integration validators in Integration section: Integration > Web push (VAPID) > Integration scripts
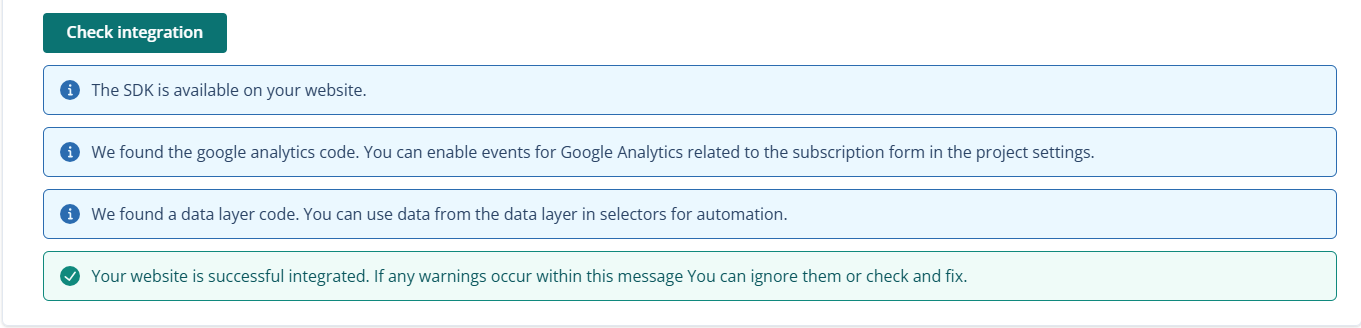
If there are any issues, solve them as indicated and then go to next steps.
2. Access your website and see if you can see the subscription form in the
Mobile push integration
Android
To be able to use PushPushGo functionalities in your Google Android application, you have to integrate it using our mobile SDK and provide credentials for your project from Firebase console.
Choose suitable SDK and implement it in your application following repository documentation:
- Android / HMS: https://github.com/ppgco/android-sdk
- Flutter: https://github.com/ppgco/flutter-sdk
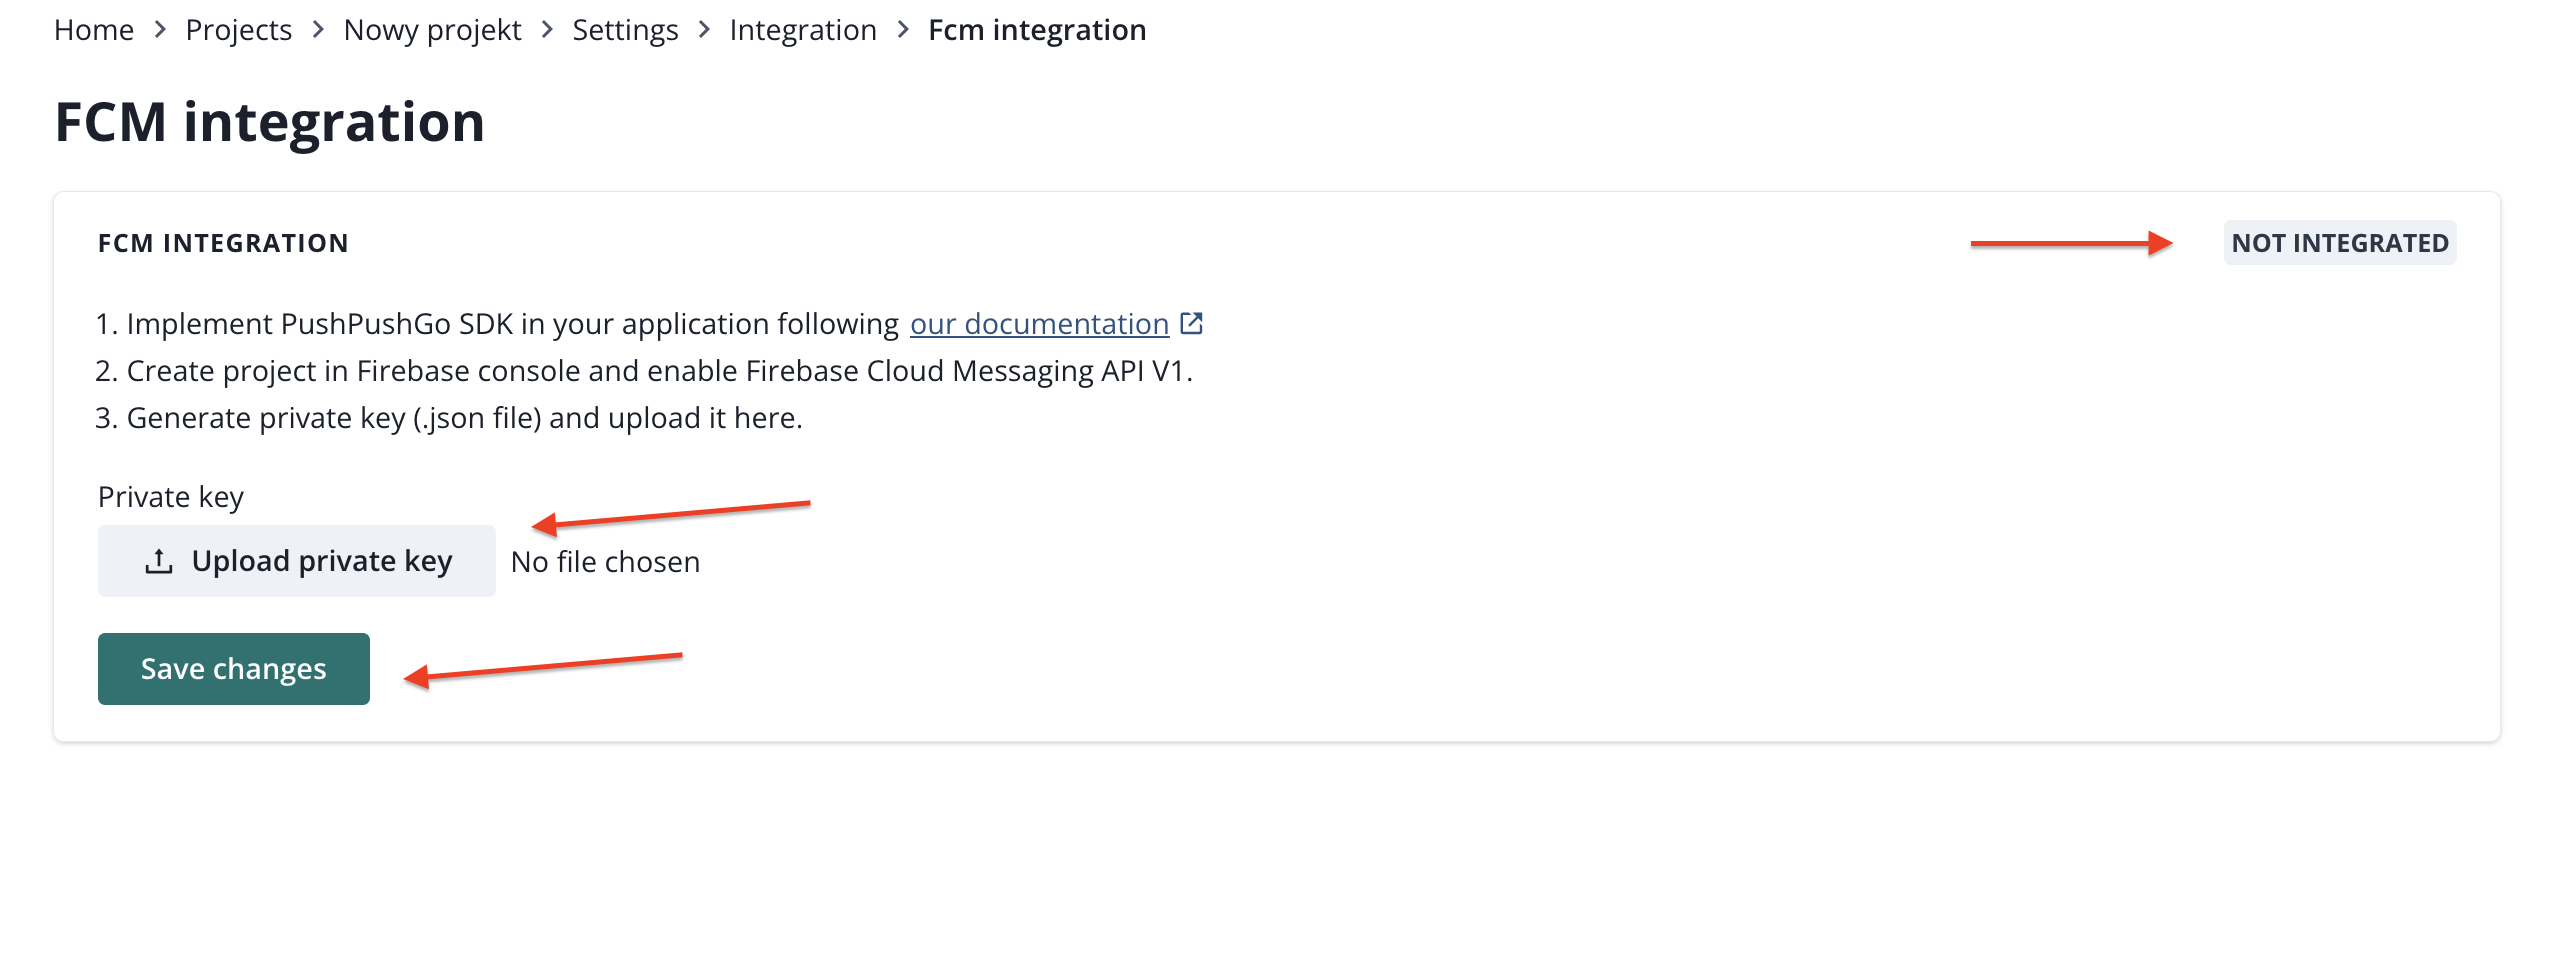
Generate a private key in Firebase console and upload it in our application. Go to Integration page in PushPushGo application:
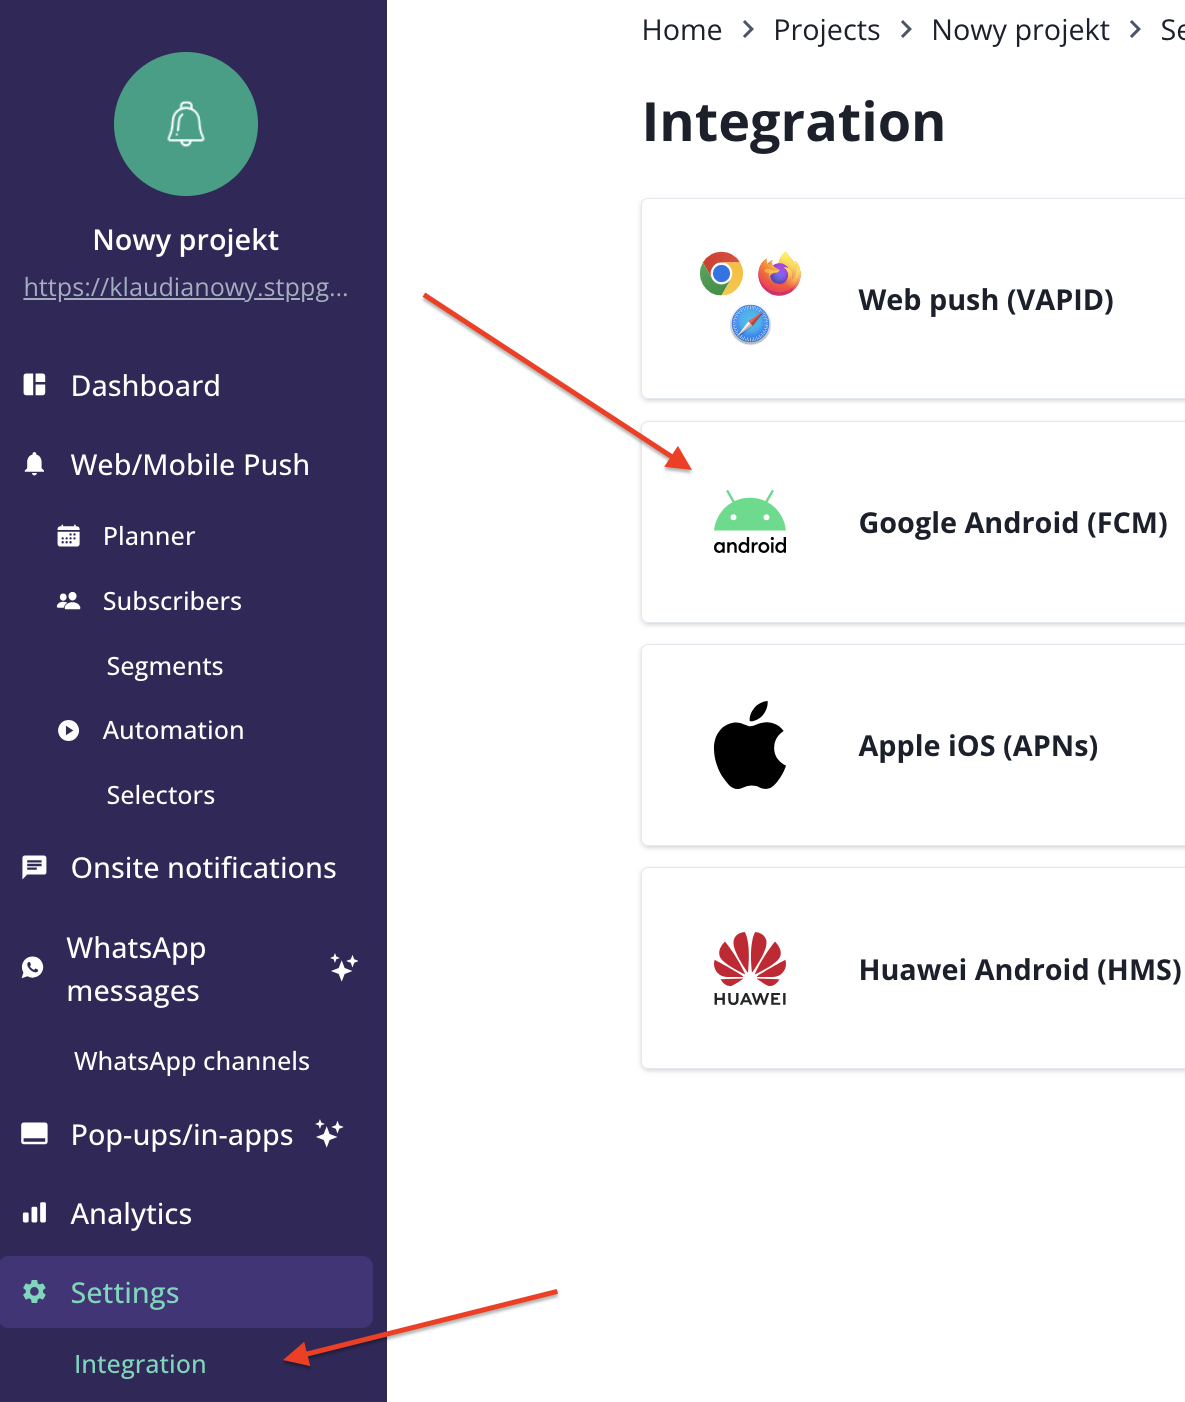
select Google Android (FCM) and upload private key file (.json).
iOS
Integration with Apple Push Notification Service allows you to send push notifications through the Apple iOS platform. In order to integrate your mobile app with PushPushGo, implement one of our mobile SDKs in your application:
To complete integration, register App ID on Apple Developer account, create APNs certificate (.p12 file) and upload it in the Integration section. Start from getting your certificate.
Create Certificate Signing Request
To generate Safari certificate you need to create Certificate Signing Request first. For this purpose launch the Keychain Access app.

Click on Keychain Access > Certificate Assistant > Request a Certificate From a Certificate Authority.

The Assistant window will appear. Enter your e-mail address and name for your certificate. Then check Saved to disk option and click Continue.

Save the Certificate Signing Request (CSR). You will need it to generate a certificate.


Register an App ID
Log into your Apple Account and go to Identifiers section.

In Indentifiers click the add button (+) on the top left.

Select App IDs from the list of options and click continue.

Select App type and click Continue.

Enter a name or description for the App ID in the Description field. Select Explicit App ID and enter the app’s bundle ID in the Bundle ID field. The explicit App ID you enter here should match the bundle ID you entered in the target’s Summary panel in Xcode. Select the corresponding checkboxes to enable the app capabilities you want to use and click 'Continue'.

Review the registration information and click Register.

Go to Certificate tab. You will see a list of certificates you have created here.

In Certificates, click the add button (+) on the top left.

Scroll down to "Services", select Apple Push Notification service SSL (Sandbox & Production) option and click Continue.

Select the App ID you have created earlier from the list and click Continue.

Now you have to click on the Choose File button and select the CSR (Certificate Signing Request) you have generated. Proceed with Continue button.

Download your certificate, then double click on the file to install it.

The installed certificate will appear in Keychain Access (which you have used to create CSR). Right-click on the certificate and export the file.

Save certificate using Personal Information Exchange (.p12) format.

Enter password and remember it - you will need the password to integrate your project with APNS.

After saving a certificate, go to Providers view (left-side navigation > Providers view) in the PushPushGo application, then scroll down to IOS Support.
Upload your certificate in a p.12 file format, type the passphrase with which you have secured the certificate, toggle 'Toggle production' (unless you want integration to work in development environment) and click Save.
Remember that your project can only have one appBundleId assigned - and it can only be changed via an IT ticket. By uploading new certificates you are only overwriting them, without changing other parameters, i.e. appBundleId. If another certificate containing appBundleId is sent - an error will be returned.
In case of uploading an expired certificate or if there are more certificates and keys in the store - an error will be returned.
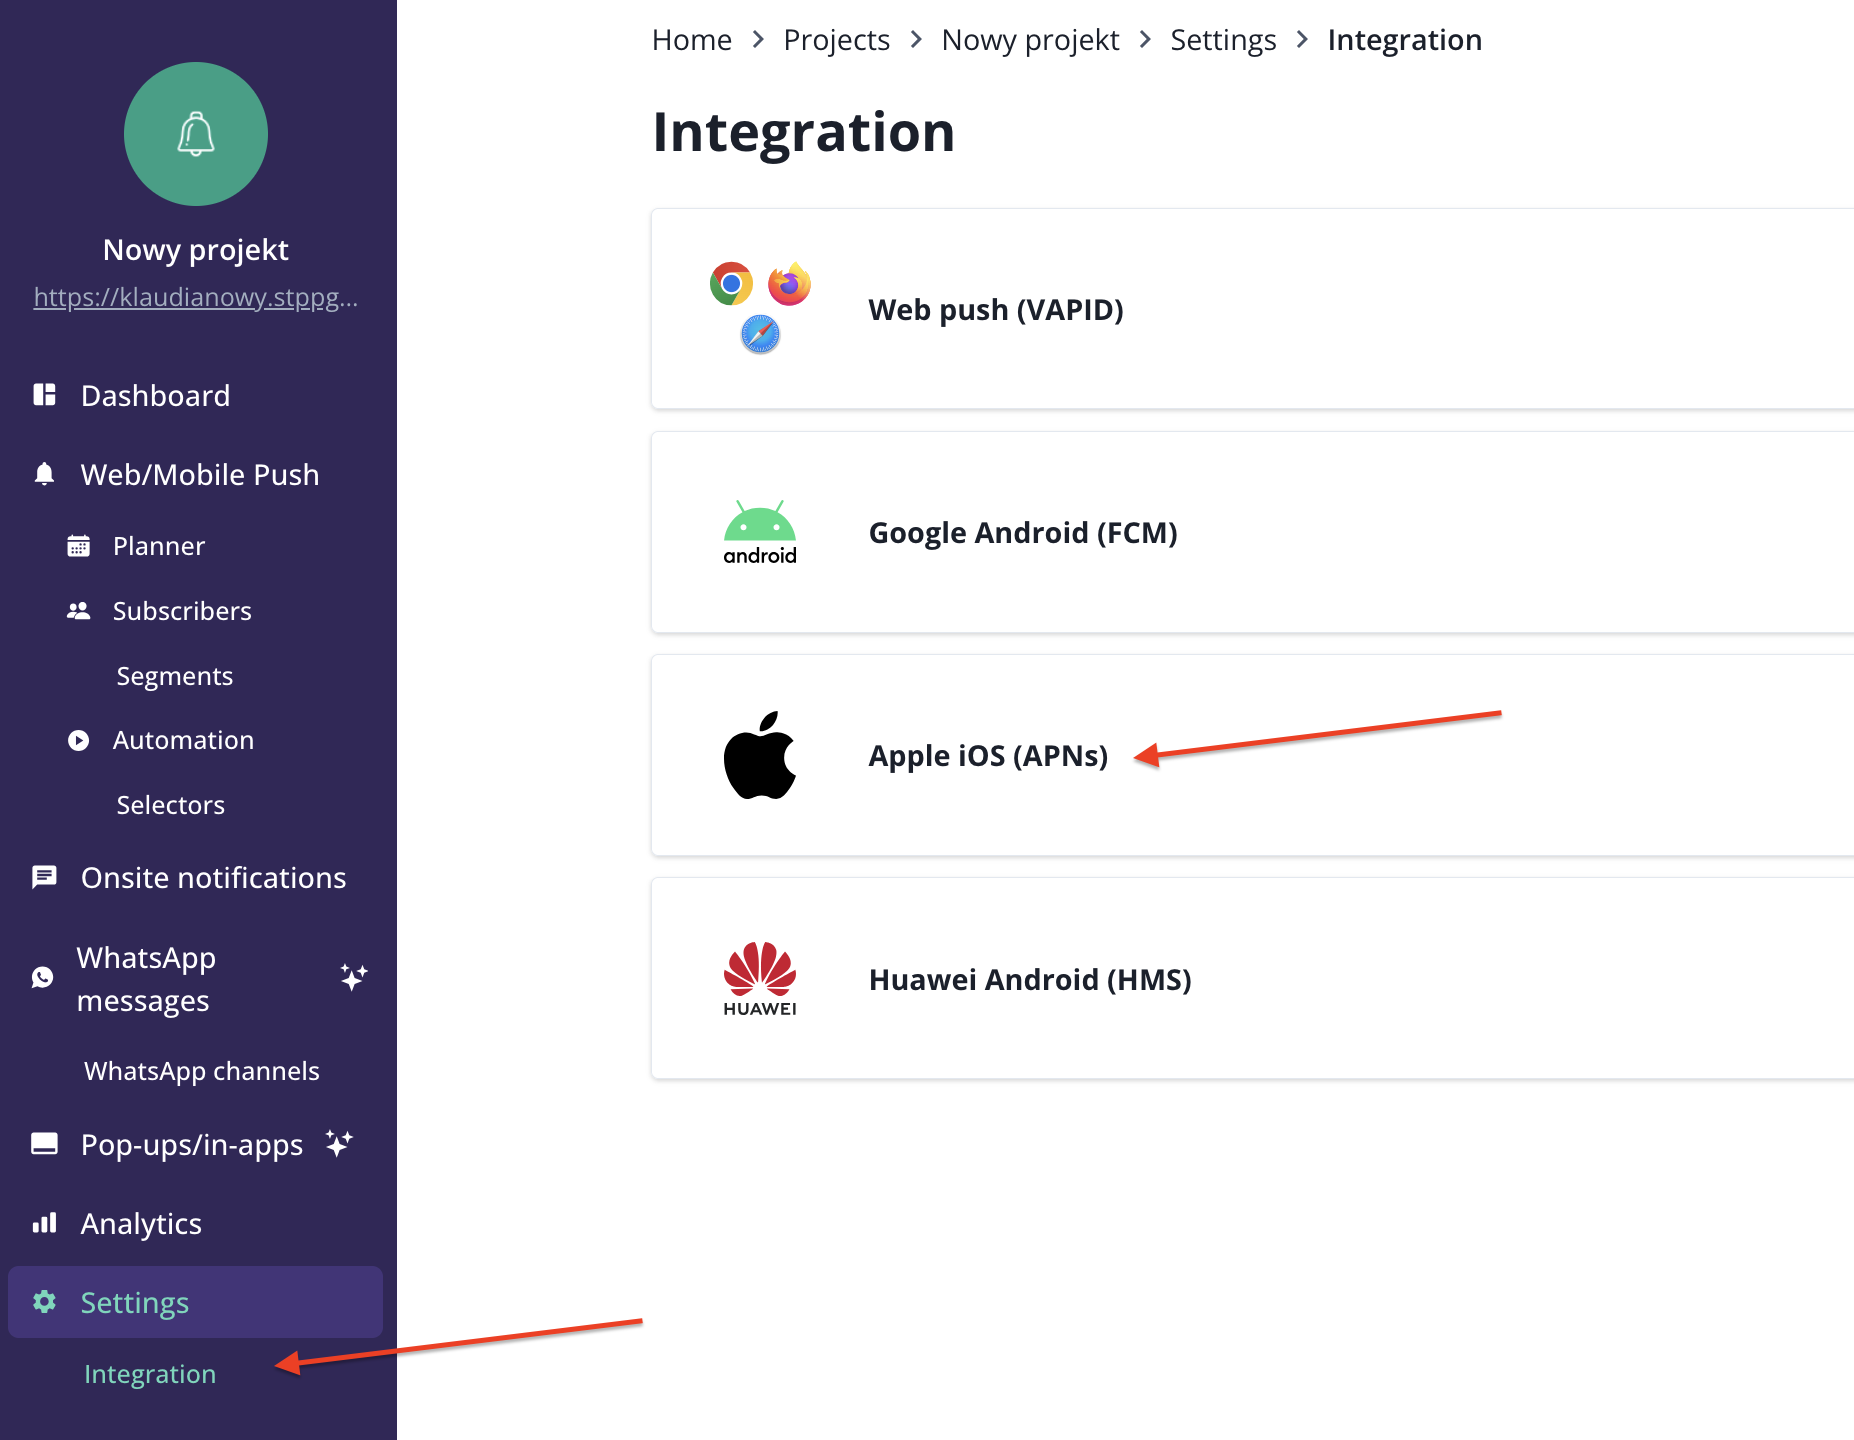
Go to Integration section in PushPushGo application and upload your certificate.
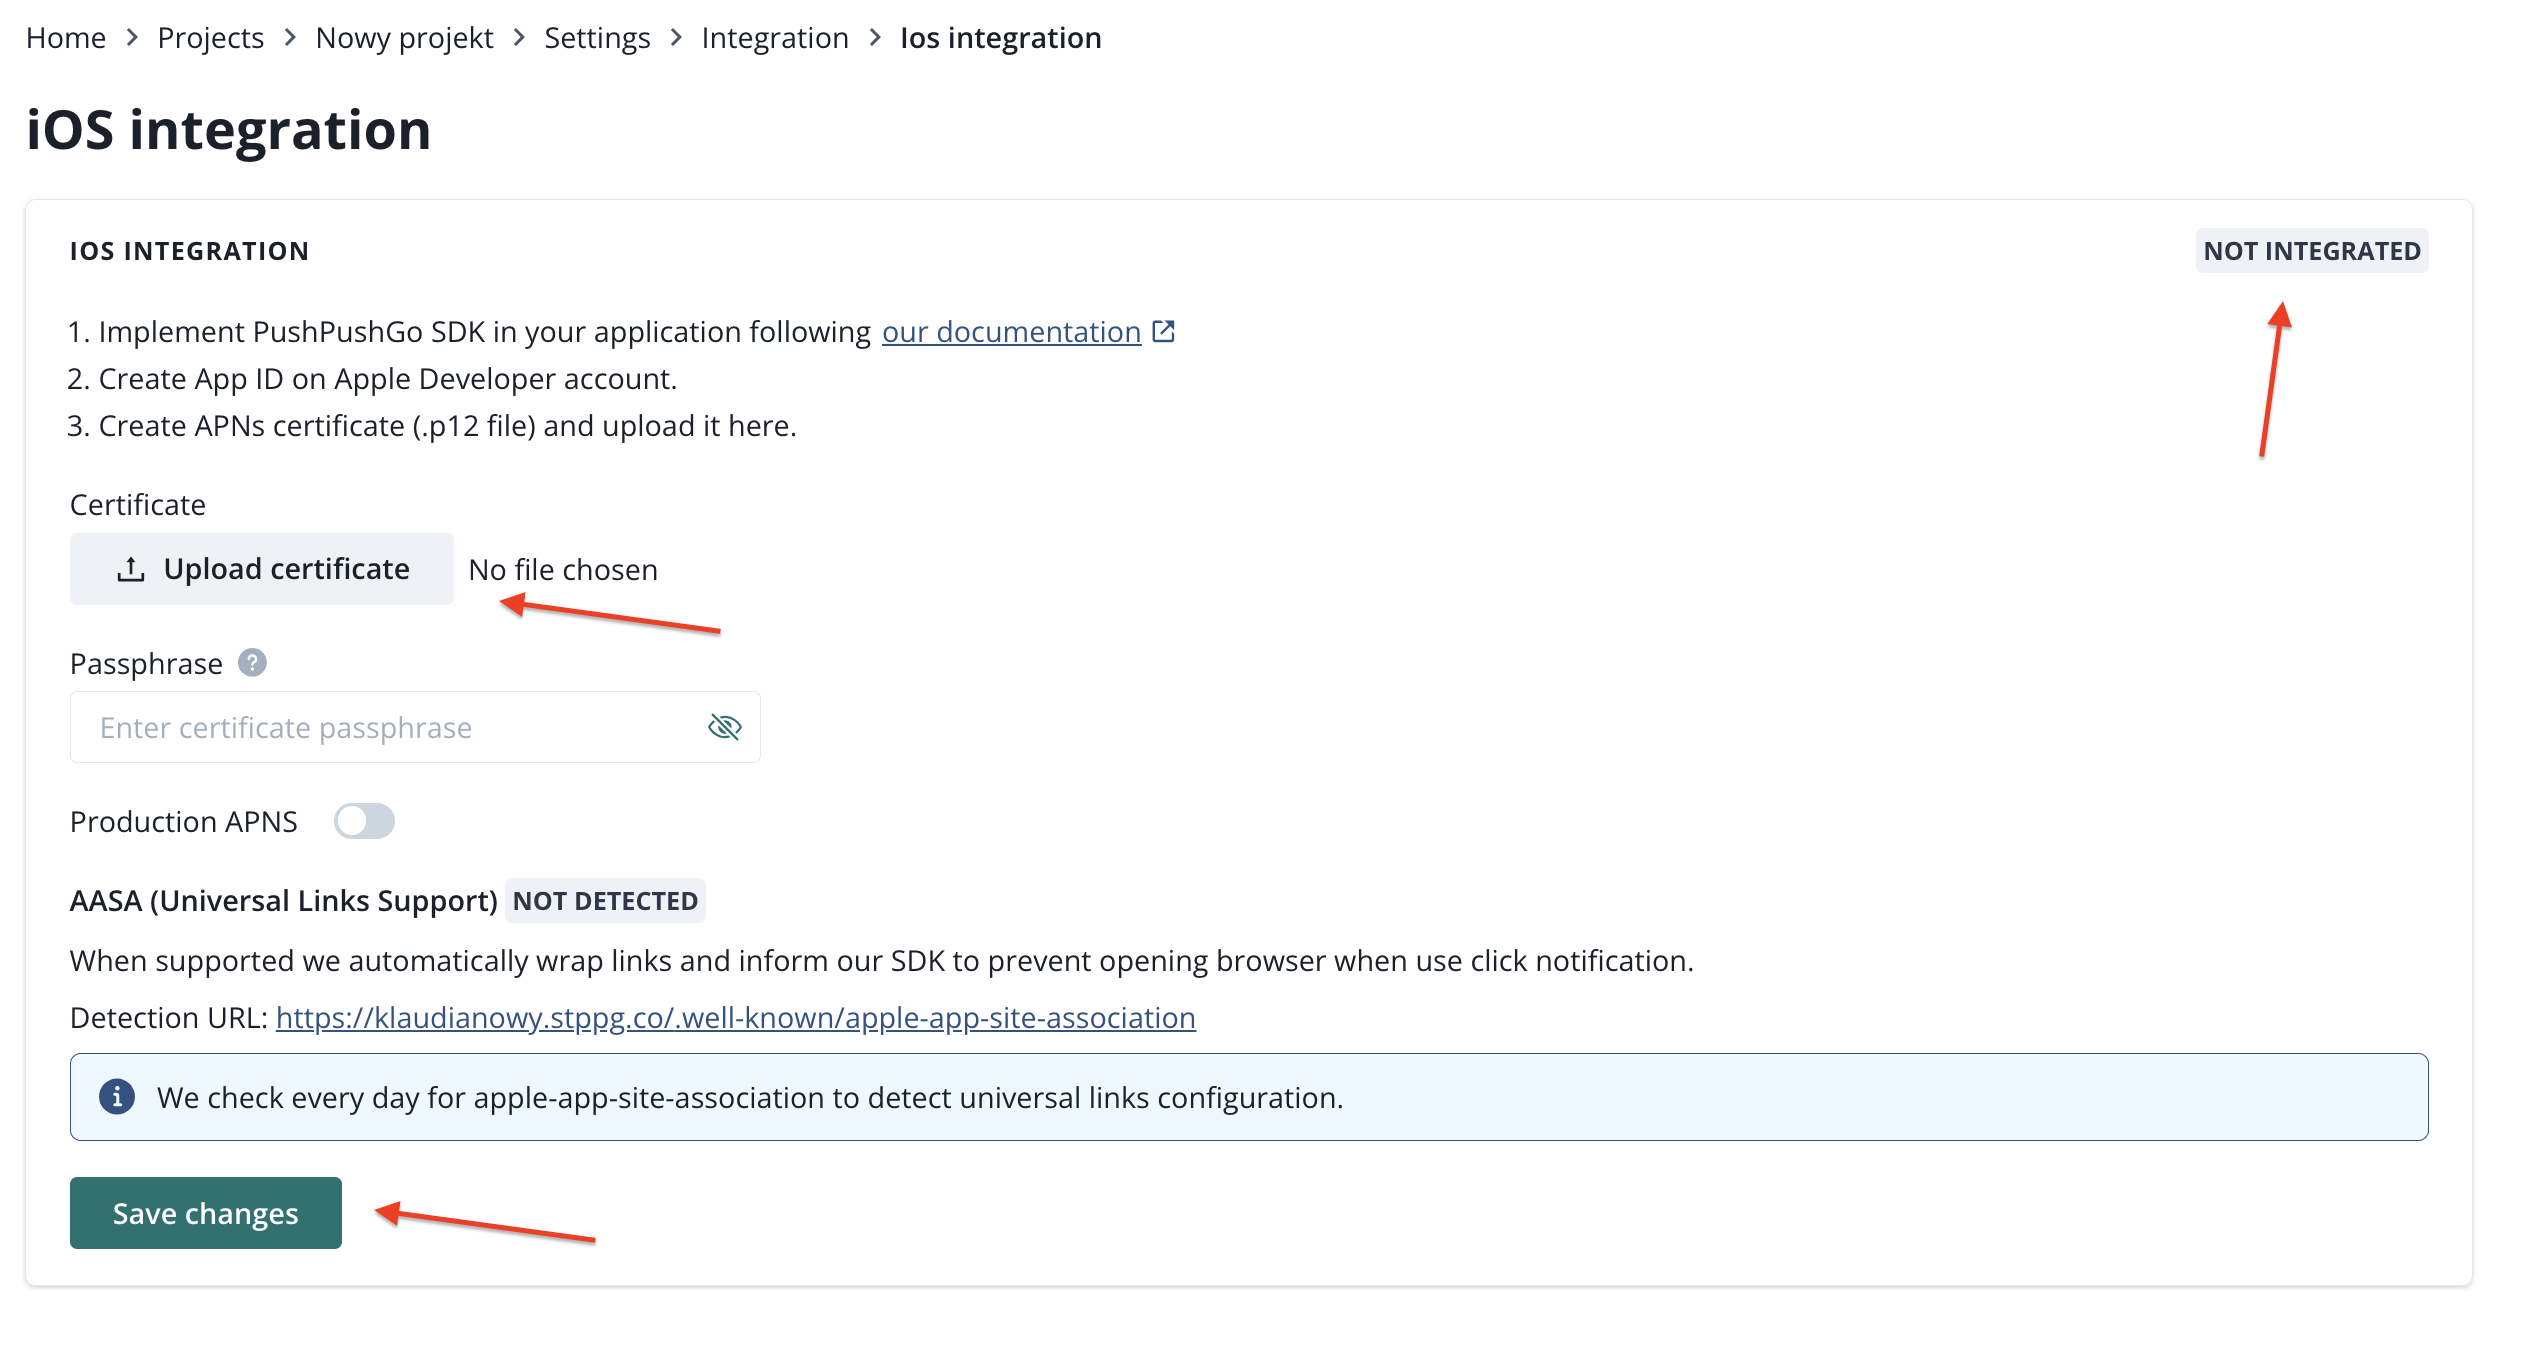
The flag will change from NOT INTEGRATED to INTEGRATED.
Huawei
To be able to use PushPushGo functionalities in your Huawei Android application, you have to integrate it using our mobile SDK and provide credentials for your project from AppGallery Connect.
Choose a suitable SDK and implement it in your application following repository documentation:
- Android / HMS: https://github.com/ppgco/android-sdk
- Flutter: https://github.com/ppgco/flutter-sdk
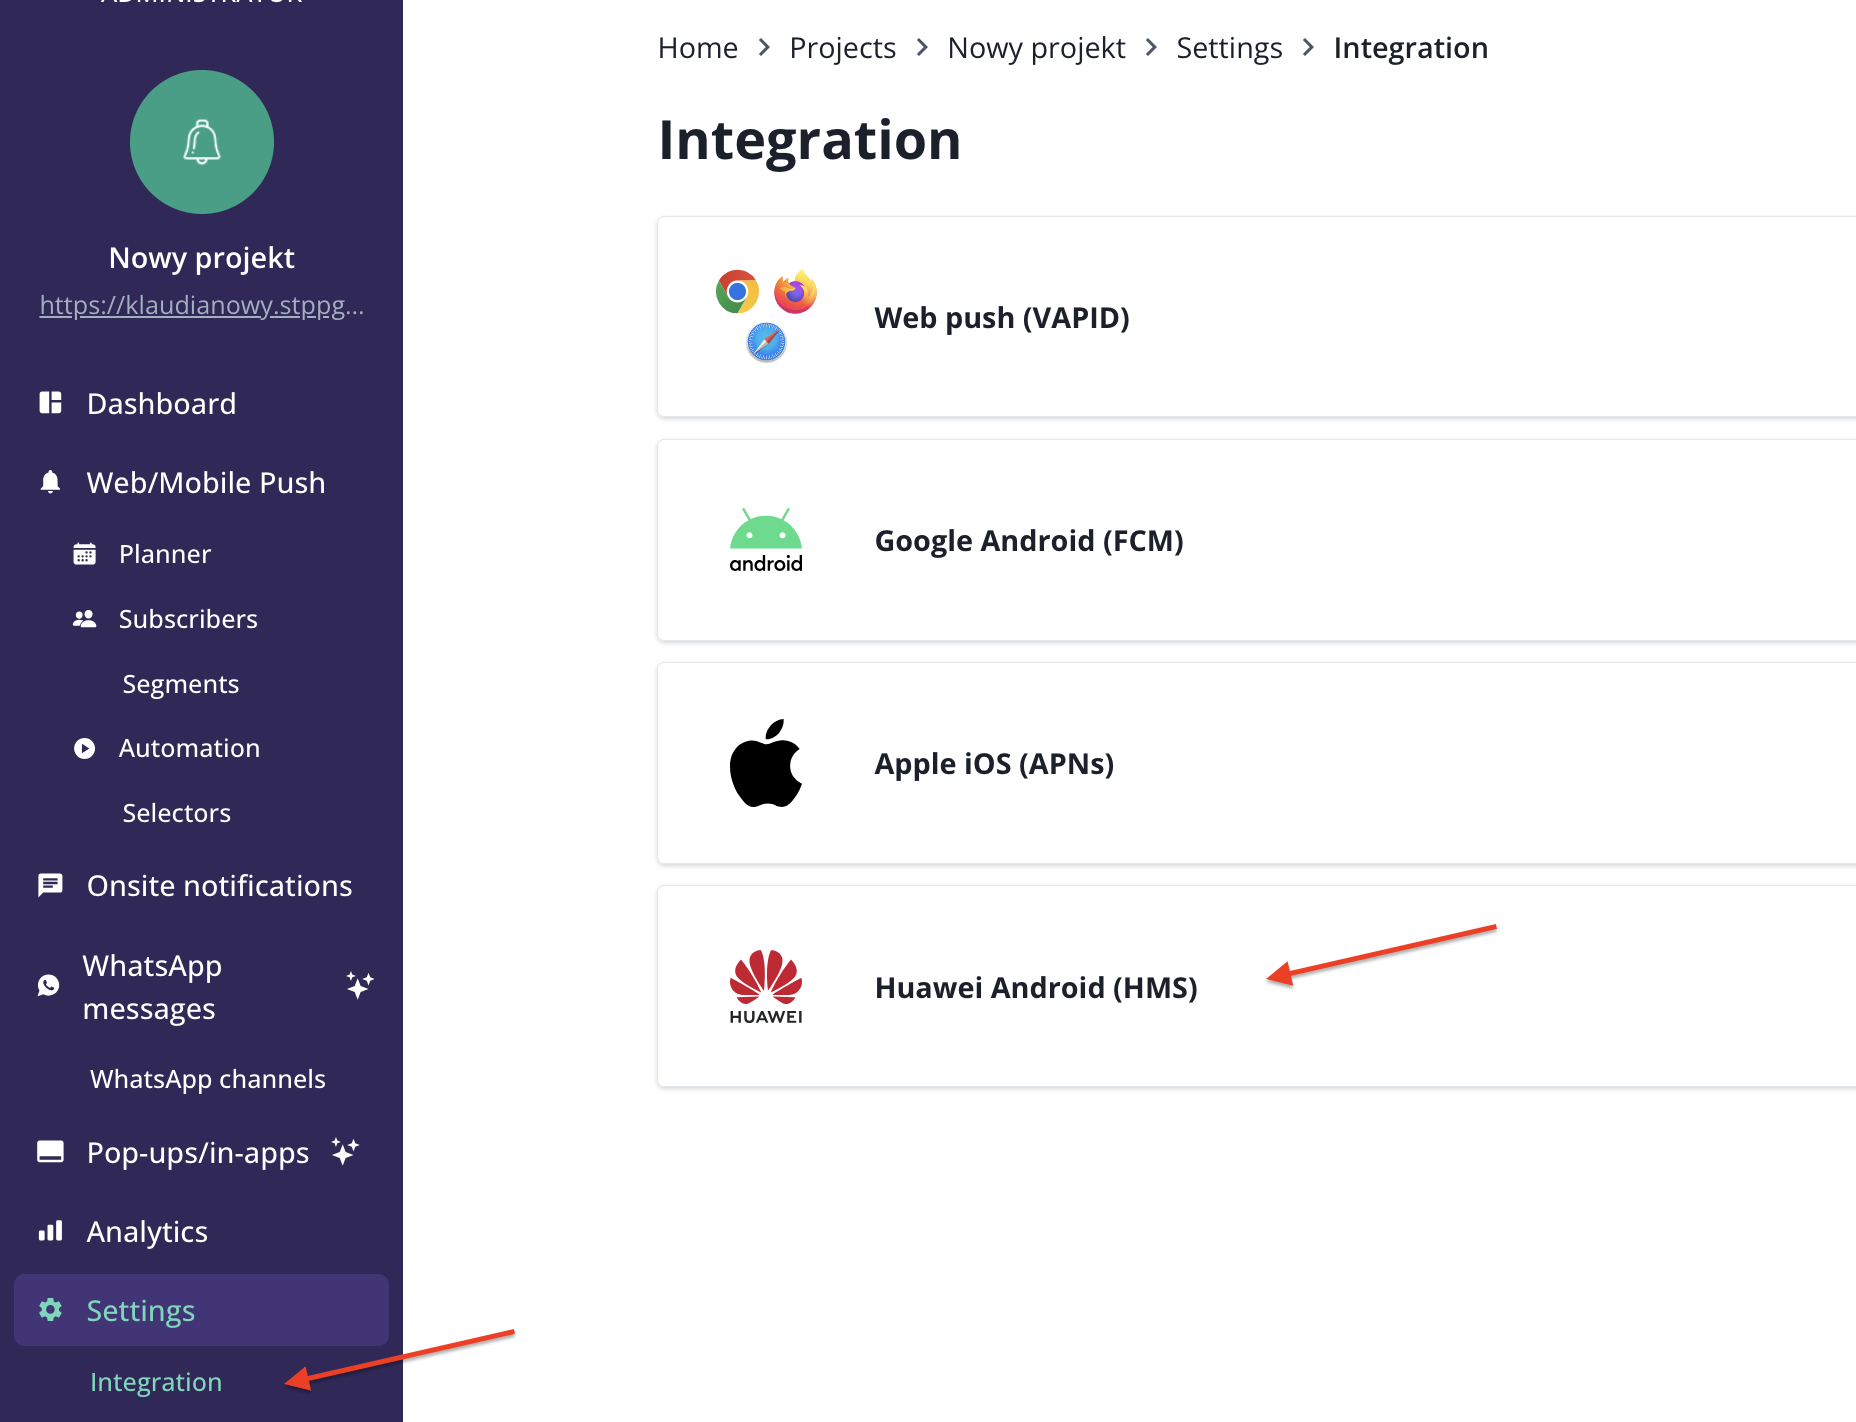
Go to Integration page and then select Huawei Android (HMS).
Type your App ID, Client secret, Auth URL, and Push URL and click Save.
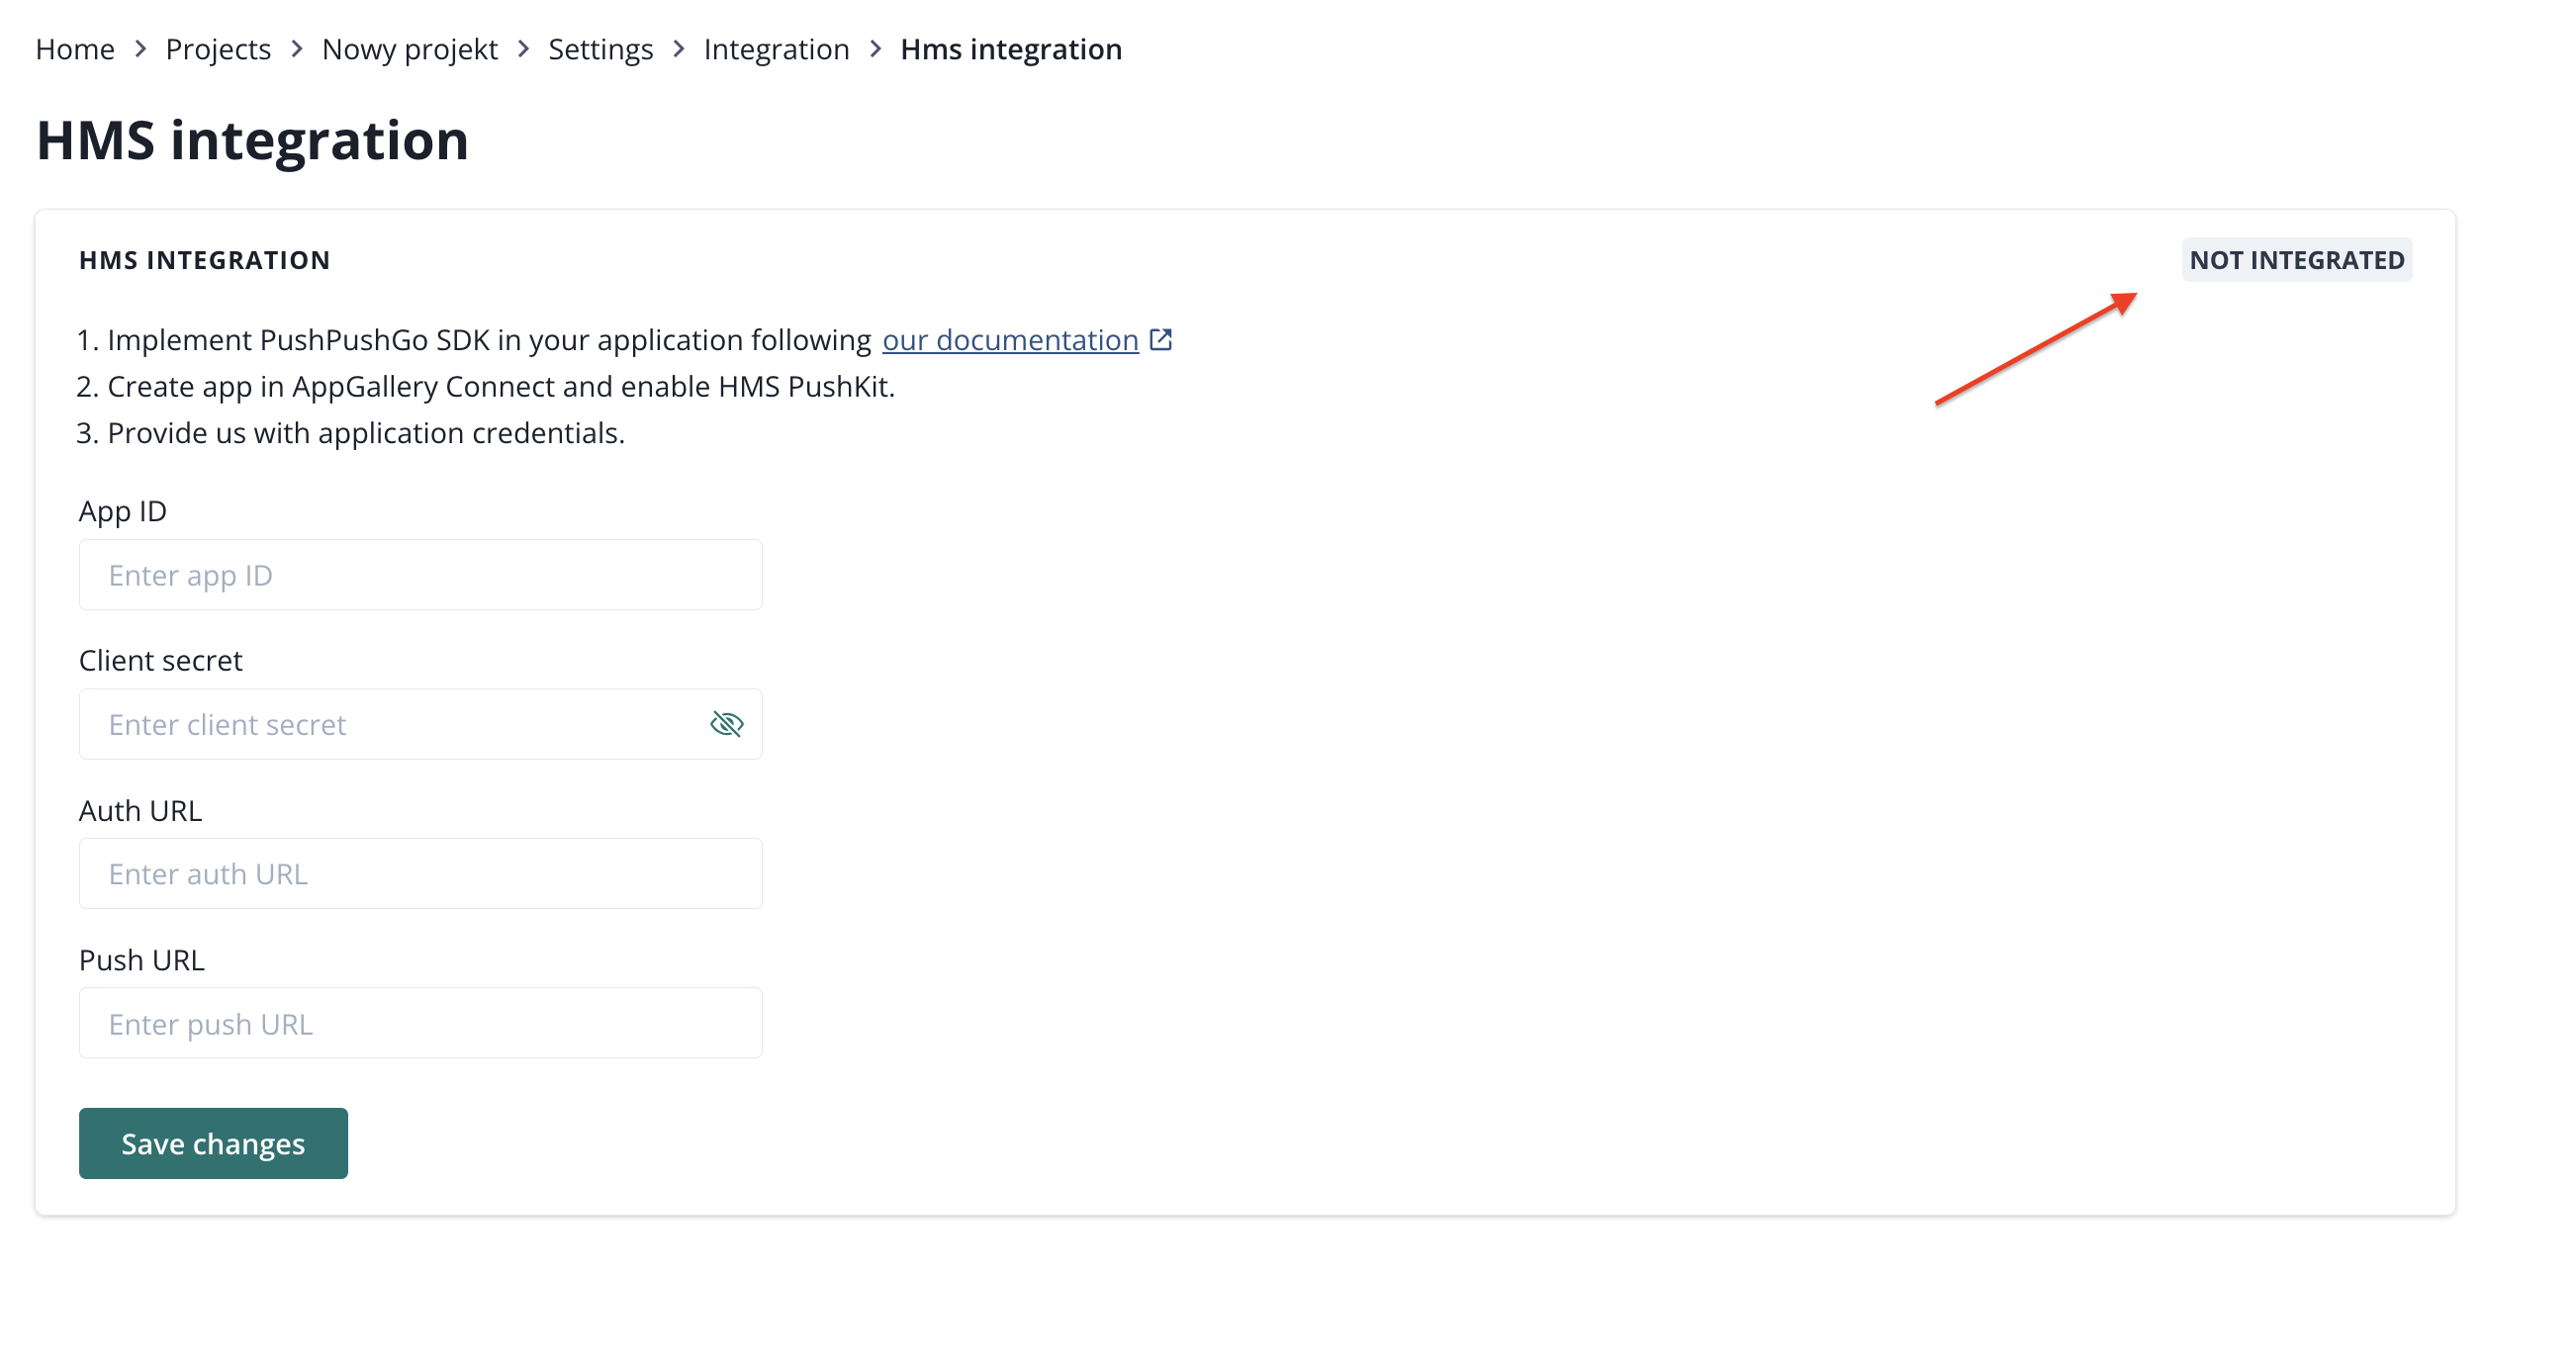
The flag will change from NOT INTEGRATED to INTEGRATED.
You can change your HMS integration at any time.